
Ah, the smell of grilled cheese wafting through the kitchen – it’s like a warm hug on a plate! There’s just something so comforting about that crispy, buttery exterior hugging melty, gooey cheese. Now, let me tell you about my latest obsession: the Grinder Grilled Cheese! It’s a delightful twist on the classic, cooked in a grinder that gives it that extra crunch and flavor. I remember the first time I made it – I was experimenting with my new kitchen gadget, and the result was pure magic! Trust me, once you try this version, you’ll never look at a regular grilled cheese the same way again. It’s quick, satisfying, and oh-so-delicious!
Ingredients List
- 2 slices of bread (any type you prefer – sourdough, whole grain, or classic white work great!)
- 2 slices of cheese (your favorite variety, like cheddar, mozzarella, or pepper jack for a kick!)
- 1 tablespoon butter (unsalted, for that perfect golden crust)
- Optional: garlic powder (about 1 teaspoon for a flavorful twist), herbs (like oregano or basil), or any additional toppings you love (think tomatoes, bacon, or even avocado!)
How to Prepare Instructions
Step 1: Prepare the Grinder
First things first, let’s get that grinder or pan heated up! Set it to medium heat – this is crucial because you want to make sure the bread gets that nice golden crust without burning. If it’s too hot, you’ll end up with a charred exterior and cold cheese inside. Give it a couple of minutes to warm up, and you’ll know it’s ready when you can feel the heat radiating from the surface. Trust me, this step sets the stage for grilled cheese perfection!
Step 2: Butter the Bread
Now, grab your unsalted butter and spread a nice, even layer on one side of each slice of bread. Make sure to get the edges too – we want every bite to be deliciously buttery! The buttered side will be the one making contact with the grill, so don’t skimp here. If you like a little kick, sprinkle some garlic powder on the butter before placing it down. It adds a lovely aroma that you won’t regret!
Step 3: Assemble the Sandwich
Alright, it’s time to assemble! Place the first slice of bread, butter side down, directly on the hot grinder. Next, layer on your cheese – I usually go for two slices, but feel free to add more if you’re feeling indulgent! If you’re adding any optional toppings like sliced tomatoes or crispy bacon, now’s the time to sprinkle them on top of the cheese. Finally, place the second slice of bread on top, butter side up. You’re just a few steps away from cheesy bliss!
Step 4: Grill the Sandwich
Let’s get grilling! Cook the sandwich for about 3 to 4 minutes on one side. Keep an eye on it; you want that beautiful golden brown color. When you see the edges starting to crisp up, it’s time to flip! Use a spatula to gently lift and turn the sandwich over. Grill the other side for another 3 to 4 minutes. The cheese should be melting and gooey inside, while the outside becomes perfectly crispy. It’s like a cheesy hug in sandwich form!
Step 5: Serve the Grinder Grilled Cheese
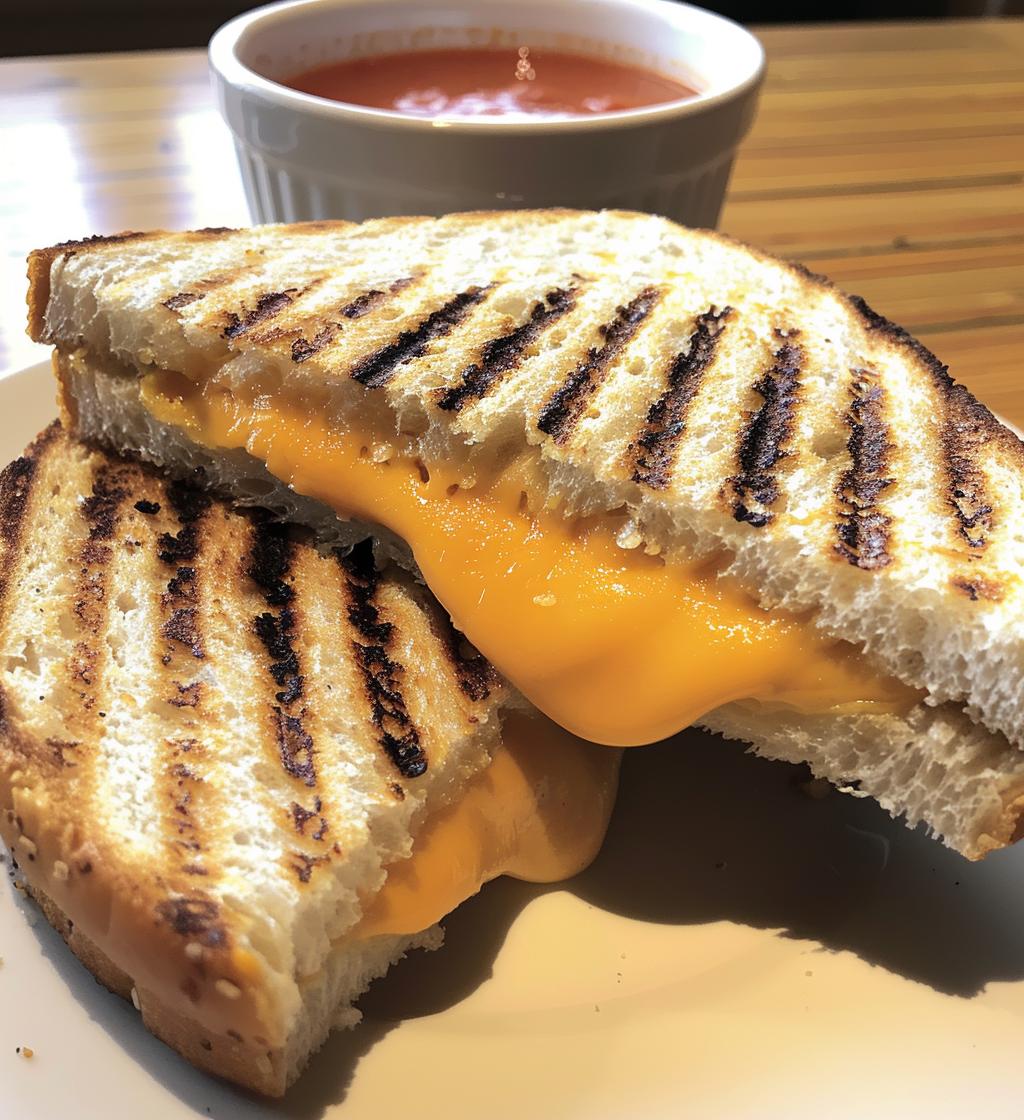
Once both sides are grilled to perfection, remove the sandwich from the heat and let it cool for a minute before slicing. This resting time is crucial because the cheese will be super hot and melty. I love serving my Grinder Grilled Cheese with a side of tomato soup or a fresh salad for a cozy meal. Slice it in half, and watch that cheese stretch – it’s a sight that never gets old! Enjoy every gooey, cheesy bite!
Why You’ll Love This Recipe
- Quick preparation – you can whip this up in just 13 minutes!
- Easy cleanup – just a few ingredients and one pan make for minimal mess.
- Customizable flavors – switch up the cheese, bread, and toppings to match your mood!
- Satisfying taste – the crispy, buttery exterior paired with gooey cheese is simply irresistible.
- Perfect for any time of day – whether it’s a snack or a comforting meal, it fits the bill.
- Kid-friendly – a fun, delicious way to get the little ones involved in the kitchen!
- Impressive yet simple – it’s a great dish to serve friends and family that looks gourmet without the fuss.
Tips for Success
To make your Grinder Grilled Cheese truly unforgettable, here are a few handy tips that’ll elevate your sandwich game!
- Choose the right cheese: For that ultimate melt, opt for cheeses like cheddar, Gruyère, or fontina. They melt beautifully and give you that gooey texture we all crave!
- Don’t rush the heat: Keep that grinder or pan at medium heat. If it’s too hot, you’ll end up with burnt bread and unmelted cheese. Patience is key for that perfect golden crust!
- Experiment with bread: Try different types of bread for varying flavors and textures. Sourdough adds a tangy twist, while brioche delivers a rich sweetness. You really can’t go wrong!
- Add some herbs: A sprinkle of fresh herbs or spices like oregano or crushed red pepper flakes can give your grilled cheese a delightful kick. Don’t be afraid to get creative!
- Cover while grilling: If you want to speed up that melting process, cover the sandwich with a lid for a minute or two. This helps trap the heat and ensures the cheese gets nice and gooey!
- Let it rest: After grilling, allow your sandwich to cool for a minute before slicing. This helps the cheese set slightly, making it easier to cut without all that deliciousness oozing out!
With these tips in your back pocket, you’ll be on your way to making the perfect Grinder Grilled Cheese every single time. Happy grilling!
Nutritional Information
When it comes to enjoying a delicious Grinder Grilled Cheese, it’s always good to know what you’re indulging in! Here are the typical nutritional values for one sandwich. Keep in mind that these values are estimates and can vary based on the ingredients you choose:
- Calories: 300
- Fat: 20g
- Saturated Fat: 10g
- Unsaturated Fat: 8g
- Trans Fat: 0g
- Cholesterol: 40mg
- Sodium: 500mg
- Carbohydrates: 30g
- Fiber: 1g
- Sugar: 2g
- Protein: 12g
These tasty stats show just how satisfying this sandwich can be! So, whether you’re treating yourself for lunch, dinner, or a midnight snack, you can enjoy every gooey bite knowing what’s in it. Happy munching!
FAQ Section
Got questions about making the perfect Grinder Grilled Cheese? I’ve got you covered! Here are some common queries that pop up when whipping up this cheesy delight:
Can I use gluten-free bread?
Absolutely! There are plenty of delicious gluten-free breads available that work perfectly for this recipe. Just make sure to check the texture and how it grills up – some brands toast up better than others!
What if I don’t have a grinder?
No worries! You can easily make this on a regular skillet or frying pan. Just follow the same steps, and you’ll still achieve that melty goodness!
Can I make this sandwich dairy-free?
Yes, you can! Look for dairy-free cheese alternatives that melt well. There are some great options out there that can give you that gooey texture without the dairy.
How should I store leftovers?
If you happen to have any leftovers (which is rare in my house!), wrap the sandwich in foil or place it in an airtight container. It can be stored in the fridge for up to 2 days. Just remember, it’s best enjoyed fresh!
How can I reheat my Grinder Grilled Cheese?
The best way to reheat is in a skillet over medium heat. This way, you’ll maintain that crispy texture while warming up the cheese. Just keep an eye on it so it doesn’t burn!
Can I add more toppings to my sandwich?
Of course! Feel free to get creative with your toppings. Sautéed mushrooms, jalapeños, or even a fried egg can take your Grinder Grilled Cheese to the next level!
If you have any more questions, don’t hesitate to reach out! I love sharing ideas and tips to help you enjoy this delicious twist on a classic. Happy grilling!
Storage & Reheating Instructions
If you find yourself with leftover Grinder Grilled Cheese (which is a rare occurrence in my house, but it happens!), storing it properly is key to maintaining that delightful texture and flavor. First, let the sandwich cool down to room temperature. Then, wrap it tightly in aluminum foil or place it in an airtight container. This will help keep it fresh and prevent it from drying out. You can store it in the fridge for up to 2 days.
Now, when it comes to reheating, I’ve got a little trick for you! The best way to bring back that crispy exterior and gooey cheese is to use a skillet. Just preheat your skillet over medium heat, and add the sandwich right in. Heat it for about 3-4 minutes on each side, or until it’s warmed through and the cheese is melty again. This method keeps the bread crispy while ensuring the cheese is perfectly gooey, just like when you first made it!
If you’re in a rush, you can also use the microwave, but be careful – the bread might get a bit soft. To do this, place the sandwich on a microwave-safe plate and cover it with a damp paper towel. Heat it for about 30 seconds, then check it. If it needs more time, do it in 10-second intervals until it’s warm. Just remember, the best flavor and texture come from reheating in the skillet!
With these storage and reheating tips, you can enjoy your Grinder Grilled Cheese even after it’s been made. Happy munching again!
Print
Grinder Grilled Cheese: 7 Irresistible Ways to Indulge
- Prep Time: 5 minutes
- Cook Time: 8 minutes
- Total Time: 13 minutes
- Yield: 1 sandwich 1x
- Category: Snack
- Method: Grilling
- Cuisine: American
- Diet: Vegetarian
Description
A delicious twist on the classic grilled cheese sandwich, made using a grinder.
Ingredients
- 2 slices of bread
- 2 slices of cheese
- 1 tablespoon butter
- Optional: garlic powder, herbs, or additional toppings
Instructions
- Heat a grinder or pan over medium heat.
- Spread butter on one side of each slice of bread.
- Place one slice of bread, butter side down, on the grinder.
- Add cheese on top of the bread.
- Add any optional toppings if desired.
- Top with the second slice of bread, butter side up.
- Grill until golden brown, about 3-4 minutes.
- Flip and grill the other side for another 3-4 minutes.
- Remove from heat and let cool for a minute before slicing.
Notes
- Use your favorite type of cheese for better flavor.
- Experiment with different types of bread.
- Serve with soup or salad for a complete meal.
Nutrition
- Serving Size: 1 sandwich
- Calories: 300
- Sugar: 2g
- Sodium: 500mg
- Fat: 20g
- Saturated Fat: 10g
- Unsaturated Fat: 8g
- Trans Fat: 0g
- Carbohydrates: 30g
- Fiber: 1g
- Protein: 12g
- Cholesterol: 40mg
Keywords: Grinder Grilled Cheese, Grilled Cheese, Sandwich