
Oh my goodness, let me tell you about these *Cheesy Garlic Chicken Wraps*! They’re like a warm hug on a plate. Seriously, the combination of tender shredded chicken, gooey cheese, and that punch of garlic is nothing short of magical. What I love most is how ridiculously easy they are to whip up—perfect for those busy weeknights when you just want something comforting and delicious. Plus, they’re incredibly versatile! You can toss in your favorite veggies or even spice them up with some hot sauce. Once they’re out of the oven, the smell alone will have everyone gathered around the kitchen. Trust me, these wraps will quickly become a family favorite!
Ingredients for Cheesy Garlic Chicken Wrap
Here’s everything you’ll need to make these delicious wraps! I love how simple and straightforward the ingredients are. You probably have most of them in your kitchen already!
- 2 cups cooked chicken, shredded: This can be any leftover chicken you have on hand—rotisserie chicken works great!
- 1 cup shredded cheese: I usually go for a blend of cheddar and mozzarella for that perfect melty goodness.
- 2 cloves garlic, minced: Fresh garlic adds such an aromatic kick, but you can use garlic powder in a pinch if needed.
- 1/2 cup sour cream: This makes the filling creamy and rich. You could also use Greek yogurt for a healthier twist!
- 4 large tortillas: I prefer flour tortillas for their softness, but corn tortillas are a tasty gluten-free option.
- 1/4 cup chopped parsley: Fresh parsley adds a nice pop of color and flavor. You can skip it if you’re not a fan!
- Salt and pepper to taste: Don’t forget to season! A little salt and pepper goes a long way in enhancing the flavors.
How to Prepare Cheesy Garlic Chicken Wrap
Alright, let’s get down to the fun part—making these delicious cheesy garlic chicken wraps! It’s super easy, and I promise you’ll have them ready in no time. Just follow these steps, and you’ll be savoring that cheesy goodness before you know it!
Preheat the Oven
First things first, you’ll want to preheat your oven to 350°F (175°C). Preheating is crucial because it helps the wraps cook evenly and ensures that cheese melts beautifully. Trust me, you don’t want to skip this step!
Mix the Filling
Now, grab a large bowl and combine your shredded chicken, cheese, minced garlic, sour cream, chopped parsley, and a sprinkle of salt and pepper. I like to mix it all together using a fork or a spatula until everything is well combined. You want that cheesy, garlicky goodness to be evenly distributed throughout. The smell is already amazing, isn’t it?
Assemble the Wraps
Next up, it’s time to assemble! Spread an even layer of your filling mixture onto each tortilla, leaving a little space around the edges. Then, fold in the sides and roll it up tightly from the bottom. Make sure they’re snug so nothing spills out during baking! Place each wrap seam-side down in a baking dish. You can fit them close together, but not too tight!
Bake the Wraps
Pop those wraps in the preheated oven and bake for about 15-20 minutes. You’ll know they’re ready when the cheese is all melty and bubbly. Keep an eye on them, and if you see a little golden brown on top, that’s perfect! It adds a nice texture.
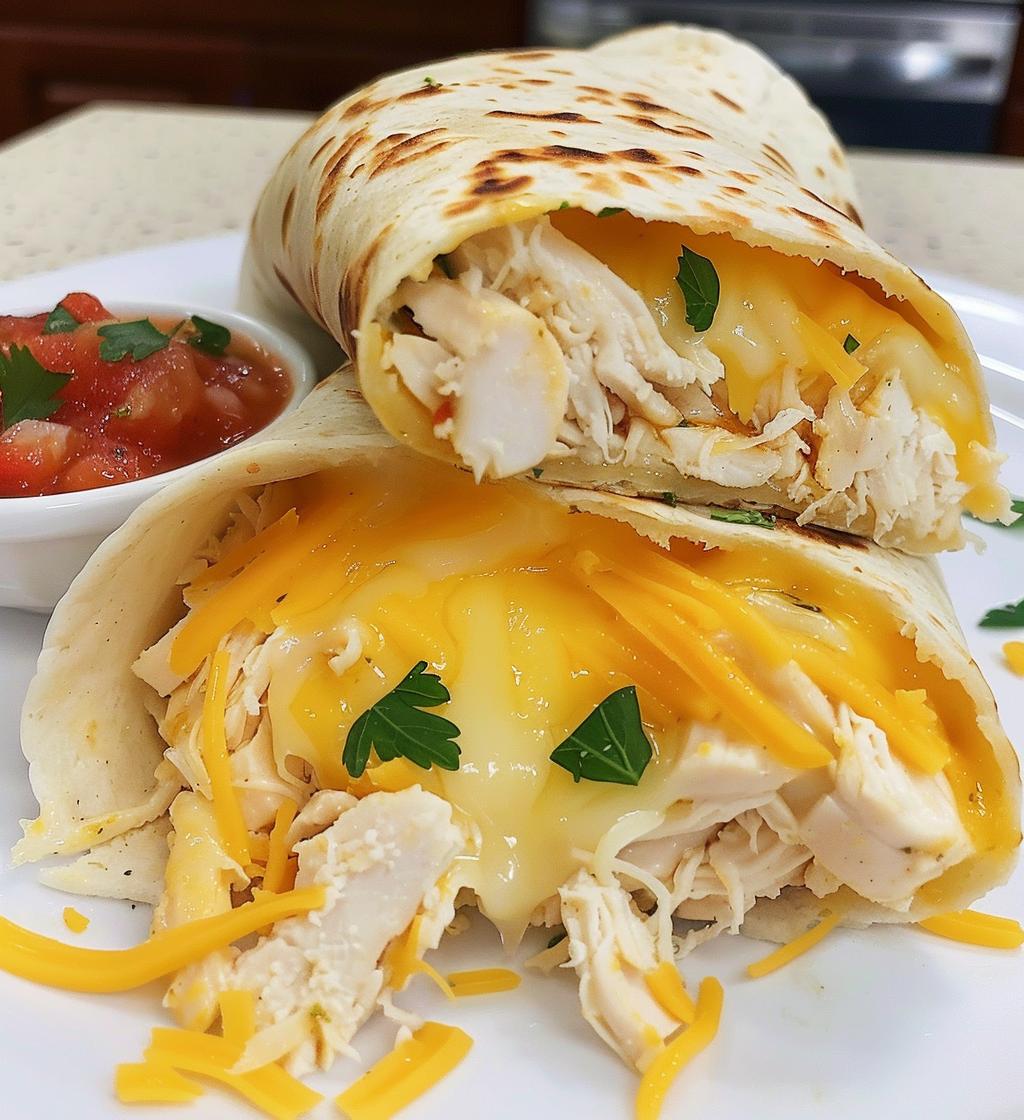
Serve and Enjoy
Once they’re done baking, take them out and let them cool for just a minute. Then, slice each wrap in half—it’s easier to handle and looks great on a plate! Serve them warm, and don’t forget to pair them with some fresh salsa or your favorite dipping sauce. You’re going to love how cozy and satisfying these wraps are!
Nutritional Information for Cheesy Garlic Chicken Wrap
Let’s talk numbers! Here’s the estimated nutritional information for each *Cheesy Garlic Chicken Wrap*. Keep in mind that these values can vary based on the specific ingredients you use, but this will give you a good idea of what you’re working with:
- Serving Size: 1 wrap
- Calories: 350
- Fat: 18g
- Saturated Fat: 10g
- Unsaturated Fat: 3g
- Trans Fat: 0g
- Cholesterol: 70mg
- Sodium: 600mg
- Carbohydrates: 30g
- Fiber: 2g
- Sugar: 2g
- Protein: 20g
This wrap is not only delicious but packed with protein to keep you satisfied. Enjoy the cheesy goodness while knowing you’re fueling your body right!
Tips for Success
Now that you’re ready to make these *Cheesy Garlic Chicken Wraps*, here are some of my top tips for ensuring they turn out perfectly every time! Trust me, these little nuggets of wisdom will help you avoid common pitfalls and elevate your wraps to the next level.
- Use fresh ingredients: The fresher your chicken, cheese, and garlic, the better your wraps will taste. If you can, go for freshly shredded cheese over pre-packaged stuff for that ultimate melt!
- Experiment with spices: Don’t hesitate to add your favorite spices to the filling. A dash of paprika or cayenne pepper can give it a nice kick if you’re feeling adventurous!
- Veggie power: Feel free to throw in some veggies like spinach, bell peppers, or even mushrooms! Just sauté them a bit first to soften them up before mixing them in.
- Don’t overstuff: It can be tempting to pile on the filling, but keep it to a reasonable amount. Overstuffed wraps can burst during baking, and nobody wants that mess!
- Check for doneness: Every oven is different, so keep an eye on your wraps as they bake. You want that cheese bubbly and the tops just slightly golden—perfectly irresistible!
- Serve with style: Presentation matters! Slice them neatly and arrange on a platter with a colorful salsa or dipping sauce. It’ll make your meal feel even more special.
- Make it a meal prep: These wraps are fantastic for meal prepping! Assemble them ahead of time and freeze them individually. Just pop them in the oven when you’re ready to enjoy!
With these tips up your sleeve, you’re well on your way to making the *best* cheesy garlic chicken wraps that will impress everyone at the table. Happy cooking!
Why You’ll Love This Recipe
- Quick Prep Time: Whip these wraps up in just 10 minutes—perfect for busy weeknights!
- Easy Ingredients: You probably have everything you need right in your kitchen, making it super convenient.
- Comforting Flavors: The combination of cheesy, garlicky chicken is pure comfort food that warms the soul.
- Versatile: Customize with your favorite veggies or spices to make it your own!
- Meal Prep Friendly: Great for making ahead and freezing for those nights when you need a quick meal.
- Crowd-Pleaser: These wraps are sure to impress family and friends; everyone loves cheesy goodness!
- Healthy Option: Packed with protein and can be made lighter with substitutions like Greek yogurt.
FAQ about Cheesy Garlic Chicken Wrap
Got questions about these delicious *Cheesy Garlic Chicken Wraps*? Don’t worry, I’ve got you covered! Here are some of the most common queries that come up, along with my answers to help you out.
Can I use raw chicken instead of cooked?
While I recommend using cooked chicken for this recipe to save time, you can use raw chicken if you’re up for it! Just make sure to cook it thoroughly before shredding and mixing it into the filling.
What if I don’t have sour cream?
No problem! You can substitute Greek yogurt or even cream cheese for a different but equally creamy texture. Just adjust the amount to your liking!
Can I make these wraps ahead of time?
Absolutely! You can assemble the wraps and store them in the fridge for up to a day before baking. Just cover them well so they don’t dry out. If you want to freeze them, wrap each one tightly in plastic wrap and freeze. When you’re ready to eat, just bake them straight from the freezer, adding a few extra minutes to the cooking time.
Are these wraps gluten-free?
To make these wraps gluten-free, simply swap out the regular tortillas for gluten-free ones. There are plenty of great options available that taste delicious!
How can I spice them up?
If you like a bit of heat, sprinkle in some red pepper flakes or a dash of hot sauce into the filling. You could also add jalapeños for a fresh kick—yum!
What should I serve with these wraps?
These wraps are fantastic on their own, but they pair beautifully with a side of salsa, guacamole, or even a fresh salad. A little extra dipping sauce can take them to the next level!
How do I store leftovers?
Store any leftover wraps in an airtight container in the fridge for up to 3 days. Just reheat them in the oven or microwave before enjoying again. They’re still delicious even the next day!
Can I make them vegetarian?
Of course! Swap out the chicken for some sautéed mushrooms, spinach, or even black beans. You’ll still get that cheesy, garlicky goodness, just in a veggie version!
Storage & Reheating Instructions
Let’s talk about how to keep those delicious *Cheesy Garlic Chicken Wraps* fresh and tasty for later! Proper storage is key to maintaining that scrumptious flavor and texture, so here’s what I recommend.
First off, if you have any leftovers (which is rare, but hey, it happens!), let them cool to room temperature. Then, wrap each wrap tightly in plastic wrap or aluminum foil, or pop them into an airtight container. This will help keep them from drying out in the fridge. They’ll stay good for about 3 days, but I doubt they’ll last that long!
When you’re ready to enjoy them again, the best way to reheat is in the oven. Preheat your oven to 350°F (175°C) and place the wraps on a baking sheet. Cover them with foil to prevent them from getting too crispy or drying out. Bake for about 10-15 minutes or until heated through. You’ll know they’re ready when the cheese is all melty again and the wraps are warm to the touch. Yum!
If you’re in a hurry and need a quicker option, you can always pop them in the microwave. Just place a wrap on a microwave-safe plate, cover it with a damp paper towel, and heat for about 1 minute. Check if it’s hot enough, and if not, give it another 15-30 seconds. Just be careful not to overdo it—microwaved wraps can get a bit chewy if heated too long!
With these simple storage and reheating tips, you’ll be able to enjoy your *Cheesy Garlic Chicken Wraps* just as much the second time around. Happy munching!