
Oh, let me tell you about this beef cutlets recipe that has become a staple in my kitchen! It’s one of those dishes that feels like a warm hug after a long day. Seriously, it’s so easy to whip up, and the flavor is absolutely incredible! I remember the first time I made these cutlets for my family—they couldn’t believe how juicy and satisfying they were. What sets this recipe apart is how simple it is while still offering that homemade comfort food vibe. Plus, you can customize it with your favorite spices or sauces! Trust me, once you give this a try, it’ll be a go-to meal for busy weeknights or any occasion when you want something delicious without all the fuss.
Ingredients for Beef Cutlets Recipe
Gathering the right ingredients is key to making these delicious beef cutlets. Here’s what you’ll need:
- 1 pound ground beef: This forms the heart of the cutlets, bringing that rich flavor and juicy texture. I always go for lean ground beef to keep things a bit healthier!
- 1 cup breadcrumbs: These will help bind everything together and give your cutlets that lovely crispy exterior. You can use plain or seasoned breadcrumbs, depending on how much flavor you want to add.
- 1 egg: This acts as a binder, helping all the ingredients stick together. Make sure it’s beaten lightly before mixing it in!
- 1 small onion, finely chopped: Fresh onion adds sweetness and depth to your cutlets. Finely chopping it ensures it blends well into the mixture without any big bites of raw onion.
- 2 cloves garlic, minced: Garlic brings that aromatic flavor that’s just irresistible! Mince it finely so it distributes evenly throughout the cutlets.
- 1 teaspoon salt: Essential for enhancing all those wonderful flavors. Feel free to adjust this based on your taste preference!
- 1/2 teaspoon black pepper: A lovely touch of heat and spice. You can add more if you like a bit of a kick!
- 1 teaspoon paprika: This adds a beautiful color and a mild smokiness to the cutlets. It’s one of my favorite spices to use!
- Vegetable oil for frying: You’ll need enough to coat the bottom of your skillet. This is what gives the cutlets that golden brown finish we all love.
Once you have all these ingredients prepped, you’ll be ready to dive into making these mouthwatering beef cutlets!
How to Prepare Beef Cutlets Recipe
Now that you have everything prepped, let’s dive into making these delightful beef cutlets! I promise, it’s a straightforward process, and the results will have everyone raving!
Step 1: Mixing the Ingredients
Start by grabbing a large mixing bowl. Add your pound of ground beef, breadcrumbs, beaten egg, finely chopped onion, minced garlic, salt, black pepper, and paprika. Now, the fun part: mix everything together with your hands or a wooden spoon until it’s well combined. You want the mixture to be cohesive but not overly packed—think of it as a gentle hug for the ingredients! The texture should be moist but hold together when shaped.
Step 2: Shaping the Cutlets
Once your mixture is ready, it’s time to shape the cutlets. I usually grab about a handful of the mixture and form it into a patty, about 1/2 inch thick. Don’t stress too much about perfection; just aim for uniformity in size so they cook evenly. If you like, you can make them a bit thicker for a juicier bite, but keep an eye on the frying time!
Step 3: Frying the Cutlets
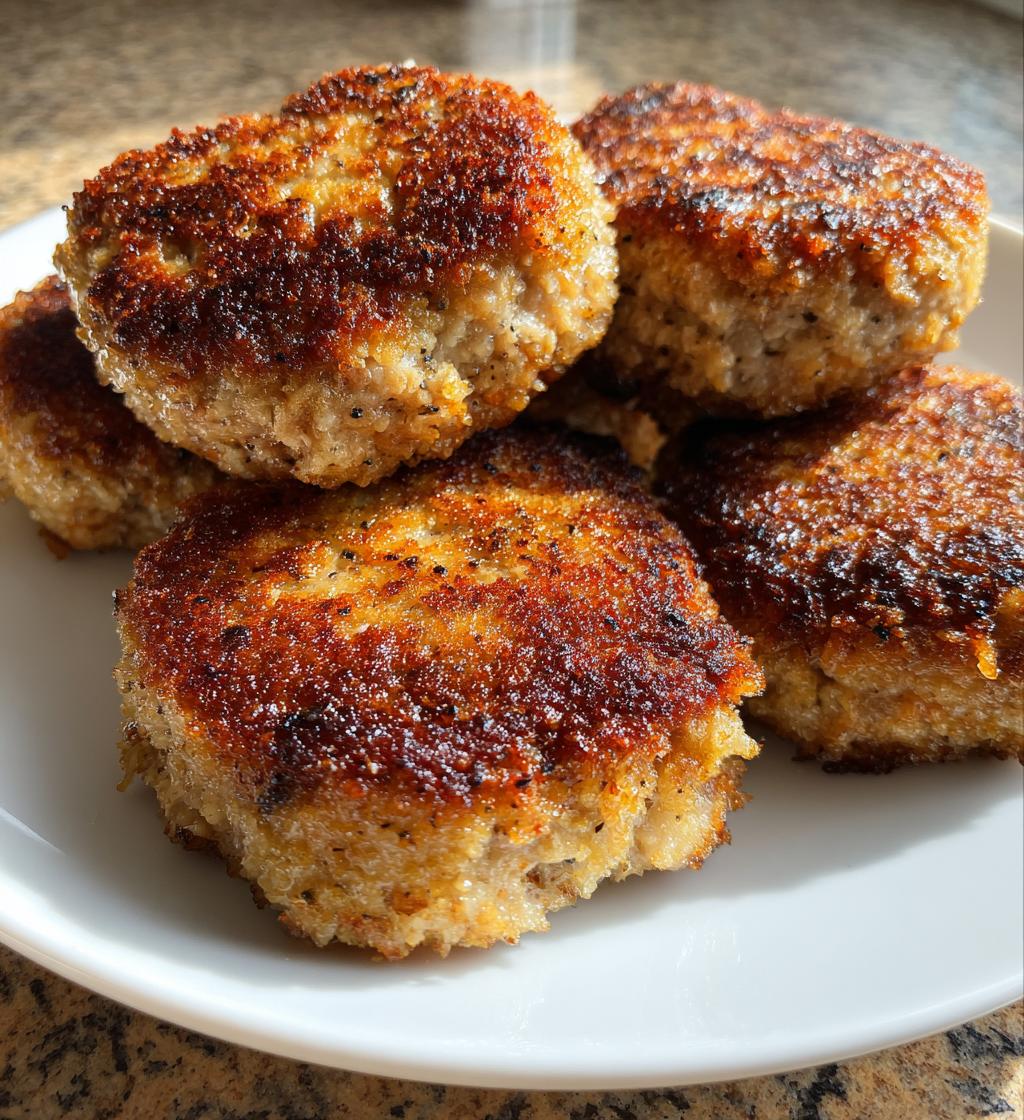
Now, let’s get frying! Heat a good amount of vegetable oil in a skillet over medium heat—enough to coat the bottom. You’ll know it’s ready when a small drop of the mixture sizzles upon contact. Carefully add the cutlets to the skillet, making sure not to overcrowd them. Fry for about 4-5 minutes on each side until they’re golden brown and deliciously crispy. If they’re browning too quickly, lower the heat a bit. Patience is key to getting that perfect golden finish!
Step 4: Draining and Serving
Once the cutlets are beautifully brown, use a slotted spoon to remove them from the skillet and place them on a plate lined with paper towels. This step is crucial as it helps drain off any excess oil, keeping them crispy and not greasy. Now, you can serve them up hot! They’re fantastic with your favorite dipping sauce or even as a hearty sandwich filling. Enjoy every bite!
Why You’ll Love This Beef Cutlets Recipe
- Quick to prepare: This recipe comes together in just about 30 minutes, making it perfect for busy weeknights when you want something satisfying without spending hours in the kitchen.
- Flavor-packed: The combination of spices and fresh ingredients makes these cutlets incredibly tasty. Each bite is filled with juicy, savory goodness that will have everyone asking for seconds!
- Versatile: You can serve them with a variety of sauces or sides—think tangy ketchup, creamy mayo, or even a zesty yogurt sauce. They also work wonderfully in a sandwich or on a salad!
- Kid-friendly: Kids love these cutlets! They’re fun to eat, easy to customize with their favorite flavors, and perfect for little hands.
- Freezer-friendly: Make a big batch and freeze the leftovers! They reheat beautifully, so you can enjoy them any day of the week without the hassle of cooking from scratch.
- Simple ingredients: You probably already have most of these ingredients in your pantry, making this a budget-friendly meal that doesn’t skimp on flavor.
Trust me, once you’ve tried these beef cutlets, you’ll find yourself making them again and again!
Tips for Success with Beef Cutlets Recipe
Before you dive into making these delicious beef cutlets, I’ve got a few tips that will help you nail this recipe every single time. Trust me, these little nuggets of wisdom can make a world of difference!
- Don’t overmix: When combining the ingredients, be gentle! Overmixing can lead to tough cutlets. You want to mix just until everything is combined—think of it as a cozy hug, not a wrestling match!
- Temperature matters: Make sure your oil is hot enough before adding the cutlets. If it’s not sizzling when they hit the pan, they’ll absorb too much oil and become greasy. A quick test is to drop a tiny bit of the mixture into the oil; if it sizzles, you’re good to go!
- Batch frying: If you’re making a large batch, fry the cutlets in batches instead of overcrowding the skillet. This ensures each cutlet gets that perfect golden-brown crust without steaming.
- Adjust seasoning: Feel free to customize the seasoning to your taste! Adding fresh herbs like parsley or thyme can elevate the flavor, or even a dash of hot sauce for a kick!
- Let them rest: After frying, let the cutlets rest on paper towels for a few minutes. This allows excess oil to drain off and helps them stay crispy. Plus, it gives you a moment to catch your breath before digging in!
- Try different binders: If you want to switch things up, you can use crushed crackers, panko, or even mashed potatoes as a binder instead of breadcrumbs. Each option adds a unique twist to the flavor and texture!
With these tips in your back pocket, you’ll be well on your way to beef cutlet perfection. Enjoy the process and happy cooking!
Variations of Beef Cutlets Recipe
If you’re like me, you love to play around with recipes and add your own twist! The great thing about these beef cutlets is their versatility. Here are some fun variations you can try that’ll keep things exciting in the kitchen:
- Spicy Kick: Add a teaspoon of cayenne pepper or some chopped jalapeños to the mixture for a spicy version that’ll wake up your taste buds!
- Herbaceous Delight: Mix in some fresh herbs like chopped parsley, cilantro, or basil for a fresh twist. They’ll add a beautiful flavor and a pop of color!
- Cheesy Goodness: Fold in some shredded cheese, like cheddar or mozzarella, into the beef mixture for melty, cheesy cutlets. Who doesn’t love a cheesy bite?
- Italian Style: Add Italian seasoning, like oregano, thyme, and a sprinkle of parmesan cheese for a delicious Italian flair. Serve with marinara sauce for dipping!
- Asian Fusion: Incorporate soy sauce, ginger, and green onions into the mixture for an Asian-inspired cutlet. Serve with a sweet chili sauce for a tasty dipping option.
- Veggie Boost: Sneak in some grated carrots or zucchini to add moisture and nutrition. Just be sure to squeeze out any excess water from the veggies before mixing!
Feel free to mix and match these ideas or come up with your own! The possibilities are truly endless, and that’s part of the joy of cooking. You’ll find that each variation brings something new and delicious to the table. Happy experimenting!
Storage & Reheating Instructions
So, you’ve made a batch of these mouthwatering beef cutlets, and now you’re wondering how to keep them fresh and delicious for later. Don’t worry—I’ve got you covered!
First off, to store your leftover cutlets, let them cool completely on a wire rack or a plate. Once they’re cool, transfer them to an airtight container. If you’re stacking them, I recommend placing a piece of parchment paper between layers to prevent them from sticking together. They’ll stay good in the fridge for up to 3 days.
If you want to keep them longer, you can also freeze them! Just wrap each cutlet individually in plastic wrap, then place them in a freezer-safe bag or container. They’ll last for about 2 months in the freezer. Trust me, having a stash of these ready to go is a lifesaver!
When it’s time to enjoy your leftovers, you can reheat them in a couple of ways. For the best results, I suggest using the oven. Preheat it to 350°F (175°C), place the cutlets on a baking sheet, and heat for about 10-15 minutes, or until they’re warmed through and crispy again. If you’re in a hurry, the microwave works too—just pop them in for about 30-60 seconds. They won’t be as crispy, but they’ll still be tasty!
And there you have it! With these simple storage and reheating tips, you can enjoy your beef cutlets multiple times without losing any of that deliciousness. Happy eating!
Nutritional Information
When it comes to enjoying food, I always find it helpful to know what I’m putting into my body. Here’s the estimated nutritional information for each serving of these delightful beef cutlets. Keep in mind that values can vary a bit based on specific ingredients and cooking methods, but this gives you a good idea:
- Serving Size: 1 cutlet
- Calories: 250
- Fat: 15g
- Saturated Fat: 5g
- Unsaturated Fat: 8g
- Trans Fat: 0g
- Cholesterol: 55mg
- Sodium: 400mg
- Carbohydrates: 10g
- Fiber: 1g
- Sugar: 1g
- Protein: 20g
With a solid balance of protein and flavor-packed goodness, these beef cutlets are not only delicious but also provide a satisfying meal option. Enjoy knowing that they’re a tasty treat that won’t weigh you down!
FAQ about Beef Cutlets Recipe
I get a lot of questions about these beef cutlets, and I totally understand why! They’re such a versatile dish, and everyone wants to make sure they get it just right. Here are some of the most common questions I receive, along with my answers to help you out!
Can I use a different type of meat?
Absolutely! While this beef cutlets recipe is fantastic with ground beef, you can easily swap in ground turkey, chicken, or even pork. Just keep in mind that cooking times might vary slightly based on the meat you choose!
Can I bake these instead of frying?
Yes, you can! If you prefer baking, preheat your oven to 400°F (200°C). Place the cutlets on a greased baking sheet and bake for about 20-25 minutes, flipping halfway, until they’re golden brown. They won’t be quite as crispy, but they’ll still be delicious!
What can I serve with beef cutlets?
Oh, the options are endless! You can serve them with a simple salad, mashed potatoes, or even a side of pasta. They’re also fantastic in a sandwich with some lettuce and tomato. Don’t forget your favorite dipping sauce—ketchup, BBQ sauce, or a tangy yogurt sauce all work beautifully!
Can I make the mixture ahead of time?
Definitely! You can prepare the cutlet mixture a day in advance and store it in the fridge. Just make sure to cover it tightly. When you’re ready to cook, let it sit at room temperature for about 15 minutes before shaping and frying.
How do I store leftovers?
Leftover cutlets can be stored in an airtight container in the fridge for up to 3 days. If you want to keep them longer, freeze them as mentioned earlier! Just make sure they’re completely cooled before wrapping them up.
Can I add more vegetables to the mixture?
Absolutely! Adding finely grated carrots, zucchini, or bell peppers can increase the nutrition and flavor. Just be sure to squeeze out any excess moisture from the veggies to prevent the mixture from getting too wet!
What’s the best way to reheat these cutlets?
The oven is the best way to reheat them! Preheat it to 350°F (175°C), place the cutlets on a baking sheet, and heat for about 10-15 minutes. If you’re in a hurry, the microwave works too—just remember they won’t be as crispy!
I hope these FAQs help you feel more confident as you whip up these delicious beef cutlets! If you have any other questions, feel free to ask. Happy cooking!
Print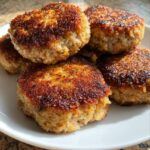
Beef Cutlets Recipe: 5 Comforting Steps to Deliciousness
- Prep Time: 15 minutes
- Cook Time: 15 minutes
- Total Time: 30 minutes
- Yield: 4 servings 1x
- Category: Main Dish
- Method: Frying
- Cuisine: American
- Diet: Gluten Free
Description
Easy beef cutlets recipe for a delicious meal.
Ingredients
- 1 pound ground beef
- 1 cup breadcrumbs
- 1 egg
- 1 small onion, finely chopped
- 2 cloves garlic, minced
- 1 teaspoon salt
- 1/2 teaspoon black pepper
- 1 teaspoon paprika
- Vegetable oil for frying
Instructions
- In a bowl, combine ground beef, breadcrumbs, egg, onion, garlic, salt, pepper, and paprika.
- Mix until well combined.
- Shape the mixture into cutlets.
- Heat oil in a skillet over medium heat.
- Fry the cutlets for 4-5 minutes on each side until golden brown.
- Remove from skillet and drain on paper towels.
Notes
- Serve with your choice of sauce.
- You can add herbs for extra flavor.
- Store leftovers in the fridge for up to 3 days.
Nutrition
- Serving Size: 1 cutlet
- Calories: 250
- Sugar: 1g
- Sodium: 400mg
- Fat: 15g
- Saturated Fat: 5g
- Unsaturated Fat: 8g
- Trans Fat: 0g
- Carbohydrates: 10g
- Fiber: 1g
- Protein: 20g
- Cholesterol: 55mg
Keywords: beef cutlets recipe