

Oh my goodness, let me tell you about these amazing vegan gluten-free waffles! They’re not just easy to whip up, but they’re also incredibly delicious and make for a guilt-free breakfast that’ll have you jumping out of bed in the morning. I just love how fluffy they turn out, and the best part? You only need a handful of simple ingredients that you probably already have in your pantry. Trust me, once you taste that warm, buttery goodness drizzled with maple syrup or topped with fresh fruit, you’ll be hooked! It’s like a cozy hug in waffle form. So, roll up your sleeves and let’s dive into this super healthy recipe that’s sure to become a weekend favorite in your house!
Ingredients List
(Tip: You’ll find the full list of ingredients and measurements in the recipe card below.)
- 1 cup gluten-free flour
- 1 tablespoon baking powder
- 1 tablespoon sugar
- 1/4 teaspoon salt
- 1 cup almond milk
- 2 tablespoons coconut oil, melted
- 1 teaspoon vanilla extract
How to Prepare Vegan Gluten Free Waffles Healthy Recipe
Alright, let’s get into the fun part—making these delightful vegan gluten-free waffles! I promise you, it’s as easy as pie, or should I say, waffle? Just follow these simple steps, and you’ll have a stack of deliciousness ready in no time!
Step 1: Combine Dry Ingredients
First things first, grab a mixing bowl and toss in that 1 cup of gluten-free flour, 1 tablespoon of baking powder, 1 tablespoon of sugar, and 1/4 teaspoon of salt. Use a whisk or a fork to mix everything together until it’s all combined. This step is super important because it helps distribute the baking powder evenly, ensuring your waffles rise beautifully. It’s like giving them a little pep talk!
Step 2: Mix Wet Ingredients
Now, let’s add some moisture to our dry mix. Pour in 1 cup of almond milk, followed by 2 tablespoons of melted coconut oil, and 1 teaspoon of vanilla extract. I just love the aroma of vanilla—it adds such a warm touch! Stir everything together until it’s nice and combined. Don’t worry if it seems a little lumpy; it’s all part of the waffle magic!
Step 3: Prepare the Waffle Iron
Next up, it’s time to get your waffle iron ready! Preheat it according to the manufacturer’s instructions, and while that’s heating up, give it a light greasing with some coconut oil or non-stick spray. This little step is crucial for ensuring your waffles come out perfectly without sticking—nobody wants a waffle disaster, right?
Step 4: Cook the Waffles
Alright, the moment we’ve been waiting for! Pour the batter onto your preheated waffle iron—about 1/2 cup should do for each waffle, but you can adjust based on how big you want them. Close the lid and cook until they’re golden brown. Usually, this takes about 5 minutes, but every waffle iron is a bit different, so keep an eye on them! You’ll know they’re ready when they’re beautifully crisp and fragrant.
Step 5: Serve and Enjoy
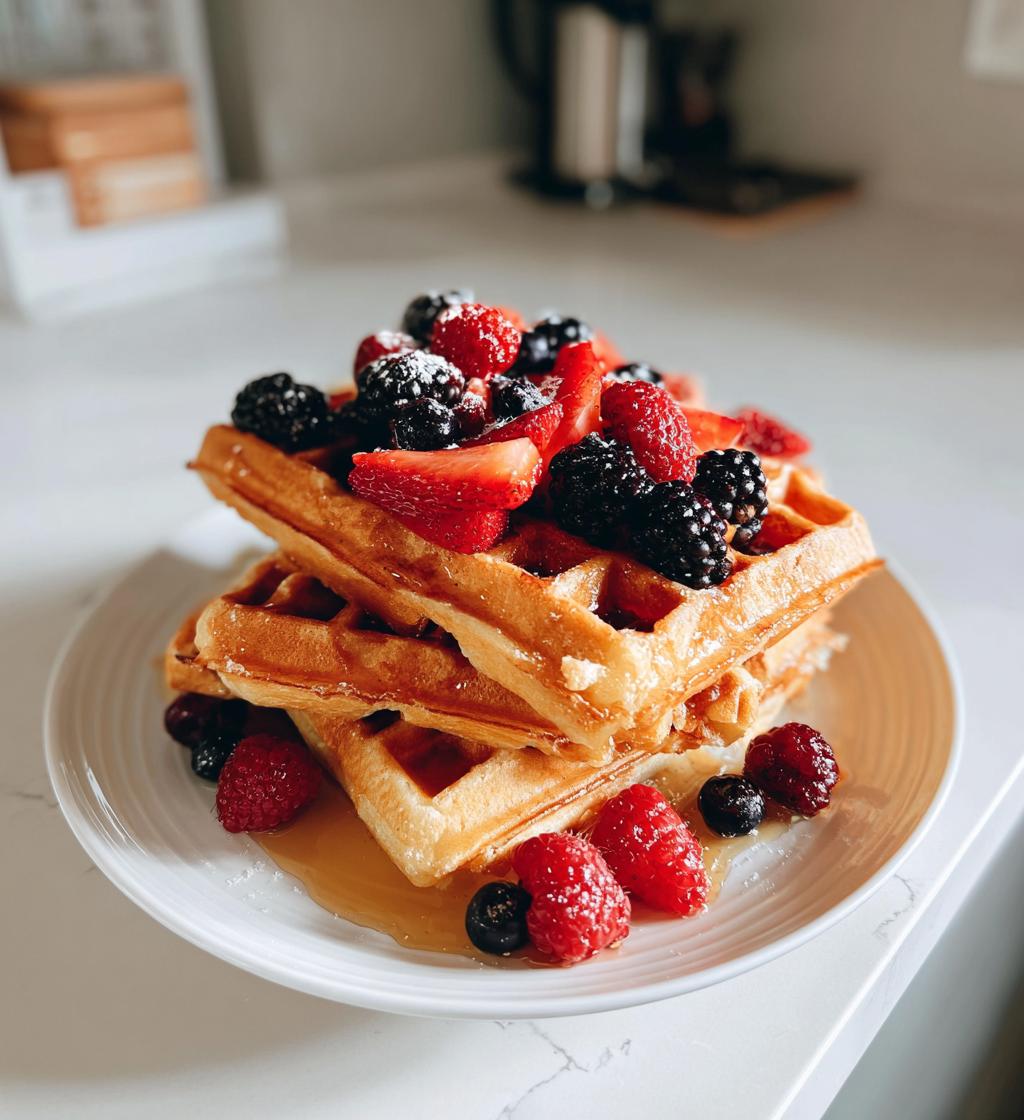
Finally, the best part—serving them up! Carefully remove the waffles from the iron and serve them warm with your favorite toppings. I love drizzling them with maple syrup, adding fresh berries, or even a dollop of almond butter for that extra oomph. Trust me, you’re going to want to savor every bite of these fluffy, healthy delights!
Why You’ll Love This Recipe
- Quick prep time—just 10 minutes to get everything ready!
- Simple and easy to make with a handful of ingredients.
- Healthy ingredients that make for a guilt-free breakfast.
- Fluffy and delicious, satisfying your waffle cravings without the gluten.
- Customizable with your favorite toppings—go wild with fresh fruit, nut butter, or syrup!
- Perfect for meal prep; make a batch and enjoy them throughout the week.
- Great for everyone—vegan, gluten-free, and totally delicious for all!
Tips for Success
Want to ensure your vegan gluten-free waffles turn out absolutely perfect? I’ve got some tried-and-true tips to help you avoid any mishaps and elevate your waffle game!
- Measure Carefully: Since gluten-free flours can vary in density, I always recommend using a kitchen scale if you have one. If not, spoon the flour into your measuring cup and level it off with a knife for accuracy.
- Don’t Overmix: When combining your wet and dry ingredients, mix just until combined. Overmixing can lead to gummy waffles, and nobody wants that! A few lumps are totally okay.
- Preheat Properly: Make sure your waffle iron is fully preheated before pouring in the batter. This helps achieve that crispy exterior while keeping the inside fluffy. Also, a quick test pour of a small amount of batter can help you gauge if it’s ready!
- Experiment with Add-ins: Feel free to enhance your waffles with add-ins like blueberries, chocolate chips, or nuts! Just fold them in gently before cooking. It makes for a fun surprise in every bite!
- Keep Them Warm: If you’re making a big batch, keep the cooked waffles warm in an oven set to 200°F (93°C) while you finish cooking the rest. This way, they’ll all be ready to enjoy together.
- Check for Doneness: If you’re unsure whether your waffles are done, look for that beautiful golden-brown color and a slight steam release. They should feel crisp on the outside and fluffy inside.
With these tips, you’ll be well on your way to creating a stack of dreamy vegan gluten-free waffles that everyone will rave about! Happy cooking!
Storage & Reheating Instructions
So, you’ve made a delicious batch of vegan gluten-free waffles, but maybe you’ve got some leftovers (or you just want to meal prep for the week—smart move!). Storing them properly is key to keeping that fluffy goodness intact!
First, let your waffles cool completely before storing them. This helps prevent any sogginess. Once they’re cool, stack them with a piece of parchment paper in between each waffle to keep them from sticking together. Then, pop them in an airtight container or zip-top bag and store them in the refrigerator. They’ll stay fresh for about 3-4 days.
When it’s time to enjoy your waffles again, I highly recommend reheating them in a toaster for the best results. This will help bring back that delightful crispiness! Just toast them until they’re heated through and a little golden, and you’re good to go. You can also use an oven set to 350°F (175°C) for about 5-10 minutes if you want to heat up a larger batch, but the toaster is my favorite method for that perfect texture.
Now you’re all set to enjoy those healthy waffles whenever the craving strikes! Happy munching!
Nutritional Information
Alright, let’s talk nutrition! I know you’re curious about what’s in these yummy vegan gluten-free waffles, so here’s a breakdown of the estimated nutritional values per waffle. Keep in mind that these are approximate values, and they can vary based on the specific ingredients you use. But it gives you a good idea of what you’re enjoying!
- Calories: 150
- Fat: 7g
- Saturated Fat: 5g
- Unsaturated Fat: 2g
- Trans Fat: 0g
- Cholesterol: 0mg
- Sodium: 200mg
- Carbohydrates: 20g
- Fiber: 2g
- Sugar: 2g
- Protein: 3g
These waffles are not only tasty but also a great way to start your day with a healthy boost! Enjoy knowing you’re treating yourself right while indulging in a delightful breakfast.
FAQ Section
Got questions about these scrumptious vegan gluten-free waffles? Don’t worry, I’ve got you covered! Here are some common queries I hear, along with my best answers to help you on your waffle-making journey.
Can I use a different type of gluten-free flour?
Absolutely! You can try using oat flour, almond flour, or a store-bought gluten-free flour blend. Just keep in mind that different flours may yield slightly different textures, but they’ll still be delicious!
How can I make these waffles sweeter?
If you like your waffles on the sweeter side, feel free to add a bit more sugar or even maple syrup to the batter. You can also top them with sweetened yogurt or a drizzle of honey or agave syrup for that extra touch!
Can I make the batter ahead of time?
While it’s best to cook the waffles right after mixing the batter for optimal fluffiness, you can prepare the dry ingredients ahead of time and store them in an airtight container. Just add the wet ingredients when you’re ready to cook!
What toppings do you recommend?
Oh, the topping possibilities are endless! I love serving these waffles with fresh berries, sliced bananas, a sprinkle of nuts, or a drizzle of almond butter. You could also go for a classic maple syrup or even a dollop of coconut whipped cream. Yum!
Can I freeze these waffles?
Yes, you can! Just let them cool completely, then stack them with parchment paper in between and store them in a freezer-safe bag or container. When you’re ready to enjoy, simply pop them in the toaster or oven to reheat!
Are these waffles suitable for kids?
Definitely! These vegan gluten-free waffles are kid-friendly and make for a fun breakfast option. You can even let the little ones help with the toppings—trust me, they’ll love it!
Feel free to reach out if you have any more questions or tips—I’m here to help you make the best waffles ever! Happy cooking!
For more delicious recipes, check out our all recipes page!
For information on the health benefits of almond milk, you can visit Healthline.
For tips on gluten-free cooking, check out Gluten Free Palate.
Print
Vegan Gluten Free Waffles Healthy Recipe for Guilt-Free Joy
- Prep Time: 10 minutes
- Cook Time: 15 minutes
- Total Time: 25 minutes
- Yield: 4 waffles 1x
- Category: Breakfast
- Method: Waffle Maker
- Cuisine: American
- Diet: Vegan
Description
Healthy vegan gluten-free waffles that are easy to make and delicious.
Ingredients
- 1 cup gluten-free flour
- 1 tablespoon baking powder
- 1 tablespoon sugar
- 1/4 teaspoon salt
- 1 cup almond milk
- 2 tablespoons coconut oil, melted
- 1 teaspoon vanilla extract
Instructions
- In a bowl, mix gluten-free flour, baking powder, sugar, and salt.
- Add almond milk, melted coconut oil, and vanilla extract. Stir until combined.
- Preheat waffle iron and lightly grease it.
- Pour batter onto the waffle iron and cook until golden brown.
- Serve with your favorite toppings.
Notes
- Store leftovers in the refrigerator.
- Reheat in a toaster for best results.
- Adjust sweetness to taste.
Nutrition
- Serving Size: 1 waffle
- Calories: 150
- Sugar: 2g
- Sodium: 200mg
- Fat: 7g
- Saturated Fat: 5g
- Unsaturated Fat: 2g
- Trans Fat: 0g
- Carbohydrates: 20g
- Fiber: 2g
- Protein: 3g
- Cholesterol: 0mg
Keywords: vegan gluten free waffles healthy recipe