
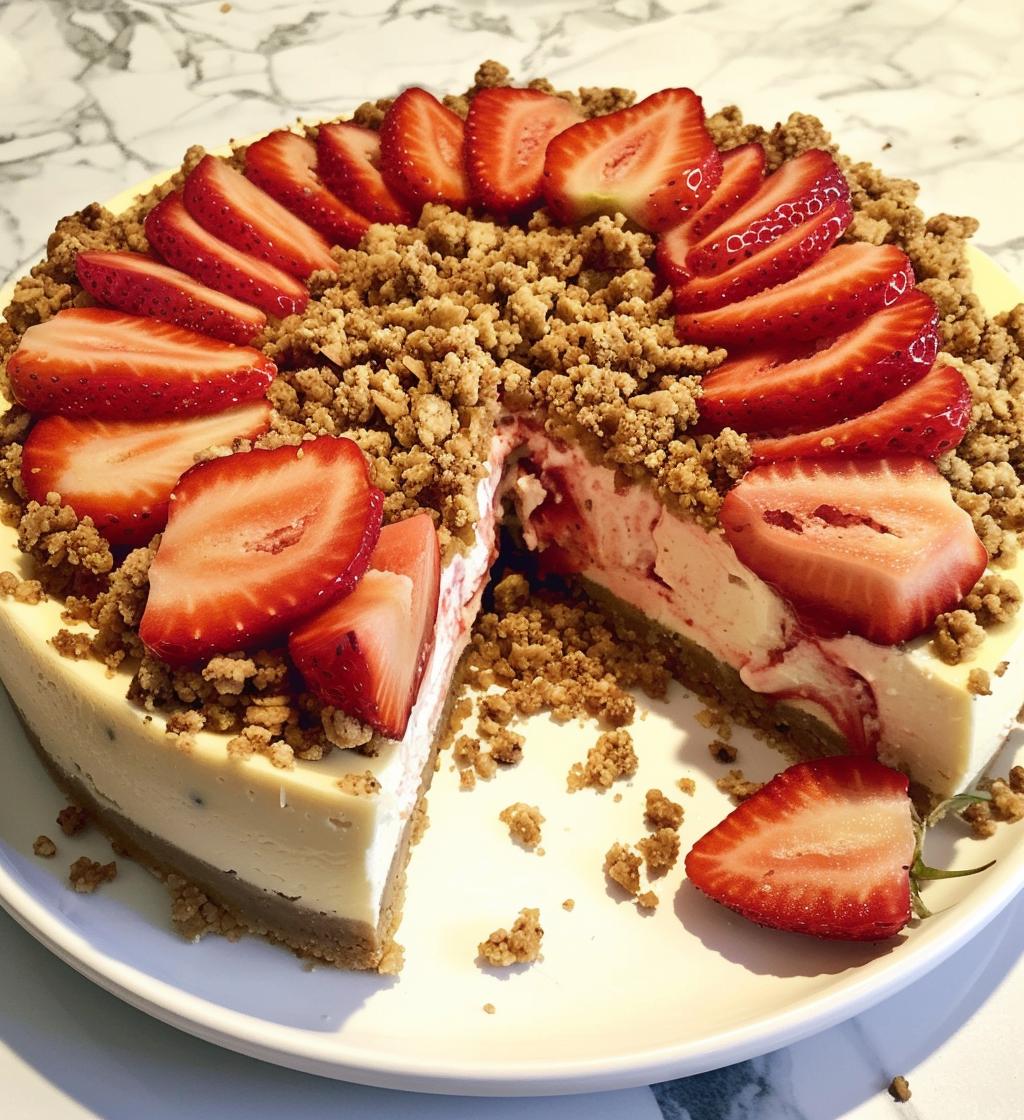
Oh my goodness, let me tell you about the *Strawberry Crumble Cheesecake*! It’s like a slice of sunshine on a plate—creamy, fruity, and just the right amount of crunch from that buttery crumble topping. I remember the first time I made this for a summer barbecue; my friends practically swooned over it! The sweetness of the fresh strawberries paired with the richness of the cream cheese is absolutely divine. And that crumble? It adds a delightful texture that keeps you coming back for more. Trust me, once you try this cheesecake, you’ll want it in your dessert rotation forever. It’s a crowd-pleaser that’s perfect for any occasion!
Ingredients for Strawberry Crumble Cheesecake
Gathering the right ingredients is crucial for making the *Strawberry Crumble Cheesecake* sing with flavor! Here’s what you’ll need:
- 1 1/2 cups of graham cracker crumbs: These will form the base of your cheesecake, giving it that classic sweet crunch.
- 1/2 cup of unsalted butter, melted: This helps bind the crumbs together for a buttery, rich crust.
- 2 cups of cream cheese, softened: Make sure it’s at room temperature for a smooth and creamy filling—no one likes lumps!
- 1 cup of granulated sugar: This sweetens the cheesecake, balancing the tartness of the strawberries.
- 1 teaspoon of vanilla extract: A splash of this adds a lovely depth of flavor to the filling.
- 3 large eggs: They provide structure and help set the cheesecake perfectly.
- 2 cups of fresh strawberries, sliced: These are the star of the show, bringing fresh, fruity goodness to each bite.
- 1/2 cup of all-purpose flour: This will help support the fruit and create a nice crumble topping.
- 1/4 cup of brown sugar: This adds a hint of caramel flavor to the crumble, making it even more irresistible.
- 1/4 teaspoon of salt: Just a pinch enhances all the flavors and balances the sweetness.
Trust me, having these ingredients ready will set you up for cheesecake success!
How to Prepare Strawberry Crumble Cheesecake
Preheat the Oven
First things first, let’s get that oven preheating to 325°F (160°C). Preheating is super important because it ensures that the cheesecake bakes evenly from the start, giving you that perfect creamy texture. You don’t want to rush this part, so let it heat up while you prepare the other components!
Prepare the Crust
Now, grab a bowl and mix your graham cracker crumbs with the melted butter until it’s all combined and crumbly. It should look like wet sand! Then, take a springform pan and press that crumb mixture firmly into the bottom—this is your crust, after all! The more you press it down, the more stable it’ll be when you slice into it later. I usually use the bottom of a measuring cup to get it nice and even.
Make the Cheesecake Filling
In another bowl, beat together the softened cream cheese, granulated sugar, and vanilla extract until it’s smooth and creamy—this is where the magic happens! Add the eggs one at a time, mixing well after each addition. This step is crucial; you want everything to be fully incorporated for that luscious filling. You’ll know it’s ready when it’s silky and lump-free!
Assemble the Cheesecake
Now, pour that beautiful cream cheese mixture over the crust you prepared earlier. Spread it evenly, then layer those fresh strawberry slices on top. You want to see those vibrant reds peeking through because they’re going to shine in the final presentation!
Add the Crumble Topping
In a separate bowl, combine the all-purpose flour, brown sugar, and salt for the crumble topping. Mix it well, then sprinkle this mixture generously over the strawberries. This topping will create that delightful crunch that contrasts beautifully with the creamy cheesecake.
Bake and Cool
Now it’s time to pop your cheesecake into the oven for about 50-60 minutes. You’ll know it’s done when the edges are set but the center still has a slight jiggle—it’ll firm up as it cools. Once baked, let it cool in the pan for a little while before removing the sides of the springform. This cooling step is essential for avoiding cracks and helping the cheesecake maintain its shape. Patience is key here, but trust me, it’ll be worth the wait!
Tips for Success
To ensure your *Strawberry Crumble Cheesecake* turns out absolutely divine, let’s go over some of my favorite tips! First, always use fresh strawberries—they’re sweeter and juicier than frozen ones, making a huge difference in flavor. Also, make sure your cream cheese is softened to room temperature before mixing; this helps avoid lumps and gives you that silky texture we all love. When it comes to baking, keep an eye on the cheesecake during the last few minutes; every oven is different, and you don’t want to overbake it. Lastly, patience is key! Letting it chill in the fridge for a few hours (or overnight if you can resist) allows the flavors to meld beautifully. Trust me, your taste buds will thank you!
Nutritional Information
Here’s a quick look at the estimated nutritional data for each slice of *Strawberry Crumble Cheesecake*. Keep in mind that these figures are approximate and can vary based on specific ingredients used:
- Calories: 350
- Fat: 20g
- Protein: 5g
- Carbohydrates: 35g
- Sugar: 20g
- Sodium: 250mg
These numbers can help you keep track of your indulgence, but honestly, who’s counting when it comes to something this delicious? Enjoy every bite!
FAQ About Strawberry Crumble Cheesecake
Can I use frozen strawberries?
Absolutely, you can use frozen strawberries if fresh ones aren’t available! Just keep in mind that they’ll release more moisture as they thaw, which can affect the texture slightly. To use frozen strawberries, let them thaw completely, drain any excess liquid, and pat them dry with a paper towel before slicing. This will help maintain that delicious balance of creamy cheesecake and fresh fruit without making it too watery. Trust me, your cheesecake will still be delightful!
How do I store leftover cheesecake?
Storing leftover *Strawberry Crumble Cheesecake* is super easy! Just cover it tightly with plastic wrap or aluminum foil to keep it fresh. If you have a cake dome, that works perfectly too! Store it in the refrigerator for up to 5 days. If you want to keep it longer, you can freeze individual slices wrapped well in plastic wrap, then place them in an airtight container. They’ll stay good for about 2 months in the freezer. Just remember to let them thaw in the fridge overnight when you’re ready to enjoy another slice!
Can I make this cheesecake in advance?
Definitely! Making the *Strawberry Crumble Cheesecake* in advance is a fantastic idea, especially if you’re planning for a special occasion. You can prepare it a day or two ahead of time, and just let it chill in the fridge until you’re ready to serve. This also gives the flavors more time to meld together, making each bite even tastier! Just make sure to hold off on adding any toppings until you’re close to serving to keep everything fresh and vibrant. Your guests will be so impressed with your planning!
Why You’ll Love This Recipe
- Delicious Balance: The creamy cheesecake pairs wonderfully with the fresh strawberries, creating a delightful balance of flavors in every bite.
- Textural Delight: The buttery crumble topping adds a satisfying crunch, making each slice a textural experience that you’ll crave.
- Simple to Make: With straightforward steps and easy-to-find ingredients, this cheesecake is perfect for both seasoned bakers and newbies alike!
- Perfect for Any Occasion: Whether it’s a summer BBQ, a holiday gathering, or just a sweet treat for yourself, this cheesecake fits right in.
- Make Ahead Friendly: You can prepare it in advance, allowing the flavors to develop and making your life easier when hosting!
- Visually Stunning: The vibrant red strawberries on top make it a showstopper dessert that looks as good as it tastes.
- Adaptable Recipe: You can easily swap out strawberries for your favorite fruits or add your own twist to the crumble topping!
Serving Suggestions
When it comes to enjoying your *Strawberry Crumble Cheesecake*, I’ve got some delightful serving suggestions that will elevate the experience! First off, a dollop of freshly whipped cream on top is always a crowd-pleaser. It adds a light and airy touch that perfectly complements the richness of the cheesecake.
If you’re feeling a bit adventurous, consider pairing your cheesecake with a scoop of vanilla ice cream. The cold, creamy ice cream against the warm, buttery crumble is a match made in heaven! For a refreshing twist, serve it alongside a bright, citrusy sorbet—lemon or raspberry would be fabulous choices.
Now, let’s talk drinks. A cup of freshly brewed coffee or a rich espresso pairs beautifully with the sweetness of the cheesecake, enhancing those flavors with every sip. If you prefer something fruity, a sparkling strawberry lemonade or a glass of chilled rosé will bring out the berry goodness in the cheesecake brilliantly.
Lastly, don’t forget about garnishes! A sprinkle of mint leaves adds a fresh pop of color and a hint of herbal brightness that cuts through the richness, making each bite even more delightful. Trust me, these simple additions will take your *Strawberry Crumble Cheesecake* to the next level!
Storage & Reheating Instructions
Storing your leftover *Strawberry Crumble Cheesecake* is a breeze! Just make sure to cover it tightly with plastic wrap or aluminum foil to keep it fresh and prevent it from absorbing any fridge odors. If you have a cake dome, that works wonderfully too! You can keep it in the refrigerator for up to 5 days, and I promise it’ll still taste amazing.
If you want to enjoy it later, you can freeze individual slices. Just wrap each slice snugly in plastic wrap and then place them in an airtight container. This way, they’ll stay good for about 2 months in the freezer. When you’re ready to indulge again, simply let them thaw in the fridge overnight for the best results. No need to reheat—serving it chilled allows that creamy cheesecake texture to shine through beautifully!
So, whether you’re savoring a slice right after baking or enjoying it days later, this cheesecake is sure to remain just as delicious. Enjoy every bite!
Print
Strawberry Crumble Cheesecake: 7 Steps to Pure Bliss
- Prep Time: 20 minutes
- Cook Time: 60 minutes
- Total Time: 1 hour 20 minutes
- Yield: 8 servings 1x
- Category: Dessert
- Method: Baking
- Cuisine: American
- Diet: Vegetarian
Description
A delicious strawberry crumble cheesecake with a buttery crumble topping.
Ingredients
- 1 1/2 cups graham cracker crumbs
- 1/2 cup unsalted butter, melted
- 2 cups cream cheese, softened
- 1 cup granulated sugar
- 1 teaspoon vanilla extract
- 3 large eggs
- 2 cups fresh strawberries, sliced
- 1/2 cup all-purpose flour
- 1/4 cup brown sugar
- 1/4 teaspoon salt
Instructions
- Preheat your oven to 325°F (160°C).
- In a bowl, mix graham cracker crumbs with melted butter. Press into the bottom of a springform pan.
- In another bowl, beat cream cheese, sugar, and vanilla until smooth.
- Add eggs one at a time, mixing well after each addition.
- Pour the cream cheese mixture over the crust.
- Top with sliced strawberries.
- In a separate bowl, combine flour, brown sugar, and salt. Sprinkle over the strawberries.
- Bake for 50-60 minutes until set.
- Let cool before removing from the pan.
Notes
- Use fresh strawberries for best flavor.
- Let the cheesecake chill in the fridge for a few hours before serving.
Nutrition
- Serving Size: 1 slice
- Calories: 350
- Sugar: 20g
- Sodium: 250mg
- Fat: 20g
- Saturated Fat: 10g
- Unsaturated Fat: 5g
- Trans Fat: 0g
- Carbohydrates: 35g
- Fiber: 1g
- Protein: 5g
- Cholesterol: 80mg
Keywords: Strawberry Crumble Cheesecake, cheesecake, dessert, strawberries