
There’s something truly magical about making sourdough sandwich bread at home. I still remember the first time I pulled a warm loaf out of the oven, the smell wafting through my kitchen—it was like a hug in bread form! The soft, chewy texture and that delightful tang from the sourdough starter elevate any sandwich to a whole new level. Whether you’re crafting a classic PB&J or a gourmet turkey club, this bread adds a unique flavor that store-bought just can’t match. Trust me, once you make your own, you’ll never want to go back. Plus, it’s surprisingly straightforward! Let’s dive into how to make your very own loaf of happiness.
Ingredients for Sourdough Sandwich Bread
To whip up this delicious sourdough sandwich bread, you’ll need just a few simple ingredients. Make sure to measure accurately for the best results. Here’s what you’ll need:
- 500g bread flour
- 350ml water (room temperature)
- 100g sourdough starter (active and bubbly)
- 10g salt
That’s it! These ingredients come together to create a loaf that’s soft, flavorful, and perfect for your favorite sandwiches. Don’t forget, using a kitchen scale will give you the most precise measurements, which is super helpful when working with bread dough. Happy baking!
How to Prepare Sourdough Sandwich Bread
Now that we have our ingredients ready, let’s get into the fun part—making the sourdough sandwich bread! I promise, the process is super rewarding and totally worth it. Just follow these steps, and you’ll be well on your way to baking a beautiful loaf.
Mixing the Dough
Start by combining the bread flour and water in a large mixing bowl. Use a spatula or your hands to mix them until just combined. You don’t want to overdo it at this stage; we’re looking for a shaggy but cohesive mixture. It should look a bit messy—don’t worry, that’s normal! This initial step is crucial as it allows the flour to fully hydrate, which is key to developing flavor and texture.
Adding Sourdough Starter and Salt
Next, it’s time to add your active sourdough starter and the salt. This is where the magic happens! Mix everything together thoroughly until you achieve an even consistency. I like to use my hands for this—it’s a great way to really feel the dough come together. You want to ensure the salt is evenly distributed throughout, as it helps with flavor and fermentation.
Kneading the Dough
Once your dough is mixed, it’s time to knead! Turn the dough out onto a lightly floured surface and knead it for about 10 minutes. You can use the classic stretch-and-fold technique or simply push and fold the dough repeatedly. You’ll know it’s ready when it’s smooth, elastic, and bounces back when you poke it. This step is essential for developing that lovely gluten structure!
First Rise
Now that your dough is kneaded, place it in a lightly greased bowl and cover it with a damp cloth or plastic wrap. Let it rise in a warm spot for about 4 hours. Here’s the fun part: every hour, give the dough a fold. Just grab one side of the dough, stretch it up, and fold it over itself. This helps strengthen the gluten and gives your bread that amazing structure!
Shaping the Loaf
After the first rise, it’s time to shape your loaf! Gently turn the dough out onto a floured surface and press it down to release some of the air. Shape it into a loaf by folding the edges in and rolling it tightly. Place the shaped dough into a greased loaf pan, seam side down. Cover it again and let it rise for another 2 hours. It should puff up beautifully!
Preheating the Oven
About 30 minutes before your second rise is complete, preheat your oven to 220°C (428°F). This ensures that your oven is nice and hot, which is crucial for a good bake. While it heats up, you can prepare your baking surface. If you like, place a baking stone or an oven-safe pan on the bottom rack to create steam while baking.
Baking the Bread
Once your loaf has risen beautifully and the oven is hot, it’s time to bake! Slide the loaf into the oven and let it bake for 30-35 minutes. You’ll know it’s done when it turns golden brown and sounds hollow when tapped on the bottom. If you want that perfect crust, you can also spritz some water into the oven right after you place the bread inside.
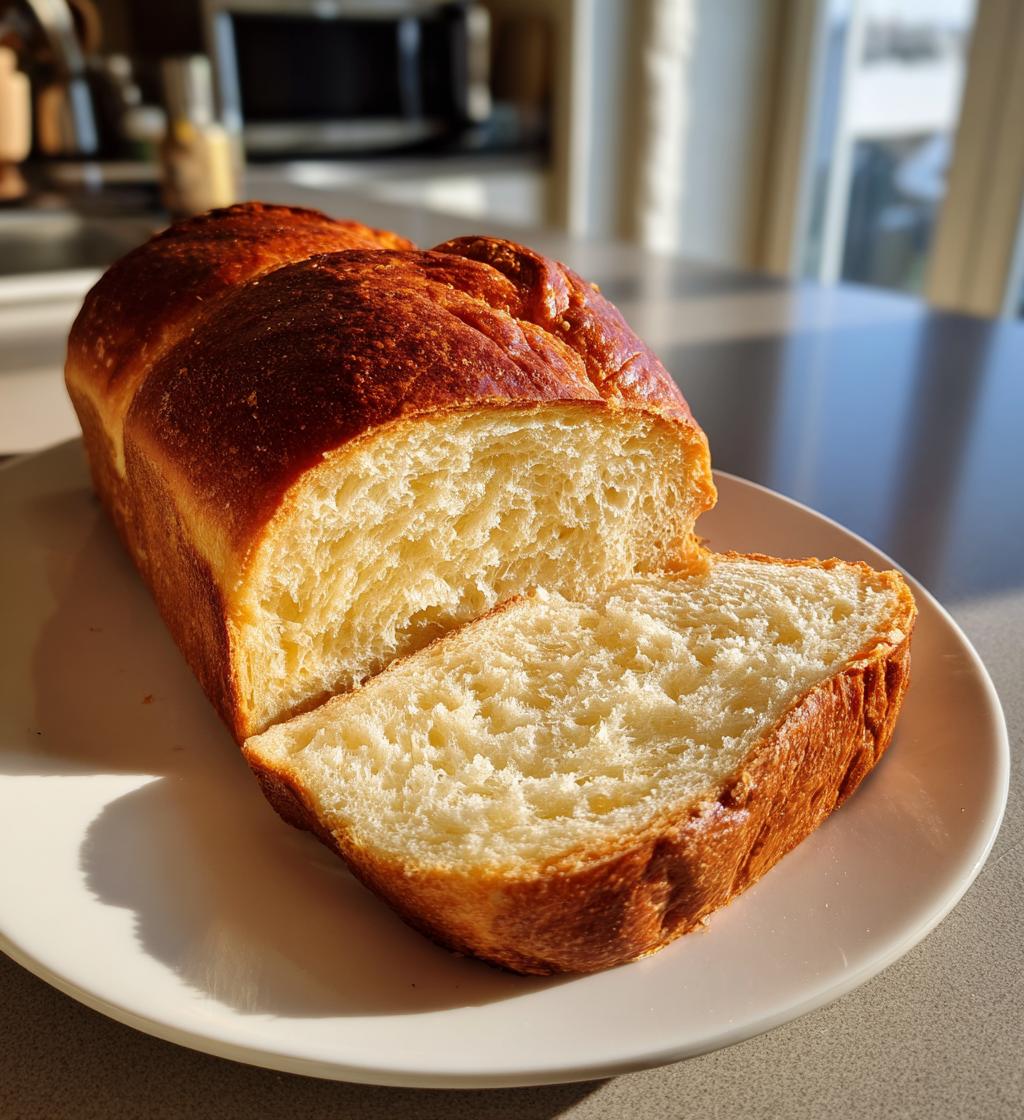
Cooling and Slicing
After baking, remove the loaf from the oven and let it cool in the pan for about 10 minutes. Then, transfer it to a wire rack to cool completely before slicing. I know it’s tempting to dig in right away, but cooling is super important! This allows the steam to escape and ensures a nice, even texture throughout the bread. Trust me, a little patience here goes a long way!
Why You’ll Love This Recipe
- It’s incredibly easy to make, even for beginners!
- The flavor is unmatched—soft, tangy, and oh-so-delicious!
- Perfect for all types of sandwiches, from classic to gourmet.
- Homemade bread has a freshness that store-bought just can’t compete with.
- You’ll feel like a baking superstar when you pull that golden loaf from the oven!
- It’s a great way to use up your sourdough starter and reduce waste.
- This bread toasts beautifully, making it perfect for breakfast or snacks.
- It’s customizable—add herbs, seeds, or even cheese for a twist!
Tips for Success
To ensure your sourdough sandwich bread turns out absolutely perfect, I’ve got a few pro tips that I swear by! Trust me, these small details can make a big difference in your baking journey.
- Use Quality Ingredients: The fresher your ingredients, the better your bread will taste! Opt for high-quality bread flour and make sure your sourdough starter is active and bubbly. A strong starter will give your bread that lovely rise and tang.
- Pay Attention to Hydration: Depending on your environment, you might need to adjust the amount of water slightly. If your kitchen is particularly dry, add a splash more water to keep the dough soft and pliable.
- Don’t Rush the Rise: Patience is key! Allowing the dough to rise fully at each stage is crucial for flavor development. If your dough isn’t rising well, try finding a warmer spot in your kitchen.
- Master the Knead: Kneading the dough properly is essential for that perfect texture. If you’re not sure, don’t hesitate to knead a little longer! The dough should feel smooth and elastic when you’re done.
- Invest in a Kitchen Scale: For the most accurate measurements, a kitchen scale is your best friend. It helps eliminate guesswork, especially when it comes to flour and water ratios.
- Cool Before Slicing: I know it’s hard to wait, but letting your bread cool completely before slicing is so important! This helps maintain the structure and prevents it from getting gummy.
- Experiment and Have Fun: Don’t be afraid to get creative! Try adding herbs, seeds, or spices to the dough for a unique flavor twist. Bread-making is as much about the process as it is about the final product, so enjoy it!
With these tips in your back pocket, you’ll be well on your way to baking the best sourdough sandwich bread ever. Happy baking, my friend!
Nutritional Information
Now, let’s talk about the nutritional goodness packed into each slice of this delightful sourdough sandwich bread! Keep in mind that these values are estimates and can vary based on specific ingredients and portion sizes, but here’s a general idea of what you can expect per slice:
- Calories: 150
- Fat: 1.5g
- Protein: 5g
- Carbohydrates: 30g
- Sugar: 0g
- Sodium: 120mg
- Fiber: 1g
This bread is a fantastic base for all your favorite toppings while still being relatively light! Whether you’re slathering on some creamy avocado or piling on deli meats, you can feel good about enjoying this homemade treat. Remember, baking your own bread not only allows you to control the ingredients but also lets you savor every wholesome bite. Enjoy!
FAQ Section
Got questions about making sourdough sandwich bread? Don’t worry, I’ve got you covered! Here are some of the most common inquiries I get, along with my best answers. Let’s dive in!
Can I use all-purpose flour instead of bread flour?
Absolutely! While bread flour gives you that wonderful chewy texture due to its higher protein content, all-purpose flour will still work. Just keep in mind that the texture might be a bit softer, but it’ll still be delicious!
How do I know if my sourdough starter is active?
Your starter should be bubbly, have doubled in size within a few hours after feeding, and have a pleasant, slightly tangy smell. If it’s not doing much, give it a few more feedings to wake it up!
Can I make this bread without a stand mixer?
Definitely! You don’t need fancy equipment for this recipe. Just use your hands to mix and knead the dough. It’s a great way to connect with the bread-making process!
What if my dough isn’t rising?
If your dough isn’t rising, check the temperature of your kitchen. It might be too cold! Try moving it to a warmer spot or letting it rise longer. Patience is key when it comes to sourdough!
Can I add herbs or spices to the dough?
Oh, absolutely! Adding herbs, spices, or even cheese can give your sourdough sandwich bread a delightful twist. Just remember to adjust the flour slightly if you’re adding a lot of dry ingredients to maintain the right dough consistency.
Storage & Reheating Instructions
Once you’ve baked your delicious sourdough sandwich bread, you’ll want to know how to keep it fresh and tasty. Trust me, there’s nothing worse than stale bread! Here’s how to store it properly:
- Cool Completely: First things first, make sure your bread is completely cool before storing it. This prevents moisture from building up and making it soggy.
- Store at Room Temperature: For short-term storage, keep your bread in a bread bag or an airtight container at room temperature. It should stay fresh for about 2-3 days. Just avoid keeping it in the fridge, as that can actually dry it out faster!
- Freezing for Long-Term: If you want to keep your bread for longer, freezing is your best bet! Slice the loaf before freezing, so you can grab just what you need. Wrap each slice or the whole loaf tightly in plastic wrap, then place it in a freezer bag. It should stay good for about 3 months.
When you’re ready to enjoy your frozen bread, simply take out the slices you want and let them thaw at room temperature. If you prefer a warm slice, pop it in the toaster or microwave for a few seconds. Just be careful not to overdo it; you want that lovely texture to shine through!
With these storage tips, you’ll be able to savor your homemade sourdough sandwich bread for days to come. Happy eating!
Print
Sourdough Sandwich Bread: 7 Moments of Pure Baking Bliss
- Prep Time: 30 minutes
- Cook Time: 35 minutes
- Total Time: 5 hours
- Yield: 1 loaf 1x
- Category: Bread
- Method: Baking
- Cuisine: American
- Diet: Vegetarian
Description
This sourdough sandwich bread is soft, flavorful, and perfect for any sandwich.
Ingredients
- 500g bread flour
- 350ml water
- 100g sourdough starter
- 10g salt
Instructions
- Mix flour and water in a bowl until combined.
- Add sourdough starter and salt, mixing well.
- Knead the dough for 10 minutes until smooth.
- Let the dough rise in a warm place for 4 hours, folding every hour.
- Shape the dough into a loaf and place in a greased loaf pan.
- Cover and let rise for another 2 hours.
- Preheat the oven to 220°C (428°F).
- Bake for 30-35 minutes until golden brown.
- Cool on a wire rack before slicing.
Notes
- Use a kitchen scale for accurate measurements.
- Adjust water based on humidity.
- Store in a bread bag for freshness.
Nutrition
- Serving Size: 1 slice
- Calories: 150
- Sugar: 0g
- Sodium: 120mg
- Fat: 1.5g
- Saturated Fat: 0g
- Unsaturated Fat: 1.5g
- Trans Fat: 0g
- Carbohydrates: 30g
- Fiber: 1g
- Protein: 5g
- Cholesterol: 0mg
Keywords: sourdough sandwich bread