
Oh my goodness, let me tell you about the *Reese’s Earthquake Cake*! This dessert is nothing short of a chocolate-peanut butter dream come true. Imagine biting into a rich, fudgy chocolate cake, only to be met with pockets of creamy peanut butter and bursts of gooey melted Reese’s cups. It’s like a party in your mouth! I remember the first time I made it for a potluck; everyone was raving about it, and I felt like a rock star! It’s such a crowd-pleaser and perfect for any occasion—whether it’s a family gathering or just a cozy night in. Trust me, once you take that first bite, you’ll be hooked. It’s decadent, it’s indulgent, and it’s absolutely worth every calorie. Let’s get baking!
Ingredients for Reese’s Earthquake Cake
- 1 box chocolate cake mix (any brand will do, just make sure it’s rich and fudgy)
- 1 cup water (this helps to keep the cake moist)
- 1/2 cup vegetable oil (for that luscious texture)
- 3 large eggs (fresh is best for binding and fluffiness)
- 8 oz cream cheese, softened (make sure it’s at room temperature for easy mixing)
- 1 cup powdered sugar (for that sweet cream cheese layer)
- 1 cup peanut butter (smooth or crunchy, depending on your preference)
- 1 cup Reese’s peanut butter cups, chopped (go ahead and use the mini ones for bite-sized goodness)
- 1 cup chocolate chips (because you can never have too much chocolate!)
How to Prepare Reese’s Earthquake Cake
Preheat and Prepare Batter
First things first, you’ll want to preheat your oven to 350°F (175°C). This is crucial because a well-preheated oven helps your cake rise beautifully. While that’s warming up, grab a 9×13 inch pan and grease it generously with butter or cooking spray. Seriously, don’t skip this step—nobody wants a cake that sticks! Now, in a large mixing bowl, combine the chocolate cake mix, water, vegetable oil, and eggs. Mix it all together until the batter is smooth and creamy—this should only take a minute or two. It’s okay if you see a few lumps; they’ll bake out!
Create the Cream Cheese Layer
Next up, in another bowl, beat together the softened cream cheese and powdered sugar until it’s nice and smooth. This creamy layer is what makes this cake truly special. Once it’s ready, gently spread the cream cheese mixture over the first layer of cake batter in your greased pan. Don’t be too rough; you want to keep it fluffy and delicious!
Assemble and Bake
Now, sprinkle the peanut butter and chopped Reese’s cups on top of the cream cheese layer—oh my goodness, this is where the magic happens! Pour the remaining chocolate cake batter over everything, making sure to cover the Reese’s pieces completely. Pop the pan in the oven and bake for about 30-35 minutes. To check for doneness, insert a toothpick in the center; it should come out clean or with just a few moist crumbs. Once it’s done, let it cool in the pan for at least 10-15 minutes before serving. This cooling time helps the flavors meld together, and trust me, it’s worth the wait!
Nutritional Information
Now, let’s talk about the numbers behind this heavenly *Reese’s Earthquake Cake*. Keep in mind that these values are estimates and can vary based on the specific ingredients you use. But here’s a rough breakdown per slice (and trust me, you’re going to want more than one slice!):
- Calories: 350
- Fat: 18g
- Saturated Fat: 7g
- Trans Fat: 0g
- Cholesterol: 50mg
- Sodium: 300mg
- Carbohydrates: 40g
- Fiber: 2g
- Sugar: 30g
- Protein: 6g
So, it’s definitely a rich treat! But hey, life’s too short not to indulge every now and then, right? Enjoy every bite of this deliciousness!
Tips for Success
Alright, let’s make sure your *Reese’s Earthquake Cake* is a total showstopper! Here are some of my top tips to help you avoid any hiccups and ensure it turns out perfectly every time:
- Use room temperature ingredients: Make sure your cream cheese and eggs are at room temperature before mixing. This helps everything blend together smoothly, creating that dreamy texture.
- Don’t overmix: When combining your cake batter, mix just until everything is combined. Overmixing can lead to a dense cake, and we want it light and fluffy!
- Grease the pan well: Seriously, don’t skimp on greasing! I love using a mix of butter and a sprinkle of flour to ensure nothing sticks. You want every slice to come out perfectly intact.
- Check your oven temperature: Ovens can be sneaky! If you have an oven thermometer, use it to make sure it’s at the right temperature. A miscalibrated oven can lead to undercooked or overcooked cake.
- Let it cool: I know it’s tempting to dig in right away, but giving it at least 10-15 minutes to cool in the pan helps the flavors meld and makes slicing easier.
- Experiment with toppings: Feel free to get creative! Drizzle some melted chocolate or a sprinkle of crushed peanuts on top before serving. It adds that extra special touch!
With these tips in your back pocket, you’ll be well on your way to making the most indulgent, delicious *Reese’s Earthquake Cake*. Happy baking!
Variations of Reese’s Earthquake Cake
If you’re anything like me, you love a recipe that you can mix up and make your own! Here are some fun variations for your *Reese’s Earthquake Cake* that’ll keep things exciting and delicious:
- Different Chocolate Cake Mix: Swap out the standard chocolate cake mix for something like a dark chocolate or even a fudge brownie mix. The richer the chocolate, the more indulgent the cake!
- Nutty Twist: Add chopped walnuts or pecans to the peanut butter layer for a delightful crunch. The added texture pairs beautifully with the creamy layers!
- Chocolate Peanut Butter Swirl: Before baking, swirl in some extra peanut butter or chocolate ganache into the batter for an even richer flavor. It’s like a surprise in every bite!
- Reese’s Variations: Experiment with different sizes or types of Reese’s! Use the mini cups, or try Reese’s pieces for a fun crunch throughout the cake.
- Salted Caramel Drizzle: Once the cake is cooled, drizzle some salted caramel sauce on top for a sweet and salty combo that’s absolutely divine!
- Encapsulated Layers: Instead of just sprinkling the peanut butter and Reese’s on top, mix them into the batter! This will create layers of deliciousness throughout the cake.
- Chocolate Chips Galore: Feel free to mix in a variety of chocolate chips—dark, white, or even peanut butter chips. The more chocolate, the better, right?
These variations not only keep your baking game fresh but also allow you to cater to different tastes and occasions! So go ahead and have some fun with your *Reese’s Earthquake Cake*—you can’t go wrong!
Storage & Reheating Instructions
So, you’ve made this fantastic *Reese’s Earthquake Cake* and now you’ve got some leftovers (if you’re lucky!). Here’s how to store it properly to keep all that deliciousness intact:
- Storing Leftovers: Once your cake has cooled completely, cover it tightly with plastic wrap or aluminum foil, or transfer it to an airtight container. This helps keep it moist and prevents it from absorbing any other fridge odors. It can stay fresh in the refrigerator for up to 5 days—though I doubt it’ll last that long!
- Freezing: If you find yourself with more cake than you can handle, feel free to freeze it! Slice the cake into individual portions, wrap each slice in plastic wrap, and then place them in a freezer-safe bag. This way, you can pull out a slice whenever you have a craving! It’ll keep well for up to 2 months.
Now, when it comes to reheating, here’s how to enjoy your *Reese’s Earthquake Cake* just like it was fresh out of the oven:
- Microwave: For a quick fix, pop a slice in the microwave for about 15-20 seconds. This warms it up nicely and makes the chocolate and peanut butter oh-so gooey again!
- Oven: If you’re not in a rush, preheat your oven to 350°F (175°C), place the slice on a baking sheet, and warm it for about 10-15 minutes. This method melts the chocolate and gives you that just-baked experience.
And there you have it! With these simple storage and reheating tips, you can savor every scrumptious bite of your *Reese’s Earthquake Cake* for days to come. Enjoy!
Why You’ll Love This Recipe
- Quick to Prepare: With just a few simple steps, you can whip up this decadent dessert in no time. Perfect for those last-minute cravings or surprise guests!
- Rich and Indulgent: The combination of chocolate cake, creamy peanut butter, and gooey Reese’s cups creates a flavor explosion you won’t be able to resist.
- Crowd-Pleasing: Whether it’s a birthday party, potluck, or family gathering, this cake is always a hit. Everyone loves a slice (or two!) of this irresistible treat.
- Versatile: You can easily customize it with different chocolate mixes or toppings, making it a great go-to recipe for any occasion or taste preference.
- Leftover Friendly: This cake stays delicious for days, so you can enjoy every last crumb without worry. Plus, it’s perfect for reheating and savoring later!
- Easy to Share: Cut it into squares and serve—it’s the kind of dessert that’s perfect for sharing, so you can spread the joy (and the calories!) around.
FAQ Section
Can I use a different type of cake mix?
Absolutely! While I love the rich chocolate flavor, you can totally experiment with different mixes. A chocolate fudge cake mix or even a red velvet cake mix could add a fun twist to your *Reese’s Earthquake Cake*!
What can I do if I don’t have cream cheese?
If you’re out of cream cheese or just not a fan, you can substitute it with mascarpone cheese for a creamy texture or even Greek yogurt for a lighter option. Just keep in mind the flavor will be a bit different, but still delicious!
How do I know when the cake is done baking?
Great question! You’ll want to insert a toothpick into the center of the cake. If it comes out clean or with just a few moist crumbs, it’s ready to come out of the oven. If there’s wet batter on it, give it a few more minutes and check again.
Can I make this cake ahead of time?
Yes! You can definitely bake the *Reese’s Earthquake Cake* a day in advance. Just let it cool completely, cover it well, and store it in the fridge. It actually tastes even better the next day as the flavors meld together!
What’s the best way to serve this cake?
Honestly, it’s perfect served warm with a scoop of vanilla ice cream or a dollop of whipped cream on top. But it’s also delicious cold, so feel free to enjoy it however you like! Just be prepared for everyone to come back for seconds!

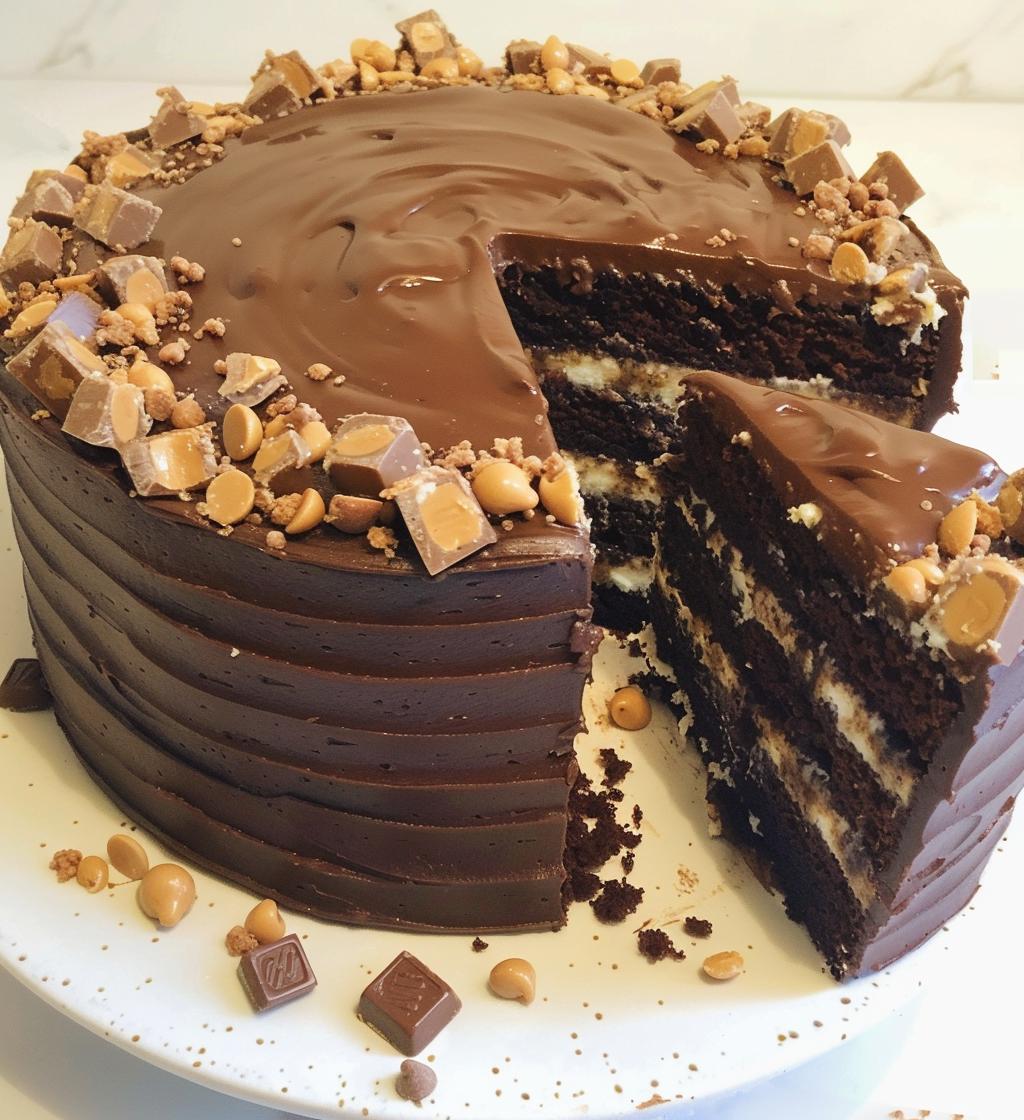
Reese’s Earthquake Cake: 7 Indulgent Layers of Joy
- Prep Time: 20 minutes
- Cook Time: 35 minutes
- Total Time: 55 minutes
- Yield: 12 servings 1x
- Category: Dessert
- Method: Baking
- Cuisine: American
- Diet: Vegetarian
Description
A rich and indulgent dessert that combines chocolate cake, cream cheese, and Reese’s peanut butter cups.
Ingredients
- 1 box chocolate cake mix
- 1 cup water
- 1/2 cup vegetable oil
- 3 large eggs
- 8 oz cream cheese, softened
- 1 cup powdered sugar
- 1 cup peanut butter
- 1 cup Reese’s peanut butter cups, chopped
- 1 cup chocolate chips
Instructions
- Preheat your oven to 350°F (175°C).
- In a bowl, mix the chocolate cake mix, water, vegetable oil, and eggs until smooth.
- Pour half of the batter into a greased 9×13 inch pan.
- In another bowl, beat the cream cheese and powdered sugar until smooth.
- Spread the cream cheese mixture over the cake batter.
- Sprinkle peanut butter and chopped Reese’s cups on top.
- Pour the remaining cake batter over the top.
- Bake for 30-35 minutes or until a toothpick comes out clean.
- Let cool before serving.
Notes
- Store leftovers in the refrigerator.
- Can be served warm or cold.
- Top with whipped cream for extra flavor.
Nutrition
- Serving Size: 1 slice
- Calories: 350
- Sugar: 30g
- Sodium: 300mg
- Fat: 18g
- Saturated Fat: 7g
- Unsaturated Fat: 8g
- Trans Fat: 0g
- Carbohydrates: 40g
- Fiber: 2g
- Protein: 6g
- Cholesterol: 50mg
Keywords: reeses earthquake cake, chocolate cake, peanut butter dessert