
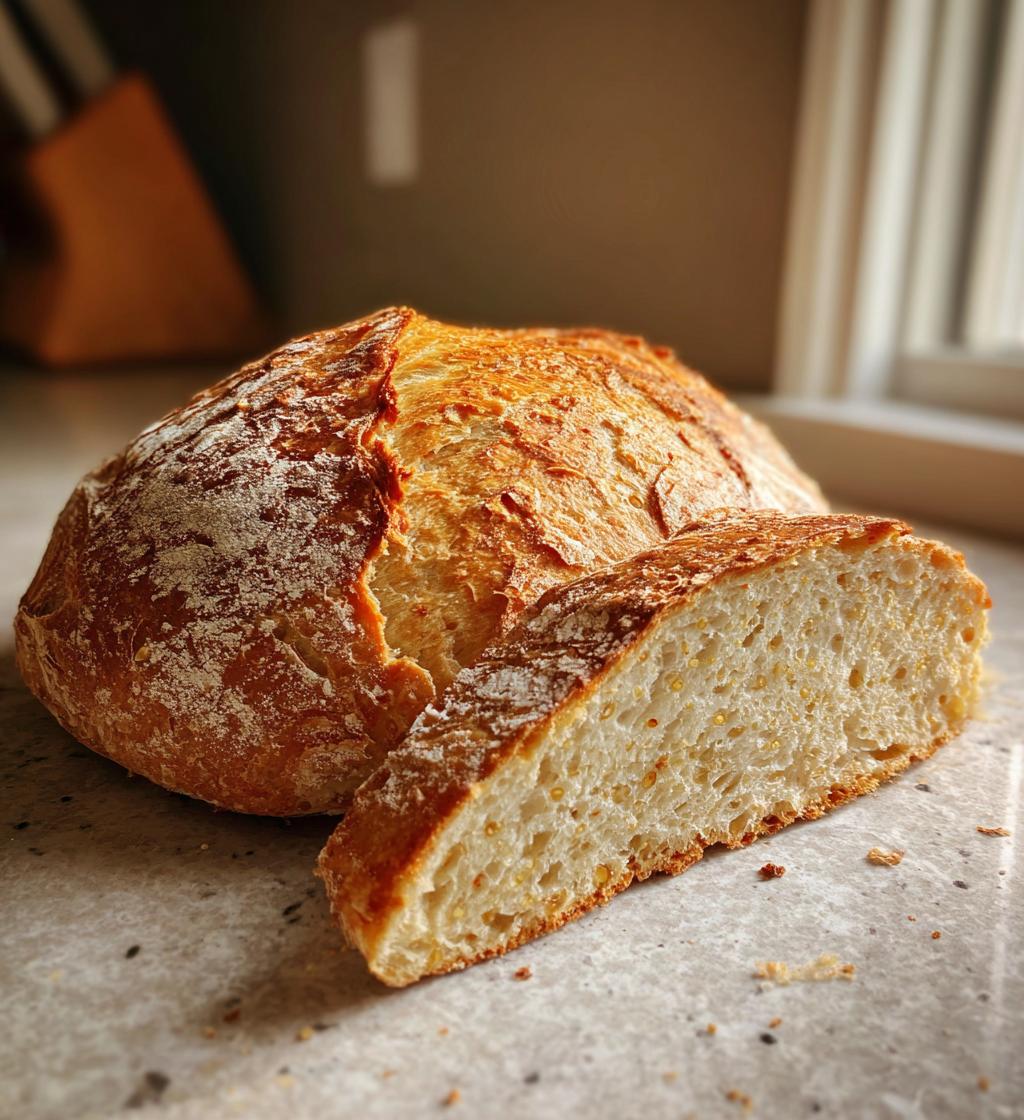
Oh my goodness, let me tell you about quinoa bread! This amazing loaf is not just gluten-free but also packed with nutrients, making it a fantastic choice for anyone looking to enjoy a healthier bread option. I stumbled upon this recipe when I was searching for ways to incorporate more whole foods into my diet, and wow, it’s been a game changer! Quinoa is such a powerhouse—it’s a complete protein, which means it contains all nine essential amino acids. Plus, it’s rich in fiber, vitamins, and minerals. Trust me, once you try making quinoa bread yourself, you’ll never want to go back to regular bread! It’s perfect for sandwiches, toast, or just enjoying with a pat of butter. Let’s dive into how to whip this up in your own kitchen!
Ingredients List
Gathering your ingredients is the first step to making this magnificent quinoa bread! Here’s what you’ll need:
- 2 cups cooked quinoa: Make sure to rinse the quinoa before cooking to remove the bitter coating. You can cook it in water or broth for extra flavor!
- 1 cup almond flour: This gives the bread a lovely nutty flavor and keeps it gluten-free. If you can’t find almond flour, you can grind whole almonds in a food processor until fine.
- 1/2 cup flaxseed meal: This is a fantastic source of omega-3 fatty acids and works as a binder in gluten-free baking. You can buy it pre-ground or grind whole flaxseeds yourself.
- 1/4 cup water: Just plain old water to help bring everything together.
- 1/4 cup olive oil: I love using extra virgin for its rich flavor, but any light olive oil will work. It helps keep the bread moist!
- 1 tsp baking powder: This will help the bread rise and give it that perfect fluffy texture.
- 1 tsp salt: Essential for enhancing all the flavors in your bread.
- 1 tsp honey or maple syrup (optional): A touch of sweetness can really elevate the taste, but feel free to skip it if you prefer a savory loaf!
Once you’ve got everything laid out, you’re ready to start mixing things up! I can’t wait for you to taste this deliciousness!
How to Prepare Quinoa Bread
Now that you’ve got your ingredients ready, let’s dive into making this scrumptious quinoa bread! Follow these simple steps for a perfect loaf every time. Trust me, you’ll feel like a baking pro in no time!
Step-by-Step Instructions
- Preheat the oven: First things first, preheat your oven to 350°F (175°C). This ensures the bread bakes evenly as soon as it hits the oven.
- Mix the dry ingredients: In a large mixing bowl, combine the cooked quinoa, almond flour, flaxseed meal, baking powder, and salt. Give it a good stir until everything is evenly mixed. You want those flavors to meld beautifully!
- Add the wet ingredients: Now, drizzle in the water and olive oil. If you’re using honey or maple syrup for a hint of sweetness, add that too. Mix all the ingredients together until you get a smooth batter. Don’t be afraid to use your hands if you need to—it’s all part of the fun!
- Transfer to a loaf pan: Grease a loaf pan with a little olive oil to prevent sticking, then pour your quinoa mixture into the pan, spreading it out evenly.
- Bake: Pop it into the preheated oven and bake for 30-35 minutes. You’ll know it’s done when a toothpick inserted into the center comes out clean. Yay, your kitchen is about to smell heavenly!
- Cool and slice: Once it’s out of the oven, let your bread cool in the pan for about 10 minutes, then transfer it to a wire rack. Allow it to cool completely before slicing. This step is crucial for the best texture!
And there you have it! A beautiful loaf of quinoa bread ready to enjoy. I can’t wait for you to take that first bite!
Nutritional Information
Before we dive into the deliciousness of quinoa bread, let’s talk about its nutritional perks! Now, keep in mind that the nutritional values can vary based on the specific ingredients and brands you use, so these are just general guidelines. Here’s what you can expect per slice:
- Calories: 120
- Fat: 7g
- Protein: 4g
- Carbohydrates: 10g
- Sugar: 1g
- Sodium: 150mg
- Fiber: 2g
This quinoa bread is not only satisfying but also a nutritious option, perfect for those looking to boost their diet with wholesome ingredients. Whether you’re enjoying it for breakfast or as a snack, you’re doing your body a favor!
Why You’ll Love This Recipe
- Gluten-Free: This quinoa bread is completely gluten-free, making it a safe choice for those with gluten sensitivities or celiac disease.
- Quick Preparation: With just 15 minutes of prep time, you can have a delicious loaf in the oven, ready to enjoy in under an hour!
- Health Benefits: Packed with protein, fiber, and healthy fats, this bread is a nutritious option that supports a balanced diet.
- Versatile Serving Options: Enjoy it sliced for sandwiches, toasted with your favorite spread, or even as a side to soups and salads. The possibilities are endless!
- Customizable: Feel free to get creative by adding herbs, spices, or seeds to tailor the flavor to your liking.
- Kid-Friendly: Even picky eaters will love this bread! It’s a great way to sneak in some extra nutrition without sacrificing taste.
Tips for Success
Alright, let’s make sure your quinoa bread turns out absolutely perfect! Here are my top tips and tricks to avoid any common pitfalls and achieve that delightful texture and flavor we all crave.
- Don’t skip rinsing the quinoa: Rinsing is crucial to wash away the saponins, which can make your bread taste bitter. Trust me, you want that nutty flavor to shine!
- Measure carefully: Accurate measurements are key in gluten-free baking. Make sure your quinoa is fully cooked and cooled before mixing it in, so it doesn’t throw off the moisture balance.
- Mix just until combined: Overmixing can lead to a dense loaf. Just stir until everything is well blended; you want to keep that airy texture!
- Let it cool completely: Letting your bread cool before slicing is a game changer. It helps set the structure, making sure you get those perfect slices instead of a crumbly mess!
- Experiment with flavors: Don’t be afraid to add herbs or spices like rosemary, garlic powder, or even seeds like sunflower or pumpkin. This bread is a blank canvas just waiting for your creative touch!
- Use a toothpick to check doneness: When you think it’s done, insert a toothpick in the center. If it comes out clean, you’re in the clear! If it’s gooey, pop it back in for a few more minutes.
- Store properly: To keep your quinoa bread fresh, store it in an airtight container at room temperature for a couple of days or in the fridge for longer. You can even freeze slices for a quick grab-and-go option!
Follow these tips, and you’ll be amazed at how delicious and satisfying your quinoa bread turns out! Happy baking!
Storage & Reheating Instructions
Now that you’ve got your delicious quinoa bread baked to perfection, let’s talk about how to keep it fresh and tasty for as long as possible! Proper storage is key to maintaining that lovely texture and flavor.
First off, once your bread has completely cooled, store it in an airtight container at room temperature for up to two days. This way, it’ll stay soft and delicious! If you know you won’t finish it within that time, I recommend slicing it up and wrapping those slices individually in plastic wrap or parchment paper, then placing them in a freezer bag. This will help prevent freezer burn and keep your bread fresh for up to two months!
When it comes to reheating, you have a couple of fantastic options. If you’re craving a warm slice, just pop it in the toaster or your toaster oven until it’s heated through. It’ll get that lovely crispiness on the outside while staying soft inside—yum! Alternatively, you can reheat it in the microwave for about 15-20 seconds, but be careful not to overdo it or it might get a little rubbery.
Another great idea is to enjoy it toasted with a bit of butter or your favorite spread on top. Whether you’re making a sandwich or just enjoying a slice with some jam, this quinoa bread is sure to be a hit, even on day three!
Variations
One of the best things about quinoa bread is how adaptable it is! You can easily switch things up and make it your own. Here are some fun variations to consider:
- Herb-Infused: Add a tablespoon or two of your favorite fresh herbs like rosemary, thyme, or basil to the mixture. It’ll give your bread a fragrant, savory twist that’s delightful!
- Spicy Kick: For those who like a little heat, toss in a teaspoon of red pepper flakes or some finely chopped jalapeños. It’ll add a warm, spicy flavor that pairs beautifully with avocado or hummus!
- Sweet and Nutty: If you’re in the mood for something sweet, mix in some chopped nuts like walnuts or pecans along with a handful of raisins or dried cranberries. It makes for a delicious breakfast or snack option!
- Cheesy Goodness: For a savory treat, fold in some grated cheese like cheddar or Parmesan. The melted cheese adds a wonderful richness that’s simply irresistible!
- Seeds Galore: Enhance the nutrition by adding a mix of seeds such as sunflower, pumpkin, or sesame seeds. They’ll add a nice crunch and boost the fiber content!
- Chocolate Chip Delight: Yes, you can even make it a little indulgent! Stir in some dark chocolate chips for a sweet treat that’s still packed with goodness. It’s like having dessert for breakfast!
Feel free to play around with these ideas and find your favorite combination. Your quinoa bread can be a different culinary adventure every time you bake it!
FAQ Section
Got questions about making quinoa bread? No worries, I’ve got you covered! Here are some common queries I get, along with my answers to help you along your baking journey.
Can I use other flours?
Absolutely! While this recipe is designed for almond flour, you can experiment with other gluten-free flours like coconut flour or chickpea flour. Just keep in mind that different flours have different moisture levels, so you may need to adjust the liquid slightly. Have fun with it!
How do I know when the bread is done?
The best way to test if your quinoa bread is done is by inserting a toothpick into the center. If it comes out clean or with just a few crumbs, it’s good to go! If it’s still wet, pop it back in the oven for a few more minutes. You want that perfect golden crust!
Can I freeze quinoa bread?
You sure can! Freezing quinoa bread is a great way to save it for later. Just slice it up, wrap each piece tightly in plastic wrap or parchment paper, and store it in a freezer bag. It’ll stay fresh for up to two months. When you’re ready to enjoy a slice, just thaw it overnight in the fridge or pop it in the toaster straight from the freezer.
Can I make this bread without flaxseed meal?
Yes, you can skip the flaxseed meal, but you might need to add an extra binding agent since it helps hold the bread together. You could try using chia seeds instead or add a little more almond flour to compensate. Just remember, the texture might change a bit!
What can I serve with quinoa bread?
Oh, so many options! You can use quinoa bread for sandwiches, toast it with avocado and a sprinkle of salt, or pair it with soups and salads. It also makes a fantastic base for open-faced sandwiches topped with your favorite spreads. Be creative!
Is quinoa bread suitable for meal prep?
Definitely! This quinoa bread is perfect for meal prep. Just bake a loaf and slice it up to have on hand for quick breakfasts or lunches throughout the week. It’s nutritious, filling, and keeps well when stored properly!
Print
Quinoa Bread: 5 Irresistible Reasons to Bake Today
- Prep Time: 15 minutes
- Cook Time: 35 minutes
- Total Time: 50 minutes
- Yield: 1 loaf 1x
- Category: Bread
- Method: Baking
- Cuisine: Gluten-Free
- Diet: Gluten Free
Description
A healthy and gluten-free bread made with quinoa.
Ingredients
- 2 cups cooked quinoa
- 1 cup almond flour
- 1/2 cup flaxseed meal
- 1/4 cup water
- 1/4 cup olive oil
- 1 tsp baking powder
- 1 tsp salt
- 1 tsp honey or maple syrup (optional)
Instructions
- Preheat your oven to 350°F (175°C).
- In a bowl, mix cooked quinoa, almond flour, flaxseed meal, baking powder, and salt.
- Add water, olive oil, and honey or maple syrup. Stir until combined.
- Transfer the mixture to a greased loaf pan.
- Bake for 30-35 minutes or until a toothpick comes out clean.
- Let it cool before slicing.
Notes
- Store in an airtight container.
- This bread is best eaten fresh.
- You can add herbs for extra flavor.
Nutrition
- Serving Size: 1 slice
- Calories: 120
- Sugar: 1g
- Sodium: 150mg
- Fat: 7g
- Saturated Fat: 1g
- Unsaturated Fat: 6g
- Trans Fat: 0g
- Carbohydrates: 10g
- Fiber: 2g
- Protein: 4g
- Cholesterol: 0mg
Keywords: quinoa bread, gluten-free bread, healthy bread