
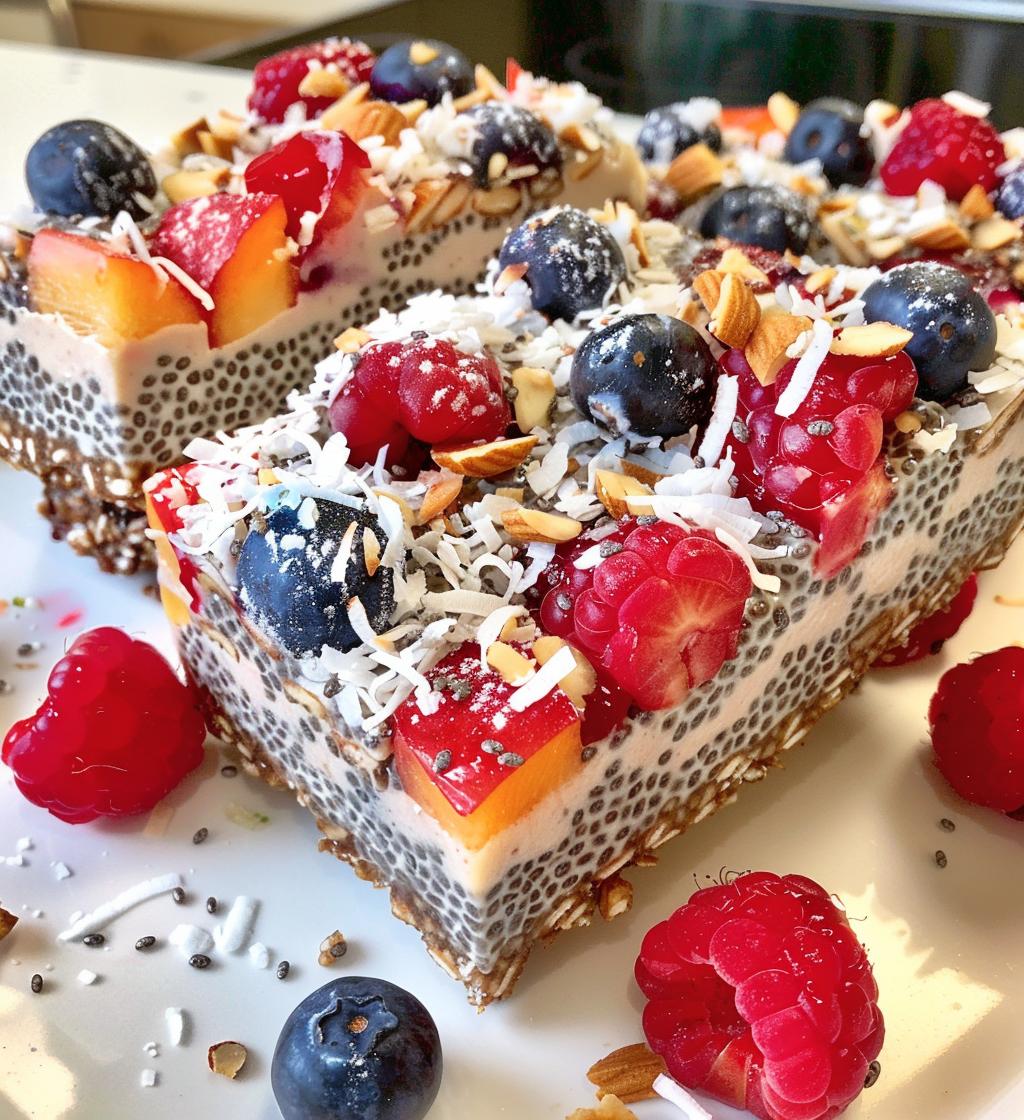
Oh my goodness, let me tell you about these no bake chia pudding bars! They’re a total game-changer when you need a quick and nutritious snack. Seriously, these bars are not only super easy to whip up, but they’re also packed with goodness and totally vegan! Just think about it—whenever that snack craving hits, you can reach for one of these delicious bars that are rich in fiber and protein. Plus, they’re so customizable! You can throw in your favorite nuts or top them with fresh fruit, and voilà! You’ve got a healthy treat that tastes amazing. I love making a batch of these at the beginning of the week; they’re perfect for breakfast on-the-go or a sweet afternoon pick-me-up. Trust me, once you try them, you’ll wonder how you ever lived without them!
Ingredients List
Gathering these ingredients is a breeze! Here’s what you’ll need to make these fantastic no bake chia pudding bars:
- 1 cup chia seeds – These tiny seeds are the star of the show! They’ll give your bars that amazing pudding-like texture.
- 4 cups almond milk – You can use any milk you love, but almond milk keeps it light and creamy.
- 1/4 cup maple syrup – This natural sweetener adds just the right amount of sweetness. Trust me, it’s a must!
- 1 teaspoon vanilla extract – A splash of vanilla enhances the flavor beautifully. You’ll want this in your bars!
- 1/2 cup shredded coconut – For a delightful chewiness and a hint of tropical flavor.
- 1/2 cup nuts (e.g., almonds or walnuts) – Adds a lovely crunch! Chop them up a bit for easier eating.
- 1/2 cup fresh fruit (e.g., berries or banana) – Top your bars with fresh fruit for a burst of flavor and color!
With these simple ingredients, you’re just a few steps away from a delicious, healthy snack that everyone will love!
How to Prepare No Bake Chia Pudding Bars
Making these no bake chia pudding bars is as simple as it gets! Just follow these easy steps, and you’ll have yourself a delicious, healthy snack ready in no time. Let’s dive in!
Step 1: Combine Chia Seeds and Almond Milk
First things first, grab a big bowl and combine the chia seeds and almond milk. Give it a good stir to make sure the seeds are evenly distributed throughout the milk. You want the mixture to be well combined and the chia seeds to start soaking up that creamy goodness. It should look like a sloshy mixture at this point, but don’t worry, it’ll thicken up soon!
Step 2: Add Sweeteners and Flavors
Now, it’s time to sweeten things up! Add in the maple syrup and vanilla extract. Stir it all together until everything is nicely mixed. This is where the magic happens; the flavors will start to blend, and your kitchen will smell amazing! Make sure to taste it—if it needs a little more sweetness, feel free to add a touch more maple syrup.
Step 3: Allow to Rest
Alright, let’s give this mixture a little time to work its magic. Let it sit for about 10 minutes. This is super important because it gives the chia seeds time to absorb the liquid and swell up. After 10 minutes, give it another stir to break up any clumps that may have formed. You’ll notice it’s starting to thicken up, which is exactly what you want!
Step 4: Mix in Coconut and Nuts
Next, add the shredded coconut and nuts into the mixture. Stir it well until everything is evenly coated. This step adds a delightful texture and crunch to your bars! Make sure the coconut and nuts are thoroughly incorporated so every bite will have that wonderful flavor and texture.
Step 5: Spread and Top
Now comes the fun part! Grab a lined baking dish (I usually use parchment paper for easy removal) and spread the chia mixture evenly in the dish. You can use a spatula to smooth it out and make it nice and even. Once it’s spread, it’s time to top it off with your fresh fruit. Sprinkle it over the top for a pop of color and freshness. Berries work wonderfully, but feel free to get creative with your favorite fruits!
Step 6: Refrigerate
The final step is crucial, so don’t skip it! Place your dish in the refrigerator and let it chill for at least 2 hours or until set. This will help the bars firm up nicely. Once they’re ready, you can cut them into bars and enjoy! Trust me, the wait is totally worth it, and the refreshing taste will have you coming back for more!
Nutritional Information
Now, let’s talk about the goodness packed into these no bake chia pudding bars! Here’s a quick breakdown of the estimated nutritional values per bar, based on the typical ingredients used:
- Calories: 150
- Fat: 8g
- Saturated Fat: 1g
- Unsaturated Fat: 7g
- Trans Fat: 0g
- Cholesterol: 0mg
- Sodium: 5mg
- Carbohydrates: 15g
- Sugar: 5g
- Fiber: 6g
- Protein: 5g
These values give you a great idea of how nutritious these bars are—packed with healthy fats, fiber, and protein! Perfect for keeping your energy levels up without any guilt. And remember, these numbers are estimates and can vary a bit depending on the specific ingredients you choose to use. But regardless, you’re in for a healthy treat!
Why You’ll Love This Recipe
- Quick and easy to prepare—just mix and chill!
- Healthy and nutrient-dense, perfect for a guilt-free snack.
- Totally vegan and suitable for various dietary needs.
- Customizable with your favorite nuts, fruits, and toppings.
- Great for meal prep—make a batch at the beginning of the week!
- Rich in fiber and protein, keeping you satisfied longer.
- No baking required, making cleanup a breeze!
- Deliciously versatile—enjoy them for breakfast, snacks, or dessert!
Tips for Success
Getting these no bake chia pudding bars just right is all about a few key tips and tricks! Here are my top recommendations to ensure your bars turn out perfectly every time:
- Don’t skip the resting time: Allowing the chia mixture to sit for those 10 minutes is crucial. This helps the seeds absorb the liquid and thicken up nicely. If you skip this step, your bars may end up too runny!
- Mix thoroughly: When you combine the ingredients, make sure everything is well-mixed. You don’t want any clumps of chia seeds or dry coconut hanging out in the mixture. Take a moment to stir well!
- Use a lined dish: Lining your baking dish with parchment paper makes removing the bars a cinch! You’ll thank yourself later when you can lift them out easily and cut them into perfect squares.
- Experiment with flavors: Don’t be afraid to get creative! Add a pinch of cinnamon or nutmeg for a warm flavor, or even mix in some cocoa powder for a chocolatey twist. The possibilities are endless!
- Check your consistency: After mixing, if your mixture seems too thick, add a splash more almond milk to loosen it up. Conversely, if it’s too runny, let it sit a bit longer until it thickens.
- Store properly: Keep your bars in an airtight container in the fridge to maintain their freshness. They’ll last up to 5 days, but I doubt they’ll stick around that long!
With these tips in mind, you’re all set to make the best no bake chia pudding bars ever! Enjoy the process and the delicious results!
Storage & Reheating Instructions
Storing your no bake chia pudding bars is super simple! Just place them in an airtight container and keep them in the fridge. They’ll stay fresh and delicious for up to 5 days. I love making a big batch at the start of the week, so I always have a healthy snack ready to go!
If you find yourself with leftovers (which, let’s be honest, is pretty rare because they’re so good!), make sure to cut them into bars before storing. This way, you can grab one whenever the snack cravings hit without any fuss!
Now, here’s the fun part: you can enjoy these bars straight from the fridge. No reheating needed! They’re perfect chilled, and the refreshing taste is absolutely delightful, especially on a warm day. But if you prefer them a little softer, just let them sit at room temperature for about 10-15 minutes before diving in. Trust me, they taste amazing either way!
FAQ Section
Got questions about these no bake chia pudding bars? Don’t worry, I’ve got you covered! Here are some of the most common queries I hear, along with my answers to help you out:
Can I use different types of milk?
Absolutely! You can substitute almond milk with any milk you prefer—oat milk, coconut milk, or even soy milk work wonderfully. Just keep in mind that the flavor and texture might vary slightly, but it’ll still be delicious!
How long do these bars last?
These bars will stay fresh in the fridge for up to 5 days when stored in an airtight container. However, I have a feeling they won’t last that long once you get a taste of them!
Can I make these bars nut-free?
For sure! Simply omit the nuts or replace them with seeds like sunflower or pumpkin seeds for a nut-free alternative. You can also add more shredded coconut or even some dried fruit for extra texture!
What if my mixture is too thick?
If you find your mixture is a bit too thick after resting, just stir in a splash more almond milk until you reach your desired consistency. It should be thick but still spreadable!
Are these bars gluten-free?
Yes! All the ingredients in this recipe are naturally gluten-free, making them a great option for those with gluten sensitivities.
Can I freeze the chia pudding bars?
While I recommend enjoying them fresh, you can freeze these bars! Just cut them into squares, wrap them individually in plastic wrap, and store them in an airtight container. They’ll keep in the freezer for about 2 months. Thaw them in the fridge before enjoying!
Can I add flavorings or spices?
Oh yes! Feel free to add a pinch of cinnamon, a dash of cocoa powder, or even some nutmeg to spice things up. It’s a great way to customize your bars to match your taste buds!
If you have any more questions or need tips, just let me know! I’m here to help you make these tasty treats perfect for your snacking needs!
Serving Suggestions
These no bake chia pudding bars are so versatile, and there are plenty of delicious ways to enjoy them beyond just grabbing one out of the fridge! Here are some of my favorite serving suggestions:
- Pair with Yogurt: Crumble a bar over a bowl of creamy yogurt for a delightful breakfast or snack. The combination of textures is just heavenly!
- Serve with Fresh Fruit: Enjoy your bars alongside a side of fresh fruit. Berries, sliced bananas, or even some exotic fruits like mango really elevate the experience.
- Drizzle with Nut Butter: A drizzle of almond or peanut butter on top adds an extra layer of flavor and protein. It’s a tasty way to take your bars to the next level!
- Enjoy with a Smoothie: These bars make a perfect snack after a smoothie or a juice. They complement a refreshing drink beautifully!
- Cut into Bite-Sized Squares: If you’re entertaining, cut the bars into bite-sized squares and serve them on a platter. They make for a great party treat or healthy dessert option!
- Top with Coconut Whipped Cream: For a special treat, add a dollop of coconut whipped cream or your favorite non-dairy whipped topping. It adds an indulgent touch that’s still guilt-free!
Feel free to mix and match these suggestions based on what you have on hand or your mood. The beauty of these bars is how easily they fit into your day, whether it’s breakfast, a snack, or dessert. Enjoy every delicious bite!
Print
No Bake Chia Pudding Bars: 5 Reasons You’ll Adore Them
- Prep Time: 15 minutes
- Cook Time: 0 minutes
- Total Time: 2 hours 15 minutes
- Yield: 12 bars 1x
- Category: Snack
- Method: No Bake
- Cuisine: Healthy
- Diet: Vegan
Description
A simple and healthy no bake chia pudding bar recipe.
Ingredients
- 1 cup chia seeds
- 4 cups almond milk
- 1/4 cup maple syrup
- 1 teaspoon vanilla extract
- 1/2 cup shredded coconut
- 1/2 cup nuts (e.g., almonds or walnuts)
- 1/2 cup fresh fruit (e.g., berries or banana)
Instructions
- Combine chia seeds and almond milk in a bowl.
- Add maple syrup and vanilla extract. Mix well.
- Let the mixture sit for 10 minutes, then stir again.
- Add shredded coconut and nuts. Mix until combined.
- Spread the mixture evenly in a lined baking dish.
- Top with fresh fruit.
- Refrigerate for at least 2 hours or until set.
- Cut into bars and serve.
Notes
- Store bars in the fridge for up to 5 days.
- Substitute almond milk with any milk of choice.
- Feel free to add your favorite toppings.
Nutrition
- Serving Size: 1 bar
- Calories: 150
- Sugar: 5g
- Sodium: 5mg
- Fat: 8g
- Saturated Fat: 1g
- Unsaturated Fat: 7g
- Trans Fat: 0g
- Carbohydrates: 15g
- Fiber: 6g
- Protein: 5g
- Cholesterol: 0mg
Keywords: no bake chia pudding bars, healthy snack, vegan dessert