
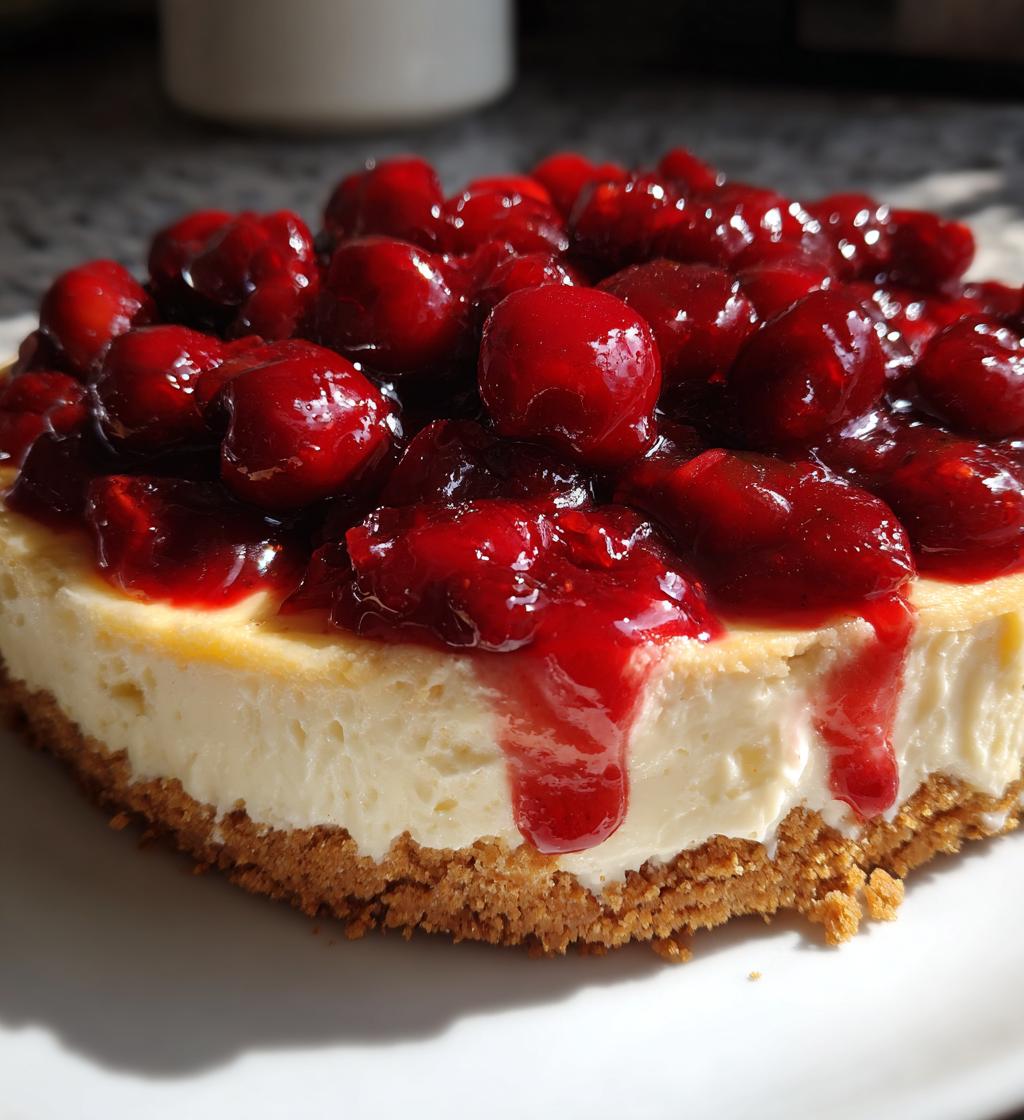
If you’re looking for a dessert that’s as easy to make as it is delicious, then let me introduce you to my absolute favorite—no bake cherry cheesecake! Seriously, this creamy, dreamy treat is the perfect way to satisfy your sweet tooth without ever turning on the oven. It’s got a buttery graham cracker crust, a luscious cream cheese filling, and it’s all topped off with a sweet cherry pie filling that just sings summer! Whether you’re hosting a dinner party, celebrating a birthday, or just want something sweet after dinner, this no bake cherry cheesecake fits the bill perfectly. Plus, it sets in the fridge while you kick back and relax, making it an effortless yet impressive dessert. Trust me, once you try it, you’ll want to whip it up again and again!
Ingredients for No Bake Cherry Cheesecake
- 1 1/2 cups graham cracker crumbs
- 1/2 cup unsalted butter, melted
- 1 cup powdered sugar
- 2 cups cream cheese, softened
- 1 cup whipped cream
- 1 can cherry pie filling
How to Prepare No Bake Cherry Cheesecake
Now that you have all your ingredients ready, let’s dive into how to whip up this no bake cherry cheesecake! I promise you, it’s as simple as pie—wait, even easier than pie! Just follow these steps, and you’ll be savoring this luscious treat in no time.
Step-by-Step Instructions
- First up, grab a mixing bowl and combine the graham cracker crumbs with the melted butter. Mix until it resembles wet sand. This is going to be the base of your cheesecake, so make sure it’s well combined!
- Next, press that crumb mixture firmly into the bottom of a 9-inch pie pan. Use the back of a measuring cup or your fingers to get a nice, even layer. It should be compact, so your crust holds together beautifully.
- In another bowl, beat the softened cream cheese and powdered sugar together until it’s silky smooth. This is where the magic happens! You want it fluffy, so keep mixing until there are no lumps left.
- Now, gently fold in the whipped cream. This step is crucial for that light and airy texture we all love! Be gentle here—don’t overmix, or you’ll lose that lovely fluffiness.
- Spread the cream cheese mixture evenly over the crust. Make sure you’ve got every corner covered! It’s like a creamy blanket for your crust.
- Lastly, pop it in the fridge and let it chill for at least 4 hours, or overnight if you can resist. This is important so it sets properly. Trust me, you’ll want it nice and firm!
- When you’re ready to serve, top it off with that sweet cherry pie filling. Wow, just wow—it’s the perfect finishing touch!
And there you have it! Simple, easy, and oh-so-delicious. Enjoy every creamy bite!
FAQ About No Bake Cherry Cheesecake
Can I use a different fruit topping?
Absolutely! While cherry pie filling is a classic choice, you can easily swap it out for other fruit toppings like blueberry, strawberry, or even a mix of fresh berries. Get creative and make it your own!
How long does it need to set?
For the best results, I recommend chilling your no bake cherry cheesecake for at least 4 hours. If you can wait overnight, even better! This allows it to set nicely and makes slicing a breeze.
Can I make this cheesecake ahead of time?
Yes, this cheesecake is perfect for making in advance! You can prepare it a day or two before your event—just keep it stored in the refrigerator until you’re ready to serve. It’s a great time-saver!
What if I don’t have whipped cream?
No worries! If you’re out of whipped cream, you can substitute it with whipped topping or even make your own by whipping heavy cream until it forms soft peaks. Just remember to fold it in gently!
How do I store leftovers?
To keep your no bake cherry cheesecake fresh, simply cover it with plastic wrap or transfer it to an airtight container. It should stay good in the refrigerator for about 3-4 days. Just try not to let it linger too long—it’s too good to resist!
Why You’ll Love This Recipe
- Quick preparation—whip it up in just 20 minutes!
- No baking required—perfect for those hot days when you don’t want to heat up the kitchen.
- Deliciously creamy texture that melts in your mouth.
- Beautifully topped with sweet cherry filling for that perfect finish.
- Great for gatherings—impress your friends and family with minimal effort!
- Versatile—swap the cherry topping for your favorite fruit to mix things up.
- Make-ahead friendly—prepare it in advance and enjoy stress-free entertaining.
- Kid-approved—everyone loves a slice of this delightful cheesecake!
Tips for Success with No Bake Cherry Cheesecake
Alright, let’s make sure your no bake cherry cheesecake turns out absolutely perfect! Here are some of my top tips that I’ve learned along the way. Trust me, these little nuggets of wisdom can make all the difference!
- Chill Time is Key: Patience is a virtue when it comes to no bake cheesecakes! Make sure to let it chill for at least 4 hours, but if you can, leave it overnight. This helps the cheesecake set beautifully and gives it that creamy texture we all love.
- Use Room Temperature Ingredients: Before you start mixing, let your cream cheese sit out for a bit so it softens up nicely. This will prevent lumps and ensure a smooth filling. No one wants a chunky cheesecake!
- Don’t Overmix: When you fold in the whipped cream, be gentle! Overmixing can deflate that lovely airy texture. Just fold until combined, and you’ll have a light and fluffy filling!
- Experiment with Flavors: Feel free to get creative! You can add a splash of vanilla extract to the cream cheese mixture for extra flavor or even mix in some lemon zest for a refreshing twist. The possibilities are endless!
- Press the Crust Firmly: When you’re making the crust, make sure to press it down firmly into the pie pan. This will help your crust hold together when you slice into it. A well-formed crust makes all the difference!
- Top It Off: Don’t forget to add the cherry pie filling just before serving. It not only adds a pop of color but also ensures it stays fresh and delicious. You can also add some fresh cherries if you’re feeling fancy!
With these tips in your back pocket, you’re on your way to mastering the art of no bake cherry cheesecake. Enjoy the process, and happy baking—oops, I mean mixing!
Nutritional Information for No Bake Cherry Cheesecake
Let’s talk about the deliciousness you’re indulging in! For each slice of this no bake cherry cheesecake, you can expect the following typical nutritional values:
- Calories: 300
- Fat: 18g
- Saturated Fat: 10g
- Unsaturated Fat: 6g
- Trans Fat: 0g
- Carbohydrates: 30g
- Sugar: 25g
- Fiber: 1g
- Protein: 4g
- Cholesterol: 45mg
- Sodium: 200mg
Keep in mind, these values are estimates and can vary based on specific ingredients used. But honestly, who’s counting when it’s all about enjoying this creamy, cherry-topped delight? So go ahead, treat yourself—you deserve it!
Storage & Reheating Instructions
Storing your no bake cherry cheesecake properly is key to keeping it fresh and delicious! After you’ve enjoyed a slice (or two), cover any leftovers with plastic wrap or transfer them to an airtight container. This helps keep the cheesecake from drying out and absorbing any odd fridge odors. It’ll stay good in the refrigerator for about 3-4 days, but trust me, it’s so tasty that it won’t last long!
If you find yourself with some extra cheesecake and want to keep it longer, you can freeze it! Just slice it up and wrap each piece tightly in plastic wrap, then place them in a freezer-safe container. It should last for up to 2 months. When you’re ready to enjoy, simply take out a slice and let it thaw in the fridge for a few hours or overnight. No reheating is necessary—just serve it chilled and enjoy the creamy goodness!
Serving Suggestions for No Bake Cherry Cheesecake
When it comes to serving my no bake cherry cheesecake, I love to keep it simple yet elegant! Here are some delightful ideas to elevate your presentation and make it even more special:
- Garnish with Whipped Cream: A dollop of freshly whipped cream on top of each slice adds a fun, fluffy touch. You can even pipe it on for a more polished look!
- Fresh Fruit: Consider adding some fresh cherries or berries as a garnish. Not only do they look beautiful, but they also enhance the fruity flavor of the cheesecake.
- Chocolate Drizzle: For a decadent twist, drizzle some chocolate sauce over the top just before serving. The combination of cherry and chocolate is simply divine!
- Serve with Coffee or Tea: This cheesecake pairs wonderfully with a cup of coffee or tea. It makes for a lovely afternoon treat or post-dinner dessert!
- Presentation on a Cake Stand: If you’re hosting a gathering, place the cheesecake on a decorative cake stand. It adds height and makes a stunning centerpiece on your dessert table!
- Slice it Neatly: When cutting your cheesecake, use a hot knife (just dip it in hot water and dry it off). It helps make clean cuts, so each slice looks picture-perfect!
With these serving suggestions, your no bake cherry cheesecake will not only taste amazing but also look gorgeous on the table. Enjoy sharing this delightful treat with family and friends!
Print
No Bake Cherry Cheesecake: 7 Steps to Dreamy Delight
- Prep Time: 20 minutes
- Cook Time: 0 minutes
- Total Time: 4 hours 20 minutes
- Yield: 8 servings 1x
- Category: Dessert
- Method: No bake
- Cuisine: American
- Diet: Vegetarian
Description
No bake cherry cheesecake is a quick and easy dessert that requires no oven. It features a creamy cheesecake filling topped with sweet cherry pie filling.
Ingredients
- 1 1/2 cups graham cracker crumbs
- 1/2 cup unsalted butter, melted
- 1 cup powdered sugar
- 2 cups cream cheese, softened
- 1 cup whipped cream
- 1 can cherry pie filling
Instructions
- Combine graham cracker crumbs and melted butter in a bowl.
- Press the mixture into the bottom of a 9-inch pie pan.
- In a separate bowl, beat cream cheese and powdered sugar until smooth.
- Fold in whipped cream until well combined.
- Spread the cream cheese mixture over the crust.
- Refrigerate for at least 4 hours or until set.
- Top with cherry pie filling before serving.
Notes
- For a firmer cheesecake, refrigerate overnight.
- You can substitute other fruit toppings if desired.
- Keep leftovers in the refrigerator.
Nutrition
- Serving Size: 1 slice
- Calories: 300
- Sugar: 25g
- Sodium: 200mg
- Fat: 18g
- Saturated Fat: 10g
- Unsaturated Fat: 6g
- Trans Fat: 0g
- Carbohydrates: 30g
- Fiber: 1g
- Protein: 4g
- Cholesterol: 45mg
Keywords: no bake cherry cheesecake, easy cheesecake, dessert