
Oh my goodness, let me tell you about one of my absolute favorite desserts to whip up: the no bake biscoff cheesecake dessert! Seriously, it’s a game changer in my kitchen. I just love how effortlessly you can create something so delicious without ever turning on the oven. I mean, who doesn’t adore the idea of a rich, creamy cheesecake that sets in the fridge instead of baking away? It’s like magic!
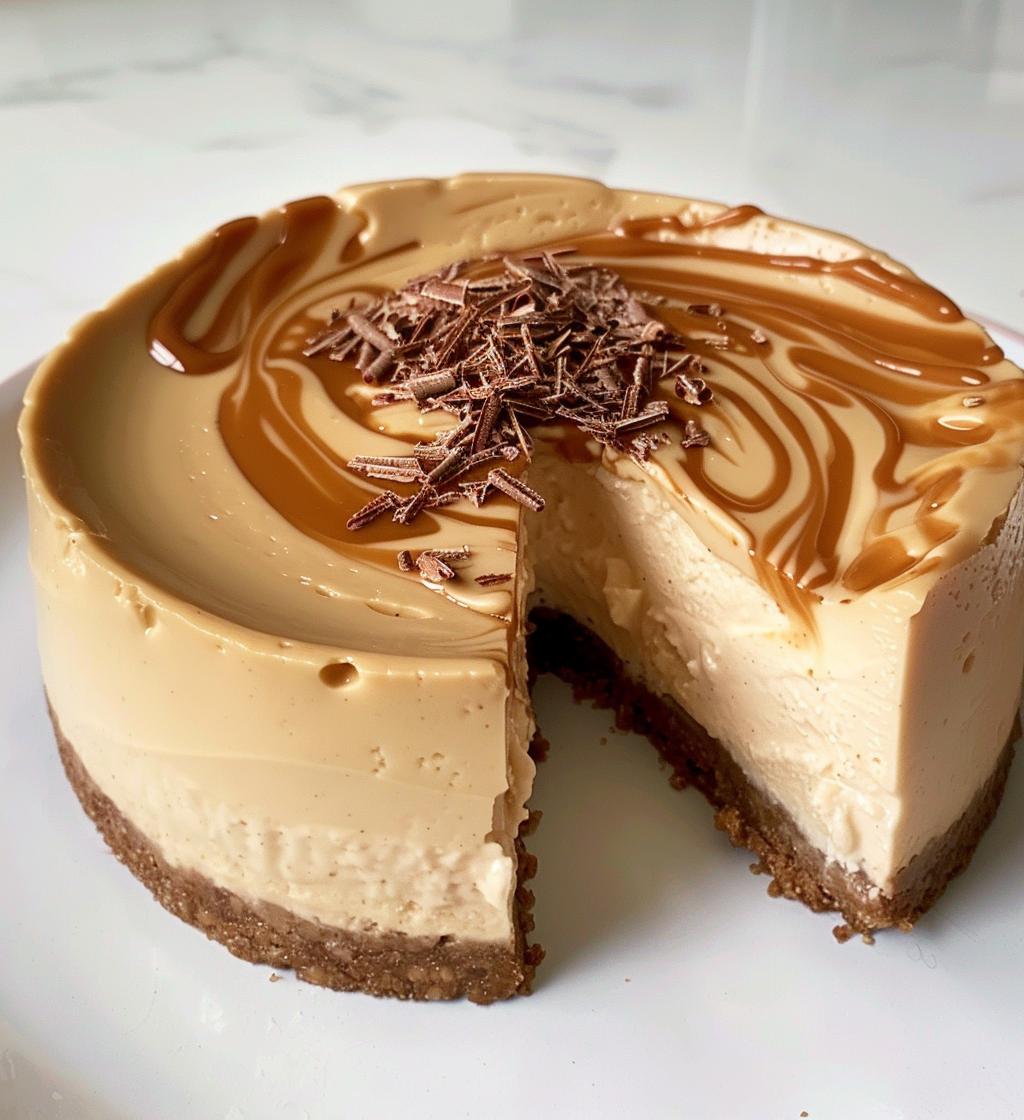
This dessert is all about those dreamy Biscoff flavors—think buttery cookies and that irresistible caramel undertone. Just imagine the crunch of the cookie base paired with the smooth cream cheese filling, all swirled with that luscious Biscoff spread. Trust me, it’s pure bliss in every bite! Plus, it comes together in about 20 minutes (not counting the chilling time, of course, but hey, good things take time, right?).
In this recipe, you’ll crush those delightful Biscoff cookies to create a buttery base, whip up a creamy filling, and let it chill until it’s perfectly set. And the best part? You can make it ahead of time for gatherings or just to treat yourself during the week. I promise, once you try this, you’ll be on repeat! Let’s dive into the details!
Ingredients for No Bake Biscoff Cheesecake Dessert
Here’s what you’ll need to create this dreamy dessert! I promise, the ingredients are super simple and absolutely delightful:
- 200g crushed Biscoff cookies
- 100g melted unsalted butter
- 400g room temperature cream cheese
- 100g powdered sugar
- 200ml heavy cream
- 50g Biscoff spread
- Optional: chocolate shavings for garnish
Make sure your cream cheese is at room temperature—this helps it blend smoothly with the sugar. And don’t skimp on the Biscoff spread; it’s what gives this cheesecake that extra layer of deliciousness that you just can’t resist! Now, let’s get to making this tasty treat!
How to Prepare No Bake Biscoff Cheesecake Dessert
Alright, my friend, let’s get down to the fun part—making this no bake biscoff cheesecake dessert! I can’t wait to share the steps with you. Don’t worry, it’s super straightforward, and I’ll guide you through every delicious moment!
Step 1: Prepare the Cookie Base
First things first, we need to create that delightful cookie base! Grab those 200g of crushed Biscoff cookies—if you don’t have pre-crushed ones, just toss them in a food processor or put them in a zip-top bag and crush them with a rolling pin. It’s a great way to relieve some stress, too! Once you have those lovely crumbs, pour them into a bowl and mix in the 100g of melted unsalted butter. You want to combine them until it looks like wet sand. It should hold together when you squeeze it in your hand. Now, press that mixture firmly into the bottom of a springform pan, creating an even layer. This will be the foundation of your cheesecake, so make sure it’s nice and compact!
Step 2: Make the Cheesecake Filling
Now onto the creamy goodness! In a large mixing bowl, beat 400g of room temperature cream cheese and 100g of powdered sugar together until it’s super smooth and creamy—this is where the magic starts to happen! Just imagine that velvety texture. Once that’s done, grab another bowl and whip 200ml of heavy cream until soft peaks form. You want it to be fluffy and light, so don’t rush this part! Gently fold the whipped cream into the cream cheese mixture. This is where you want to be careful—use a spatula and fold it in slowly to keep that airy texture. Then, add in 50g of Biscoff spread and mix until everything is just combined. Oh wow, the aroma is heavenly!
Step 3: Combine and Assemble
Alright, it’s time to bring it all together! Pour that luscious cheesecake filling over your cookie base in the springform pan. Use a spatula to smooth out the top and make it look all pretty. I like to take a moment here to admire the layers—it’s so satisfying! Now, you’ll want to cover it with plastic wrap or a lid and pop it in the fridge. This is the hard part—waiting! But trust me, it’s worth every minute.
Step 4: Set and Chill
Let your cheesecake chill for at least 4 hours, but if you can wait overnight, that’s even better! This allows it to set perfectly and develop all those gorgeous flavors. Once it’s done chilling, carefully remove it from the springform pan, and if you’d like, sprinkle some chocolate shavings on top for that extra flair. And there you have it—a stunning no bake biscoff cheesecake dessert ready to impress! Can you smell that? It’s pure bliss!
Tips for Success
Now that you’re ready to make this delightful no bake biscoff cheesecake dessert, here are some tried-and-true tips to ensure you get the best results. Trust me, following these will make your cheesecake even more fabulous!
- Use Room Temperature Ingredients: Make sure your cream cheese is at room temperature before mixing. It helps create a smoother filling without any lumps. Nobody wants a lumpy cheesecake!
- Don’t Skip the Chilling Time: I know it’s hard to wait, but letting your cheesecake chill for the full 4 hours (or overnight!) is crucial. This allows it to set properly, giving you that perfect slice.
- Fold Gently: When combining the whipped cream with the cream cheese mixture, be gentle. You want to keep that airiness for a light and fluffy texture. Think of it like a delicate dance—slow and steady!
- Customize Your Crust: While Biscoff cookies are fantastic, feel free to experiment with different cookies like Oreos or ginger snaps for a unique flavor twist. Just crush them up and use the same butter mix!
- Presentation Matters: Don’t forget to garnish! A sprinkle of chocolate shavings or even some crushed Biscoff cookies on top adds a lovely touch and makes it look extra special.
- Be Mindful of Portions: This cheesecake is rich, so smaller slices go a long way. Plus, it means you can enjoy it longer—if it lasts that long!
With these tips in your back pocket, you’re all set to create a show-stopping dessert that your friends and family will rave about. Happy baking (or should I say, no baking?)!
Nutritional Information
Now, let’s talk about the nutritional side of things for our no bake biscoff cheesecake dessert! Keep in mind that these values are estimates, so they might vary a bit depending on what brands you use or any substitutions you make. Here’s what you can expect per slice:
- Calories: 350
- Total Fat: 24g
- Saturated Fat: 12g
- Unsaturated Fat: 10g
- Trans Fat: 0g
- Cholesterol: 50mg
- Sodium: 150mg
- Total Carbohydrates: 30g
- Dietary Fiber: 1g
- Sugars: 24g
- Protein: 4g
So, while this cheesecake is certainly a treat, it’s also a little indulgence! Enjoy every creamy, dreamy bite, and remember that balance is key. Happy indulging!
Why You’ll Love This Recipe
- Quick Preparation: You can whip this up in just about 20 minutes! Perfect for when you need a dessert in a flash.
- No Baking Required: Say goodbye to turning on the oven! This cheesecake sets beautifully in the fridge, making it super easy to prepare.
- Creamy Texture: The combination of cream cheese and whipped cream creates a luxuriously smooth filling that melts in your mouth.
- Rich Flavor: The Biscoff cookies and spread add an irresistible caramel-like flavor that’s simply to die for.
- Make Ahead: It’s a fantastic make-ahead dessert! Just pop it in the fridge and let it chill until you’re ready to serve.
- Impressive Presentation: With its gorgeous layers and optional chocolate shavings, it looks as stunning as it tastes!
- Perfect for Any Occasion: Whether it’s a casual weeknight treat or a fancy gathering, this cheesecake is sure to impress everyone!
Trust me, once you make this no bake biscoff cheesecake dessert, you’ll be hooked. It’s a recipe you’ll want to keep on repeat!
FAQ Section
Can I use different cookies for the crust?
Absolutely! While Biscoff cookies are the star of this show, you can totally switch it up based on what you have on hand or your personal taste. Oreo cookies make for a fantastic crust if you’re craving that chocolatey goodness, and ginger snaps add a nice spicy kick. Just remember to crush them well and mix with the melted butter just like you would with the Biscoff. Get creative and have fun with it!
How long does it need to chill?
For the best texture, you’ll want to let your no bake biscoff cheesecake dessert chill for at least 4 hours. But if you can hold out overnight, that’s even better! This allows the flavors to meld and the cheesecake to set perfectly. Trust me, patience is key here—you’ll be rewarded with a slice that holds its shape beautifully!
Can I freeze the cheesecake?
You can definitely freeze this cheesecake if you find yourself with leftovers (though I doubt that’ll happen!). Just wrap it tightly in plastic wrap and then store it in an airtight container. It’ll keep well in the freezer for up to 2 months. When you’re ready to enjoy it, simply transfer it to the refrigerator to thaw overnight. No need to refreeze it after thawing; just serve chilled and savor every bite!
Serving Suggestions
Now that you’ve made this luscious no bake biscoff cheesecake dessert, let’s talk about how to elevate your serving experience! There are a few delightful accompaniments that can take this dessert from fabulous to absolutely unforgettable. Here are my favorite suggestions:
- Fresh Berries: A handful of fresh raspberries or strawberries adds a pop of color and a burst of tartness that beautifully contrasts the creamy sweetness of the cheesecake. Plus, they look so pretty on the plate!
- Whipped Cream: You can never go wrong with a dollop of freshly whipped cream. It adds an airy lightness that pairs perfectly with the rich filling. You could even sprinkle a little cocoa powder or cinnamon on top for an extra touch!
- Caramel Sauce: Drizzling some warm caramel sauce over each slice gives it an indulgent touch. The sweet, sticky goodness complements the Biscoff flavors beautifully—talk about heavenly!
- Chocolate Ganache: If you’re feeling fancy, make a simple chocolate ganache and pour it over the top before serving. The rich chocolate pairs so well with the Biscoff, and it looks super elegant!
- Crushed Biscoff Cookies: For that added crunch and flavor, consider sprinkling some crushed Biscoff cookies over the top just before serving. It’s a simple way to enhance that signature taste!
- Tea or Coffee: Serve it alongside a warm cup of tea or a rich espresso for a delightful end to your meal. The flavors of coffee or tea pair beautifully with the creamy cheesecake.
Each of these options adds its own charm and flavor, making your no bake biscoff cheesecake dessert an even more delightful treat. Trust me, your guests will be in dessert heaven! Enjoy every moment of serving and savoring this delicious creation!
Print
No Bake Biscoff Cheesecake Dessert: 4 Steps to Blissful Indulgence
- Prep Time: 20 minutes
- Cook Time: 0 minutes
- Total Time: 4 hours 20 minutes
- Yield: 8 servings 1x
- Category: Dessert
- Method: No Bake
- Cuisine: American
- Diet: Vegetarian
Description
A creamy and delicious no bake biscoff cheesecake dessert that’s easy to make.
Ingredients
- 200g Biscoff cookies
- 100g unsalted butter, melted
- 400g cream cheese
- 100g powdered sugar
- 200ml heavy cream
- 50g Biscoff spread
- Chocolate shavings for garnish (optional)
Instructions
- Crush the Biscoff cookies into fine crumbs.
- Mix the crumbs with melted butter until combined.
- Press the mixture into the bottom of a springform pan to form the base.
- In a bowl, beat the cream cheese and powdered sugar until smooth.
- In another bowl, whip the heavy cream until soft peaks form.
- Fold the whipped cream into the cream cheese mixture.
- Add the Biscoff spread and mix until well combined.
- Pour the filling over the cookie base and smooth the top.
- Refrigerate for at least 4 hours or overnight to set.
- Garnish with chocolate shavings before serving.
Notes
- Use room temperature cream cheese for easier mixing.
- Allow the cheesecake to chill properly for best texture.
Nutrition
- Serving Size: 1 slice
- Calories: 350
- Sugar: 24g
- Sodium: 150mg
- Fat: 24g
- Saturated Fat: 12g
- Unsaturated Fat: 10g
- Trans Fat: 0g
- Carbohydrates: 30g
- Fiber: 1g
- Protein: 4g
- Cholesterol: 50mg
Keywords: no bake biscoff cheesecake dessert