
Oh my goodness, let me tell you about these Key Lime Pie Bars! They are a burst of sunshine in every bite, with that perfect balance of tangy lime and sweet creaminess, all nestled in a buttery graham cracker crust. I remember the first time I had them at a summer barbecue, and they quickly became my go-to dessert for any gathering. The unique texture of the creamy filling paired with the crunchy crust is simply irresistible! Plus, they’re so easy to make, you’ll find yourself whipping them up for everything from casual family dinners to fancy celebrations. Trust me, once you try these bars, you’ll understand why they’re a favorite in my kitchen!
Ingredients List
(Tip: You’ll find the full list of ingredients and measurements in the recipe card below.)
- 1 1/2 cups graham cracker crumbs
- 1/2 cup unsalted butter, melted
- 1/2 cup granulated sugar
- 1 cup sweetened condensed milk
- 1/2 cup fresh lime juice (fresh is best for that zingy flavor!)
- 2 large eggs
- 1 tablespoon lime zest (don’t skip this, it really boosts the flavor!)
How to Prepare Key Lime Pie Bars
Alright, let’s get down to the nitty-gritty of making these delicious Key Lime Pie Bars! Trust me, once you get the hang of it, you’ll be whipping these up in no time. Just follow these easy steps, and you’ll have a dessert that’s sure to impress!
Step 1: Preheat the Oven
First things first, preheat your oven to 350°F (175°C). Preheating is super important because it ensures that your crust gets that lovely golden color, and the filling sets just right. So, don’t skip this step!
Step 2: Prepare the Crust
In a mixing bowl, combine the graham cracker crumbs, melted butter, and granulated sugar. Mix it all together until it resembles wet sand. Then, grab a baking dish and press that mixture firmly into the bottom. You want a nice, even layer to form the base of your bars, so use the back of a measuring cup if you need a little extra help!
Step 3: Bake the Crust
Now, pop that crust into your preheated oven and bake it for about 10 minutes. You’ll know it’s done when it’s just starting to golden and smells amazing! Let it cool for a few moments while you mix up the filling.
Step 4: Mix the Filling
In another bowl, whisk together the sweetened condensed milk, fresh lime juice, eggs, and lime zest. This is where the magic happens! The combination of sweet and tangy is just heavenly. Make sure it’s well blended, and you’re ready for the next step!
Step 5: Pour and Bake
Carefully pour that luscious lime mixture over your cooled crust. Spread it evenly with a spatula, and then slide it back into the oven. Bake for an additional 20 minutes. You’ll want to keep an eye on it; it’s done when the filling is set but still slightly jiggly in the center.
Step 6: Cool and Refrigerate
Once baked, take it out of the oven and let it cool to room temperature. Then, cover it and pop it in the fridge for at least 2 hours. This cooling time is crucial, as it allows the flavors to meld and the bars to set perfectly. Trust me, the wait is worth it!
Why You’ll Love This Recipe
- Quick and easy to prepare—perfect for when you need a last-minute dessert!
- The tangy lime flavor is refreshing and makes it a great treat any time of year.
- The buttery graham cracker crust adds a delightful crunch that complements the creamy filling.
- These bars are perfect for sharing at parties, potlucks, or family gatherings.
- They can be made ahead of time and stored in the fridge, making them a stress-free dessert option.
- With just a handful of simple ingredients, you can create a dessert that looks and tastes impressive!
- They’re a fun twist on traditional key lime pie, served in easy-to-eat bar form!
Tips for Success
Making Key Lime Pie Bars is a breeze, but I’ve got a few tips to ensure they turn out absolutely perfect every time! Trust me, these little nuggets of wisdom can save you from some common pitfalls.
- Use Fresh Limes: I can’t stress this enough! Fresh lime juice and zest make a world of difference in flavor. Bottled lime juice just doesn’t have that vibrant zing, so make sure to squeeze your limes right before you mix things up!
- Don’t Overbake: Keep a close eye on your bars during the final baking stage. They should be set around the edges but still have a slight jiggle in the center when you take them out. They’ll firm up as they cool, so don’t be tempted to bake them longer!
- Let Them Chill: Patience is key! Allow your bars to cool to room temperature before refrigerating. This helps them set up properly and enhances the flavors. Plus, they’re so much better served chilled!
- Use a Sharp Knife: When it’s time to cut your bars, use a sharp knife and wipe it clean between cuts for neat edges. This makes for beautiful presentation, and who doesn’t love a pretty dessert?
- Experiment with Toppings: Feel free to get creative! A dollop of whipped cream or a sprinkle of lime zest on top can elevate your bars even further. You could also add some fresh berries for a pop of color and flavor!
By following these tips, you’ll ensure your Key Lime Pie Bars are a hit every single time. Happy baking!
Nutritional Information
Okay, let’s talk about the nutritional info! It’s always good to know what’s in the delicious treats we love, right? Here’s the estimated breakdown for each serving of these scrumptious Key Lime Pie Bars:
- Calories: 200
- Sugar: 15g
- Fat: 10g
- Saturated Fat: 6g
- Unsaturated Fat: 4g
- Trans Fat: 0g
- Carbohydrates: 25g
- Fiber: 1g
- Protein: 2g
- Cholesterol: 40mg
- Sodium: 120mg
Keep in mind that these values are estimates and can vary based on specific ingredients and portion sizes. But don’t let the numbers scare you—these bars are a delightful treat to enjoy in moderation! Happy indulging!
Storage & Reheating Instructions
Alright, let’s talk about how to keep those delicious Key Lime Pie Bars fresh and tasty! After you’ve made them (if they last long enough for leftovers, that is!), it’s super important to store them properly. Here’s what you need to know:
First off, make sure the bars are completely cooled to room temperature before you put them in the fridge. This helps prevent condensation, which can make them soggy. Once they’re cool, cover them tightly with plastic wrap or pop them in an airtight container. They’ll stay fresh in the refrigerator for up to 5 days. But trust me, you’ll probably want to enjoy them well before then!
If you find yourself with a whole batch and think, “Wow, I need to save these for later!” you can also freeze them! Just cut the bars into individual portions, wrap each one in plastic wrap, and then place them in a freezer-safe container or bag. They’ll keep well for up to 2 months in the freezer. When you’re ready to indulge, just take one out and let it thaw in the fridge for a few hours. No reheating needed—these bars are best served chilled!
So, whether you’re enjoying them right away or saving some for later, you can feel good about keeping your Key Lime Pie Bars fresh and delicious!
FAQ Section
Got questions about these scrumptious Key Lime Pie Bars? Don’t worry, I’ve got you covered! Here are some common queries that pop up, along with my trusty answers:
How do I know when my Key Lime Pie Bars are done baking?
You’ll know they’re ready when the edges are set, and the center has a slight jiggle. It’s like a little dance! Remember, they’ll firm up as they cool, so don’t be tempted to overbake them—aim for that perfect balance!
Can I use bottled lime juice instead of fresh?
While you *can* use bottled lime juice in a pinch, I really recommend fresh lime juice for the best flavor. Fresh limes bring that vibrant zing that makes these bars truly sing! Trust me, your taste buds will thank you!
How long can I store Key Lime Pie Bars?
These bars are best enjoyed fresh, but if you have leftovers (lucky you!), they can be stored in the refrigerator for up to 5 days. Just make sure they’re covered tightly to keep that deliciousness intact!
Can I make these bars in advance?
Absolutely! Key Lime Pie Bars are perfect for making ahead of time. Just prepare them a day or two in advance, refrigerate, and they’ll be ready to wow your friends and family when you need them. Plus, the flavors get even better as they sit!
What’s the best way to cut these bars for serving?
For the prettiest slices, use a sharp knife and wipe it clean between cuts. This way, you’ll get those nice, neat edges that make your bars look as good as they taste. Presentation is key, after all!
Print
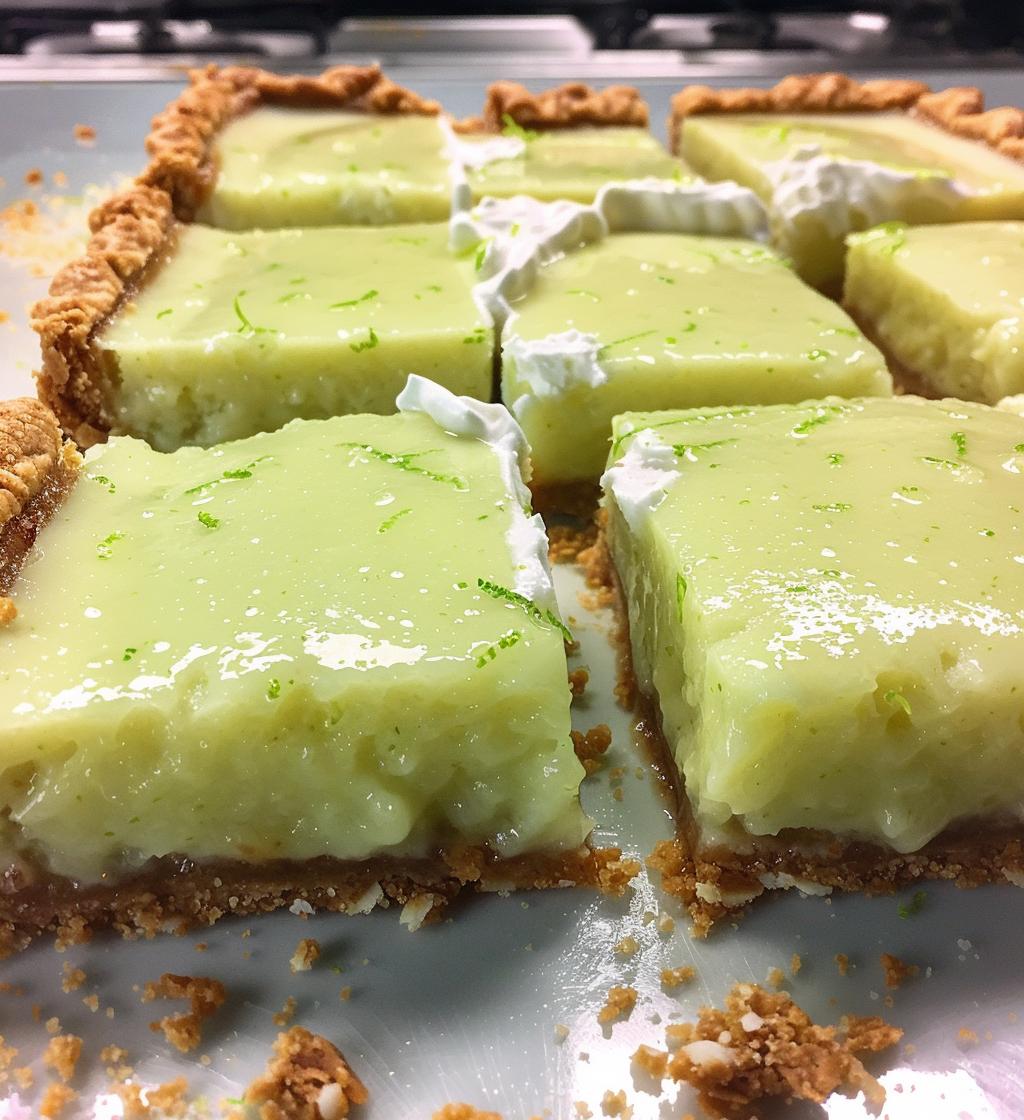
Key Lime Pie Bars: 6 Irresistible Bites of Sunshine
- Prep Time: 15 minutes
- Cook Time: 30 minutes
- Total Time: 2 hours 45 minutes
- Yield: 12 bars 1x
- Category: Dessert
- Method: Baking
- Cuisine: American
- Diet: Vegetarian
Description
A delicious dessert with a tangy lime flavor and a buttery crust.
Ingredients
- 1 1/2 cups graham cracker crumbs
- 1/2 cup unsalted butter, melted
- 1/2 cup granulated sugar
- 1 cup sweetened condensed milk
- 1/2 cup fresh lime juice
- 2 large eggs
- 1 tablespoon lime zest
Instructions
- Preheat the oven to 350°F (175°C).
- Mix graham cracker crumbs, melted butter, and sugar in a bowl.
- Press the mixture into the bottom of a baking dish.
- Bake the crust for 10 minutes.
- In another bowl, whisk together sweetened condensed milk, lime juice, eggs, and lime zest.
- Pour the lime mixture over the baked crust.
- Bake for an additional 20 minutes.
- Let cool, then refrigerate for at least 2 hours before serving.
Notes
- Can be topped with whipped cream.
- Store leftovers in the refrigerator.
- Fresh limes yield the best flavor.
Nutrition
- Serving Size: 1 bar
- Calories: 200
- Sugar: 15g
- Sodium: 120mg
- Fat: 10g
- Saturated Fat: 6g
- Unsaturated Fat: 4g
- Trans Fat: 0g
- Carbohydrates: 25g
- Fiber: 1g
- Protein: 2g
- Cholesterol: 40mg
Keywords: Key Lime Pie Bars