
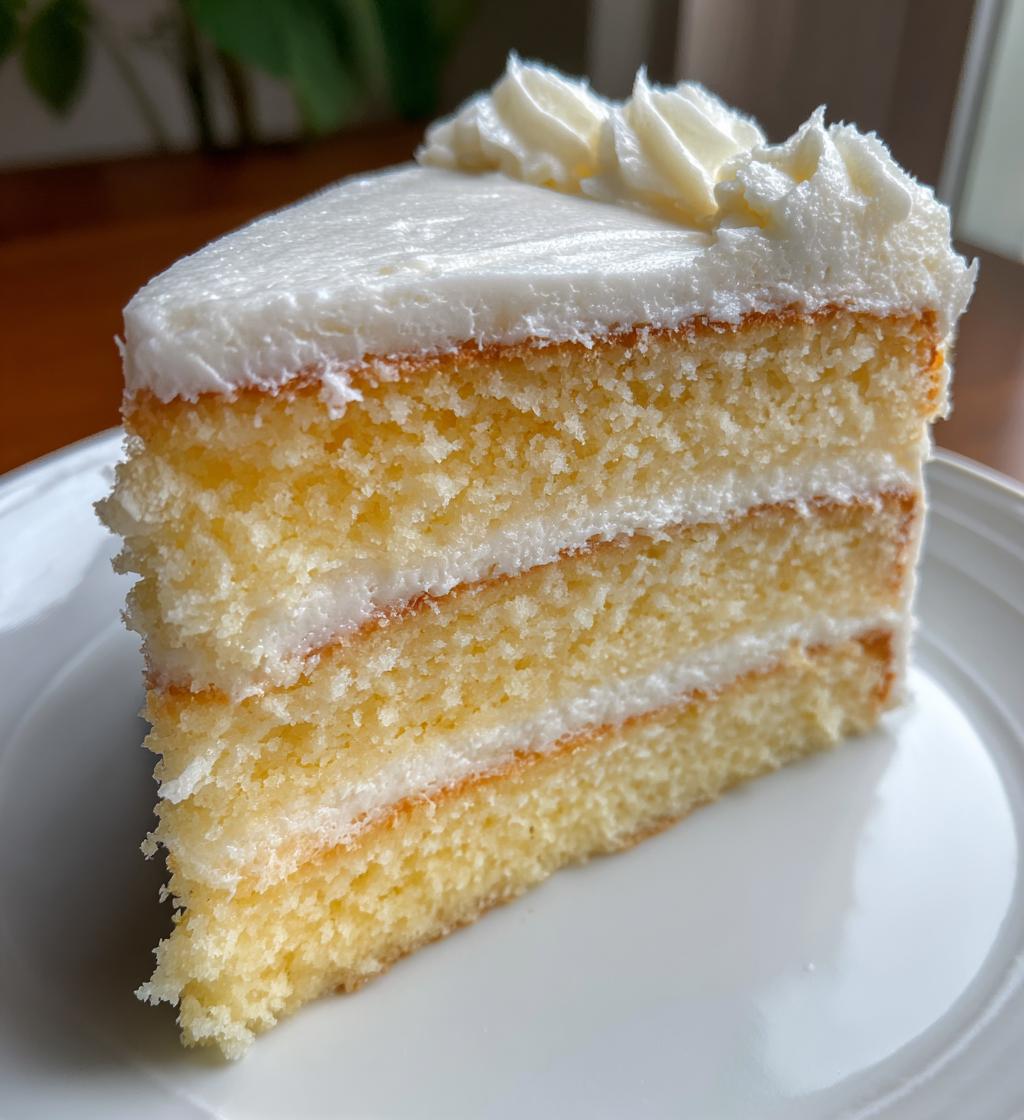
Oh, let me tell you about the *jadore layer cake*! This beauty isn’t just a dessert; it’s a showstopper that steals the spotlight at any gathering. I remember the first time I made it for my sister’s birthday. The moment I pulled it out of the oven, the whole house smelled like pure bliss! The layers rose beautifully, and I couldn’t wait to slather on the frosting. Every bite is a little slice of heaven, moist and fluffy, with just the right amount of sweetness. Trust me, it’s the perfect centerpiece for celebrations, whether it’s a birthday, an anniversary, or just a reason to indulge. You’ll want to make this again and again, and I promise your friends and family will be begging for the recipe!
Ingredients
(Tip: You’ll find the full list of ingredients and measurements in the recipe card below.)
- 2 cups all-purpose flour
- 1 1/2 cups granulated sugar
- 1 cup unsalted butter, softened to room temperature
- 4 large eggs, at room temperature
- 1 cup buttermilk, also at room temperature
- 2 teaspoons baking powder
- 1 teaspoon vanilla extract
- 1/2 teaspoon salt
- Your choice of frosting (buttercream, cream cheese, or ganache work beautifully!)
How to Prepare the Jadore Layer Cake
Alright, let’s dive into making this gorgeous *jadore layer cake*! Trust me, it’s simpler than you think, and the results are absolutely worth it. Follow these steps, and you’ll have a stunning cake that’ll impress everyone!
Preparing the Cake Batter
First things first, let’s get that delicious batter ready. Start by grabbing a large mixing bowl. You’ll want to cream together the softened butter and granulated sugar until it’s light and fluffy – oh, the smell is divine! I like to use an electric mixer for this part; it makes life so much easier. Once that’s done, add the eggs one at a time, making sure to mix well after each addition. This helps create that beautiful texture we all love.
Now, it’s time to stir in the vanilla extract – it adds such a delightful aroma! Next, in a separate bowl, combine the all-purpose flour, baking powder, and salt. Here’s a little tip: whisk them together to ensure everything is evenly distributed. Now, alternate adding this dry mixture and the buttermilk to your butter mixture, starting and ending with the flour. This keeps the batter smooth and prevents overmixing, which can make the cake dense. Just gently fold it all together until you see no more flour streaks. You got this!
Baking the Cakes
Now that your batter is ready, let’s pour it into those prepared cake pans! Divide the batter evenly between the two greased and floured 9-inch pans. I like to use a spatula to smooth the tops for an even bake. Pop them into your preheated oven at 350°F (175°C) and set your timer for 25-30 minutes. You’ll know they’re done when a toothpick inserted in the center comes out clean, and the cakes spring back when gently pressed. Don’t peek too soon, though! Let them do their thing!
Cooling and Frosting
Once your cakes are out of the oven, let them cool in the pans for about 10 minutes. This step is crucial because it allows them to firm up a bit. After that, carefully transfer them to wire racks to cool completely. You don’t want to frost them while they’re still warm; trust me, it’s a messy situation!
Now for the fun part: frosting! Once cooled, you can frost your cake as desired. Whether you go for a classic buttercream, a tangy cream cheese frosting, or a rich chocolate ganache, the options are endless! I love to layer the frosting between the cakes and then go all out on the top and sides. Don’t be shy; make it as pretty as you want! Enjoy every moment of this delicious creation—you deserve it!
Nutritional Information
Now, let’s talk about the numbers behind this delightful *jadore layer cake*! Here’s a quick look at the estimated nutritional information per slice. Keep in mind that these values can vary based on the specific ingredients you use and how you decide to frost it:
- Calories: 350
- Fat: 15g
- Saturated Fat: 9g
- Unsaturated Fat: 5g
- Trans Fat: 0g
- Cholesterol: 70mg
- Sodium: 150mg
- Carbohydrates: 50g
- Fiber: 1g
- Sugar: 25g
- Protein: 4g
This cake is definitely a treat, so enjoy it in moderation! It’s perfect for those special occasions when you want to indulge a little. Whether you’re celebrating a birthday or just treating yourself, this *jadore layer cake* is worth every delicious bite!
Why You’ll Love This Recipe
- Quick and Easy: This *jadore layer cake* comes together in about 50 minutes, making it perfect for when you’re short on time but still want to impress!
- Flavorful: With a buttery base and the option to customize your frosting, each bite is a delightful explosion of taste that everyone will love.
- Versatile: Whether it’s a birthday, anniversary, or a simple gathering, this cake fits right in and is sure to be the star of the show.
- Beautiful Presentation: The layered design is not only stunning but also allows for creativity in decorating. You can get as fancy as you want!
- Kid-Friendly: This cake is a hit with kids and adults alike. It’s a fun dessert that brings smiles to faces of all ages.
- Make-Ahead Friendly: You can prepare the cake in advance, freeze it, and frost it just before serving for stress-free entertaining!
Tips for Success
Alright, let’s make sure your *jadore layer cake* turns out absolutely perfect! Here are some of my favorite tips that I swear by:
- Use Room Temperature Ingredients: Make sure your butter, eggs, and buttermilk are at room temperature before you start. This helps everything blend together beautifully, creating that fluffy texture we all love!
- Quality Matters: Don’t skimp on your ingredients! Use real butter and pure vanilla extract for the best flavor. Trust me, it makes a difference!
- Don’t Overmix: When combining the wet and dry ingredients, mix until just combined. Overmixing can lead to a dense cake, and we want it light and airy!
- Check Your Oven Temperature: Every oven is different, so it’s a great idea to use an oven thermometer to ensure you’re baking at the right temperature. This helps prevent overbaking or underbaking.
- Cool Cakes Completely: Be patient and let your cakes cool completely before frosting. This helps the frosting go on smoothly and prevents it from melting into a gooey mess!
- Layering the Frosting: When frosting, start with a thin layer on the first layer to create a “crumb coat.” This seals in any crumbs and makes the final layer look super clean and professional.
- Experiment with Flavors: Don’t be afraid to mix things up! Try adding a bit of lemon zest to the batter or infusing your frosting with different flavors like almond or chocolate for a fun twist.
- Decorate with Love: Get creative with your decorations! Fresh fruits, edible flowers, or even sprinkles can elevate the look of your cake and make it even more special for any occasion.
With these tips, you’re well on your way to mastering the *jadore layer cake*! Enjoy the process, and don’t forget to have fun while you bake!
Variations of the Jadore Layer Cake
One of the best things about the *jadore layer cake* is how easily you can customize it to suit your taste or the occasion! Here are some fun ideas to inspire your creativity:
- Chocolate Delight: Swap out half of the flour for cocoa powder to make a rich chocolate version. You can pair it with chocolate ganache or a fluffy chocolate buttercream for a double chocolate treat!
- Fruity Freshness: Add a cup of fresh berries like raspberries or blueberries to the batter for a burst of flavor. You can also layer in some fruit preserves between the cake layers for an extra fruity surprise!
- Citrus Zing: Incorporate some lemon or orange zest into the batter for a refreshing citrus flavor. A lemon or cream cheese frosting would complement it perfectly!
- Nutty Goodness: Fold in some finely chopped nuts like walnuts or pecans into the batter for added texture and flavor. A cream cheese frosting with a hint of maple would be divine!
- Caramel Swirl: Drizzle caramel sauce into the batter before baking to create a beautiful swirled effect. Top it off with a salted caramel frosting for an indulgent treat!
- Spice It Up: Add a teaspoon of cinnamon or nutmeg to the batter for a warm, spiced flavor. This is perfect for cozy gatherings during the fall and winter months!
- Layered Fillings: Get adventurous with your fillings! Try adding a layer of whipped cream and fresh fruits, or even a layer of mousse between the cake for a delightful surprise.
The options are endless, and experimenting is part of the fun! Don’t hesitate to mix and match flavors and fillings to create your very own signature *jadore layer cake*. Enjoy the process and trust your taste buds—they’ll guide you to deliciousness!
Storage & Reheating Instructions
After you’ve enjoyed your delicious *jadore layer cake*, you’ll want to make sure it stays fresh for those future cravings. Storing it properly is key to maintaining that lovely flavor and texture we all love!
First off, if there are any leftovers (though I wouldn’t blame you if there aren’t!), let the cake cool completely before wrapping it up. I recommend placing it in an airtight container or covering it tightly with plastic wrap. This helps prevent it from drying out and keeps it fresh for up to 3 days at room temperature. If your kitchen tends to be warm, popping it in the fridge is a smart move!
If you need to store it for a longer time, you can freeze the cake! Just slice it up (if you want) and wrap each piece tightly in plastic wrap, then place them in a freezer-safe bag or container. This way, you can enjoy a slice whenever the craving hits! It’ll stay good for about 2-3 months in the freezer. When you’re ready to indulge, simply transfer the slice to the fridge to thaw overnight. No need to reheat—enjoy it cold or let it come to room temperature for that fresh-baked feel!
And remember, if you do want to reheat a slice, just pop it in the microwave for about 10-15 seconds. This will warm it up nicely without making it too gooey. Enjoy every last crumb of your *jadore layer cake*! You deserve it!
FAQ About Jadore Layer Cake
I know you might have some questions about this delightful *jadore layer cake*, so let’s tackle those common queries to make your baking experience even smoother!
Can I substitute the buttermilk?
Absolutely! If you don’t have buttermilk on hand, you can easily make your own. Just mix 1 cup of milk with 1 tablespoon of vinegar or lemon juice and let it sit for about 5-10 minutes. Voila! You’ve got a quick buttermilk substitute!
What if I don’t have cake pans?
No worries! You can use a single 9×13-inch baking dish instead. Just pour all the batter into that one dish and bake it for about 30-35 minutes. Once it’s cool, you can frost it right in the pan, or cut it into squares for serving!
How can I make the cake gluten-free?
To make a gluten-free *jadore layer cake*, simply swap the all-purpose flour for a 1:1 gluten-free baking blend. Just be sure to check that your baking powder is also gluten-free!
What’s the best way to store leftover cake?
Store any leftover cake in an airtight container at room temperature for up to 3 days or refrigerate it if your kitchen is warm. You can also freeze individual slices for up to 2-3 months—just wrap them tightly!
Can I add fillings between the layers?
Yes! Fillings like fruit preserves, whipped cream, or even chocolate mousse can elevate your cake. Just make sure your cake layers are completely cool before adding any fillings to avoid melting!
How do I know when the cake is done baking?
Check the cake around the 25-minute mark by inserting a toothpick in the center. If it comes out clean or with just a few crumbs, it’s ready! If there’s wet batter on it, give it a few more minutes and check again.
What are some delicious frosting ideas?
Oh, the possibilities are endless! Classic buttercream, cream cheese frosting, or a rich chocolate ganache are all fantastic choices. You can even try a fruity frosting like strawberry or lemon for a refreshing twist!
Can I make the cake ahead of time?
Definitely! You can bake the cake a day in advance and store it tightly wrapped at room temperature. Just frost it right before serving for the best flavor and texture!
With these answers, I hope you feel more confident about making your *jadore layer cake*! Happy baking, and remember, it’s all about enjoying the process and having fun in the kitchen!
Print
Jadore Layer Cake: 7 Reasons You’ll Fall in Love Today
- Prep Time: 20 minutes
- Cook Time: 30 minutes
- Total Time: 50 minutes
- Yield: 12 servings 1x
- Category: Dessert
- Method: Baking
- Cuisine: American
- Diet: Vegetarian
Description
A delicious and elegant layer cake perfect for any celebration.
Ingredients
- 2 cups all-purpose flour
- 1 1/2 cups granulated sugar
- 1 cup unsalted butter, softened
- 4 large eggs
- 1 cup buttermilk
- 2 teaspoons baking powder
- 1 teaspoon vanilla extract
- 1/2 teaspoon salt
- Frosting of choice
Instructions
- Preheat your oven to 350°F (175°C).
- Grease and flour two 9-inch round cake pans.
- In a bowl, mix flour, baking powder, and salt.
- In another bowl, cream butter and sugar until light and fluffy.
- Add eggs one at a time, mixing well after each addition.
- Stir in vanilla extract.
- Alternate adding flour mixture and buttermilk to the butter mixture, starting and ending with flour.
- Divide batter evenly between the prepared pans.
- Bake for 25-30 minutes or until a toothpick comes out clean.
- Let cakes cool in pans for 10 minutes before transferring to wire racks.
- Once cooled, frost as desired.
Notes
- Store in an airtight container.
- Can be frozen for later use.
- Use different flavors of frosting for variety.
Nutrition
- Serving Size: 1 slice
- Calories: 350
- Sugar: 25g
- Sodium: 150mg
- Fat: 15g
- Saturated Fat: 9g
- Unsaturated Fat: 5g
- Trans Fat: 0g
- Carbohydrates: 50g
- Fiber: 1g
- Protein: 4g
- Cholesterol: 70mg
Keywords: jadore layer cake