
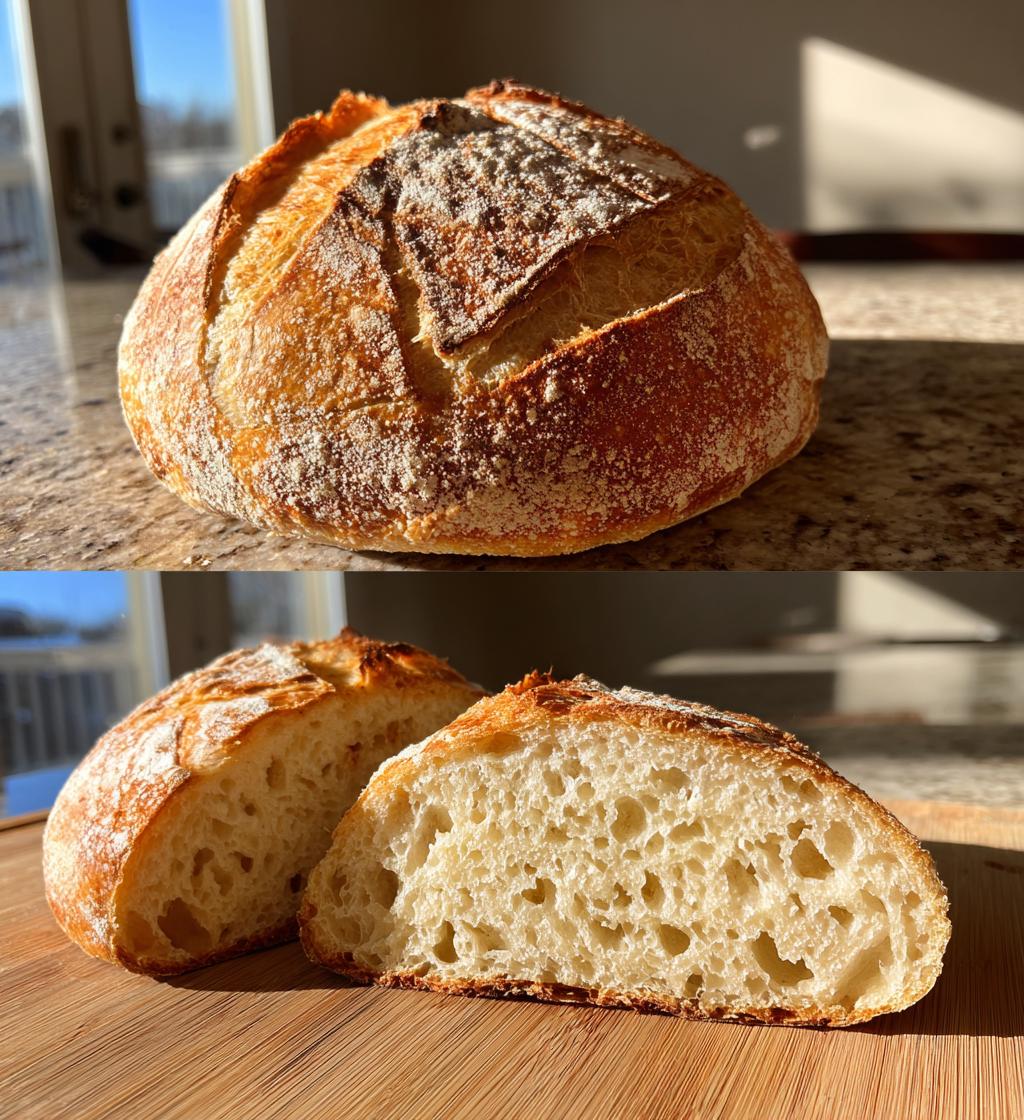
Oh my goodness, there’s just something magical about homemade sourdough bread! I remember the first time I baked a loaf—it was like a rite of passage into the world of bread-making. The aroma that fills the kitchen while it’s baking is absolutely intoxicating. You can practically taste the love and care that goes into each step. This recipe is straightforward enough for beginners but yields that gorgeous, crusty, artisan loaf that we all dream of. Trust me, once you get the hang of it, you’ll be hooked!
This sourdough bread is not just any bread; it’s a labor of love that rewards you with a chewy crumb and a tangy flavor that you simply can’t find in store-bought options. Plus, there’s something so satisfying about nurturing your sourdough starter and watching it bubble to life. You’ll feel like a true bread artisan as you shape your dough and wait for it to rise. So grab your apron, and let’s dive into this delicious adventure of homemade sourdough bread!
Ingredients List
- 500g bread flour
- 350ml water
- 100g mature sourdough starter
- 10g salt
How to Prepare Sourdough Bread
Mixing the Ingredients
Let’s get started! In a large mixing bowl, combine the 500g of bread flour with 350ml of water. I like to use my hands for this, but a spatula works too! Just mix until everything is combined, and you’ll notice a shaggy, somewhat sticky dough forming. It doesn’t have to be perfect at this stage, so don’t stress if it looks a little rough. Give it about 5-10 minutes of rest after mixing; this helps the flour absorb the water, which is crucial for a good texture later on.
Kneading the Dough
Now, it’s time to knead! Turn the dough out onto a lightly floured surface and get your hands in there. Knead the dough for about 10 minutes. You want to stretch it and fold it, giving it a good workout! The dough should transform from a sticky mess into something smooth and elastic. You’ll know you’re done when it passes the “windowpane test”—just stretch a small piece of dough between your fingers; if it stretches without tearing, you’re golden!
First Rise
Once kneaded, place the dough back into the bowl and cover it with a damp cloth or plastic wrap. Find a warm spot in your kitchen—like near a sunny window or on top of the fridge—and let it rise for about 4-6 hours. This is where the magic happens! You’ll want to check on it occasionally; it’s ready when it has doubled in size and looks puffy. If you poke it with your finger, the indentation should spring back slowly.
Shaping the Loaf
After the first rise, it’s time to shape! Gently turn the dough out onto a floured surface and flatten it slightly. With a light touch, fold the edges towards the center, then flip it over so the seam is facing down. Use your hands to shape it into a round loaf, tucking the edges under. Next, transfer it to a floured banneton—this is a basket for the second rise that helps shape the dough and creates a lovely pattern on the crust!
Second Rise
Cover the dough again with a cloth and let it rise for another 2-3 hours. This time, you want it to puff up nicely but not necessarily double in size. Just keep it warm and cozy! If you have a proofing basket, it’s perfect for this part. Just make sure to sprinkle flour in the banneton to prevent sticking!
Preheating the Oven
About 30 minutes before you plan to bake, preheat your oven to 230°C (450°F) with a Dutch oven inside. This is crucial—having that hot Dutch oven ready will give your bread a beautiful crust. So while the oven heats up, use this time to get excited about the deliciousness to come!
Baking the Bread
Once the oven is hot, carefully remove the Dutch oven. Gently transfer your shaped dough into it—don’t worry if it doesn’t look perfect! Use a sharp knife or a lame to score the top of the dough; this helps it expand while baking. Cover it with the lid and bake for 30 minutes. Then, remove the lid and bake for another 15 minutes until it’s a gorgeous golden brown. The smell will be absolutely irresistible!
Cooling the Bread
Finally, once it’s out of the oven, let the bread cool on a wire rack before slicing. This is essential! I know it’s tempting to dig in right away, but cooling allows the crumb to set properly, giving you that perfect slice. Patience is key here, but I promise it’ll be worth the wait!
Nutritional Information
Here’s a quick look at the estimated nutritional values for one slice of my homemade sourdough bread. Keep in mind that these are approximate values, but they’ll give you a good idea of what you’re enjoying with each delicious bite!
- Calories: 160
- Fat: 1g
- Saturated Fat: 0g
- Trans Fat: 0g
- Cholesterol: 0mg
- Sodium: 200mg
- Carbohydrates: 34g
- Fiber: 2g
- Protein: 5g
- Sugar: 0g
This bread is not just a treat for your taste buds; it’s also packed with wholesome goodness! The fiber and protein content make it a satisfying choice for any meal. Enjoy it toasted, with a spread, or just on its own—your taste buds (and your body) will thank you!
Tips for Success
Getting that perfect sourdough bread can be a bit of an art, but I’ve got some tips up my sleeve to help you succeed! Trust me, these little nuggets of wisdom will make a world of difference.
- Use a mature sourdough starter: This is key! A bubbly, active starter will give your bread the rise and tang it needs. Make sure to feed it regularly and use it when it’s at its peak activity.
- Be mindful of hydration: Different types of flour absorb water differently, so feel free to adjust the water amount slightly. If your dough feels too sticky, add a bit more flour during kneading, but don’t go overboard!
- Monitor the rise: Every kitchen is different! So keep an eye on your dough during the first and second rise. If it doesn’t seem to be doubling in size, give it more time or find a warmer spot. Patience is your best friend here!
- Don’t skip the scoring: Scoring helps control where the bread expands in the oven, preventing it from bursting out unpredictably. Plus, it looks beautiful! Use a sharp knife or lame for the cleanest cuts.
- Let it cool: I know, I know, the aroma is irresistible! But letting your bread cool completely on a wire rack will ensure the crumb sets properly. Cutting into it too soon can result in gummy slices, and nobody wants that!
- Experiment! Sourdough is incredibly versatile. Don’t hesitate to add herbs, spices, or even cheese to your dough for flavor variations. Just remember, if you add extra ingredients, keep an eye on the hydration levels.
With these tips in mind, you’ll be well on your way to baking beautiful, crusty sourdough that’ll impress anyone lucky enough to have a slice. Happy baking!
Variations
Oh, the possibilities are endless when it comes to sourdough! Once you’ve mastered the basic loaf, you can get creative and customize it to match your taste buds or the season. Here are some of my favorite variations that add a delightful twist to your classic sourdough bread:
- Herb Infusion: Add a handful of fresh herbs like rosemary, thyme, or oregano to the dough during the kneading stage. The aroma that wafts through your kitchen while it bakes will have everyone flocking to the oven!
- Garlic and Cheese: For a savory twist, mix in roasted garlic and shredded cheese like cheddar or mozzarella. This combination is perfect for pairing with soups or just slathering with butter!
- Olives and Sun-Dried Tomatoes: Chop up some olives and sun-dried tomatoes and fold them into your dough. This Mediterranean-inspired bread is fantastic for sandwiches or served alongside a charcuterie board.
- Spice it Up: If you love a little heat, try adding some crushed red pepper flakes or black pepper to the dough. It gives a subtle kick that elevates your bread to a whole new level of deliciousness!
- Whole Grain Goodness: Swap out some of the bread flour for whole wheat flour or even spelt flour. This not only adds a nuttier flavor but also boosts the nutritional value of your loaf!
- Seeds Galore: Incorporate seeds like sunflower, pumpkin, or sesame into your dough for added texture and a nutty flavor. You can also sprinkle some on top before baking for a lovely crusty finish.
- Sweet Surprise: For a sweeter bread, consider adding a bit of honey or maple syrup to the dough and folding in some dried fruits like cranberries, raisins, or nuts. This pairs perfectly with breakfast or as a delightful snack!
Don’t be afraid to mix and match these ideas! Each variation brings its own charm to your sourdough adventure, and you’ll discover new favorites along the way. Happy experimenting!
Serving Suggestions
Now that you’ve got this beautiful loaf of sourdough bread, let’s talk about how to enjoy it! There are so many delicious ways to serve it that you’ll find yourself reaching for this bread time and time again. Trust me, it pairs perfectly with just about anything!
First off, I absolutely love to slice it thick and toast it lightly. Then, a smear of creamy butter or a drizzle of olive oil brings out the amazing flavor of the bread. If you’re feeling fancy, sprinkle on a pinch of flaky sea salt or some freshly cracked pepper—oh, it’s heavenly!
For a classic combo, why not make a killer sandwich? Layer on some ripe avocado, a sprinkle of lemon juice, and a dash of red pepper flakes for a quick and satisfying meal. Or, try it with some sliced turkey, sharp cheddar, and a touch of mustard for a delightful lunch option. The possibilities are endless!
If you’re entertaining, serve slices of sourdough alongside a charcuterie board. Think cured meats, a variety of cheeses, and some tangy pickles. It’s the ultimate crowd-pleaser and adds that perfect crunch and flavor contrast.
And let’s not forget about soups! A warm bowl of tomato basil or a hearty lentil soup is simply incomplete without a crusty piece of sourdough for dipping. The way the bread soaks up the broth is just divine!
Want something a little sweeter? Toast a slice and top it with ricotta cheese, honey, and a handful of fresh berries for a delightful breakfast or snack. It’s like a bite of sunshine on your plate!
So grab that sourdough loaf and let your culinary creativity run wild! Whether it’s savory or sweet, this bread is ready to complement any meal. Enjoy every bite!
FAQ Section
Can I make sourdough bread without a starter?
Unfortunately, you need a sourdough starter to make authentic sourdough bread. The starter is what gives the bread its unique flavor and helps it rise. If you don’t have one yet, it’s definitely worth the effort to create your own or find a friend who can share some with you!
How do I know if my sourdough starter is ready to use?
You’ll know your sourdough starter is ready when it’s bubbly, has doubled in size after feeding, and has a pleasant, slightly tangy aroma. A good test is to drop a spoonful of starter in a glass of water; if it floats, it’s active and ready for baking!
Why is my sourdough bread dense?
A dense loaf can happen for a few reasons. It might be due to an underactive starter, insufficient kneading, or not allowing the dough to rise long enough. Make sure your starter is bubbly and active, and don’t rush those rise times—good things come to those who wait!
Can I use whole wheat flour in my sourdough bread?
Absolutely! Whole wheat flour can be used, but keep in mind that it absorbs more water than white flour. You may need to adjust the hydration level in your recipe to get the right dough consistency. It adds a lovely flavor and nutrition, so it’s definitely worth trying!
How should I store my sourdough bread?
To keep your sourdough bread fresh, store it at room temperature in a paper bag or wrapped in a clean kitchen towel. Avoid plastic bags as they trap moisture and can make the crust soggy. If you’ve got leftovers, you can slice and freeze them for later enjoyment!
Homemade Sourdough Bread: 5 Steps to Comforting Perfection
- Prep Time: 30 minutes
- Cook Time: 45 minutes
- Total Time: 6 hours 15 minutes
- Yield: 1 loaf 1x
- Category: Bread
- Method: Baking
- Cuisine: European
- Diet: Vegetarian
Description
A simple recipe for homemade sourdough bread.
Ingredients
- 500g bread flour
- 350ml water
- 100g sourdough starter
- 10g salt
Instructions
- In a large bowl, mix the flour and water until combined.
- Add the sourdough starter and salt, then knead the dough for about 10 minutes.
- Let the dough rise in a warm place for 4-6 hours, or until doubled in size.
- Shape the dough into a round loaf and place it in a floured banneton.
- Cover and let it rise for another 2-3 hours.
- Preheat the oven to 230°C (450°F) with a Dutch oven inside.
- Carefully transfer the dough to the Dutch oven and score the top.
- Bake for 30 minutes with the lid on, then remove the lid and bake for another 15 minutes until golden brown.
- Let cool on a wire rack before slicing.
Notes
- Use a mature sourdough starter for best results.
- Adjust the hydration based on your flour type.
- This bread can be stored at room temperature for up to 3 days.
Nutrition
- Serving Size: 1 slice
- Calories: 160
- Sugar: 0g
- Sodium: 200mg
- Fat: 1g
- Saturated Fat: 0g
- Unsaturated Fat: 0g
- Trans Fat: 0g
- Carbohydrates: 34g
- Fiber: 2g
- Protein: 5g
- Cholesterol: 0mg
Keywords: sourdough bread, homemade bread, artisan bread