
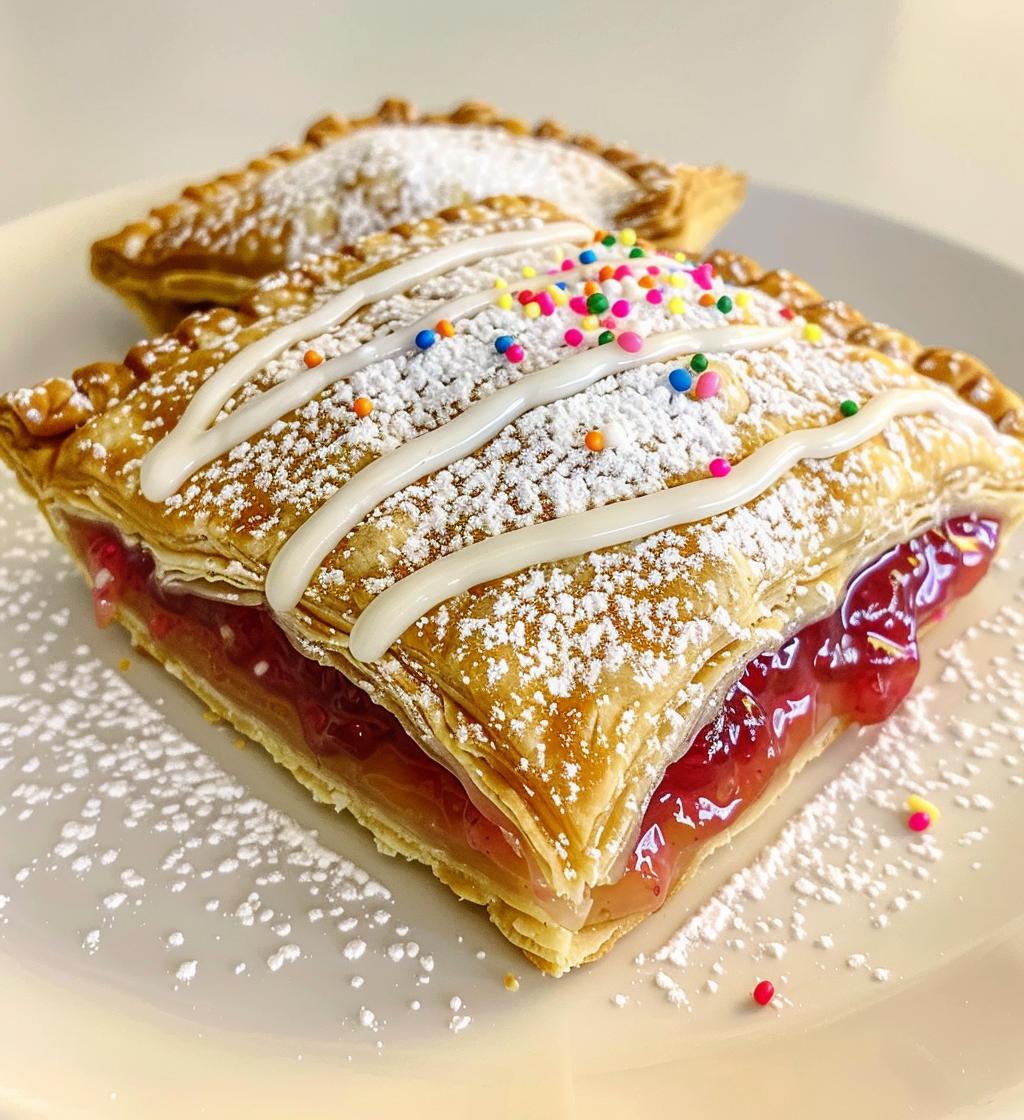
Oh my goodness, let me tell you about the sheer joy of making *Homemade Pop Tarts with Pie Crust*! When I first tackled this recipe, I was amazed at how simple and rewarding it is. There’s something so nostalgic about the flaky crust and sweet filling that takes me right back to my childhood. Trust me, once you bite into that warm, freshly baked pop tart, you won’t ever want to go back to store-bought again! The best part? You can customize the filling to whatever your heart desires—be it strawberry jam, blueberry compote, or even a rich chocolate spread. This recipe is a delightful blend of ease and creativity, and I can’t wait for you to give it a whirl in your kitchen! Let’s dive into the delicious details!
Ingredients for Homemade Pop Tarts with Pie Crust
- 2 cups all-purpose flour
- 1 teaspoon salt
- 1 tablespoon granulated sugar
- 1 cup unsalted butter, chilled and diced
- 6 to 8 tablespoons ice water
- 1 cup fruit jam or filling of your choice (like strawberry, raspberry, or even chocolate!)
- 1 large egg
- 1 tablespoon milk
- Powdered sugar for icing (to drizzle on top)
How to Prepare Homemade Pop Tarts with Pie Crust
Alright, let’s get down to the nitty-gritty of making these delightful *Homemade Pop Tarts*! I promise, once you get the hang of it, it’s a breeze. Just follow these steps, and you’ll have a batch of scrumptious pop tarts in no time!
Step-by-Step Instructions
- Preheat your oven: Start by preheating your oven to 350°F (175°C) so it’s nice and hot when your pop tarts are ready to bake.
- Mix your dry ingredients: In a large mixing bowl, combine the flour, salt, and sugar. Just whisk them together until they’re well blended.
- Cut in the butter: Add in the diced, chilled butter. Use a pastry cutter or your fingers to work it into the flour mixture until it resembles coarse crumbs. This step is crucial for that flaky texture!
- Add ice water: Gradually stir in the ice water, one tablespoon at a time, until the dough starts to come together. You want it moist but not sticky. Once it forms a ball, you’re ready for the next step!
- Roll out the dough: On a floured surface, roll out your dough to about 1/8 inch thick. Don’t worry if it’s not perfect—imperfect shapes are still delicious!
- Cut your rectangles: Use a knife or pizza cutter to slice the dough into rectangles, about 3×4 inches. You should get around 24 pieces total.
- Add the filling: Spread your jam or filling of choice on top of half the rectangles, leaving a little border around the edges.
- Seal them up: Take the remaining rectangles and place them on top of the filled ones. Press the edges together, then use a fork to crimp and seal them tight. This helps keep all that delicious filling inside!
- Brush with egg wash: In a small bowl, beat the egg and milk together. Brush this mixture over the tops of your pop tarts for that beautiful golden shine.
- Bake: Pop them in the oven for about 20–25 minutes, or until they’re golden brown and smell heavenly. Let them cool for a bit before icing!
And there you have it! Freshly baked pop tarts that are just begging to be devoured. Enjoy the process, and remember: the messier the kitchen, the more fun you had!
Why You’ll Love This Recipe
- Quick and Easy: You can whip these up in under an hour, making them perfect for a last-minute treat or breakfast on-the-go!
- Customizable Fillings: Use your favorite fruit jams, chocolate spreads, or even savory fillings for a unique twist—there’s no limit to your creativity!
- Flaky, Buttery Crust: The pie crust gives these pop tarts a delightful flakiness that you just can’t get from the store-bought versions.
- Perfect for Any Occasion: Whether it’s a cozy family breakfast, a fun party treat, or just a sweet snack, these pop tarts fit right in!
- A Nostalgic Treat: They bring back all those childhood memories of indulgence, but with the added bonus of being homemade!
Tips for Success with Homemade Pop Tarts with Pie Crust
Alright, let’s make sure your *Homemade Pop Tarts* turn out absolutely perfect! Here are my top tips to help you nail this recipe:
- Chill Your Ingredients: Make sure your butter is nice and cold. This helps create that flaky texture we all love. You can even chill your mixing bowl!
- Don’t Overwork the Dough: When mixing in the butter and water, be gentle. Overworking can lead to tough pop tarts instead of tender, flaky ones.
- Seal Them Well: Take your time sealing the edges. A good crimp with a fork not only keeps the filling inside but also adds a cute touch!
- Keep an Eye on Baking: Ovens can vary, so check your pop tarts a few minutes early. You want them golden brown and perfectly puffed.
- Let Them Cool: It’s tempting to dive right in, but letting them cool for a bit before icing keeps that icing from melting away!
With these tips, you’ll be well on your way to pop tart perfection! Enjoy the baking adventure!
Variations for Homemade Pop Tarts with Pie Crust
Now, let’s get creative! One of the best parts about making *Homemade Pop Tarts* is the endless filling possibilities—you can really let your imagination run wild! Here are some of my favorite variations to inspire your next batch:
- Nutella Delight: Spread a generous layer of Nutella between the dough for a rich, chocolatey treat that’s impossible to resist!
- Apple Cinnamon: Fill with a mixture of spiced apple pie filling and a sprinkle of cinnamon for a cozy, autumn-inspired pop tart.
- Peanut Butter and Jelly: Why not combine the classic sandwich flavors? A layer of peanut butter and your favorite jelly makes for a nostalgic twist!
- Cherry Almond: Use cherry jam and add a few drops of almond extract for a delightful flavor combination that’s simply divine.
- Savory Spinach and Feta: For a savory option, try filling with sautéed spinach and crumbled feta cheese—perfect for brunch!
Mix and match these ideas, or come up with your own—there’s no wrong way to enjoy your pop tarts! Have fun experimenting!
Storage & Reheating Instructions
Once you’ve whipped up your *Homemade Pop Tarts*, you might find yourself with a few leftovers (if you’re lucky!). To keep them fresh, store your pop tarts in an airtight container at room temperature for up to 3 days. If you want to keep them longer, pop them in the fridge where they’ll last about a week. When you’re ready to enjoy them again, just reheat in the oven at 350°F (175°C) for about 5-7 minutes to restore that delightful flakiness. You can also microwave them for about 15-20 seconds, but they won’t be quite as crisp. Enjoy every delicious bite!
Nutritional Information for Homemade Pop Tarts with Pie Crust
When it comes to enjoying your *Homemade Pop Tarts*, it’s nice to know what you’re indulging in! Here’s a rough estimate of the nutritional values based on typical ingredients used in this recipe. Keep in mind that these values can vary depending on your specific choices of jam and any variations you decide to try!
- Calories: Approximately 250 per pop tart
- Fat: 12g
- Saturated Fat: 7g
- Unsaturated Fat: 4g
- Trans Fat: 0g
- Cholesterol: 30mg
- Sodium: 200mg
- Carbohydrates: 30g
- Fiber: 1g
- Sugar: 10g
- Protein: 3g
These delightful treats pack a bit of sweetness and goodness, so enjoy them as part of a balanced diet. Happy baking and indulging!
FAQ about Homemade Pop Tarts with Pie Crust
Got questions about making your *Homemade Pop Tarts with Pie Crust*? I’ve got you covered! Here are some common queries that pop up, along with my answers to help you out:
Can I use store-bought pie crust instead of making my own?
Absolutely! If you’re short on time or just want to keep it super simple, using a pre-made pie crust is a great shortcut. Just roll it out and follow the same assembly steps.
How do I prevent the filling from leaking out during baking?
To keep your filling safe inside, make sure to seal the edges well with a fork and avoid overfilling. A little filling goes a long way!
Can I freeze the pop tarts before baking?
Yes! You can assemble your pop tarts and freeze them before baking. Just wrap them tightly in plastic wrap and store them in a freezer-safe bag. When you’re ready to bake, just pop them in the oven straight from the freezer—add a couple of extra minutes to the baking time.
What’s the best way to reheat leftovers?
For the best texture, reheat your pop tarts in the oven at 350°F (175°C) for about 5-7 minutes. This will help retain that lovely flakiness!
Can I make these pop tarts gluten-free?
Sure thing! Just swap the all-purpose flour for a gluten-free blend. Make sure it’s a 1:1 substitution for the best results!
Feel free to reach out if you have more questions as you dive into making these delightful treats. Happy baking!
Print
Homemade Pop Tarts with Pie Crust: 9 Joyful Tips to Savor
- Prep Time: 30 minutes
- Cook Time: 25 minutes
- Total Time: 55 minutes
- Yield: 12 pop tarts 1x
- Category: Dessert
- Method: Baking
- Cuisine: American
- Diet: Vegetarian
Description
A delicious homemade version of popular pop tarts using pie crust.
Ingredients
- 2 cups all-purpose flour
- 1 teaspoon salt
- 1 tablespoon sugar
- 1 cup unsalted butter, chilled and diced
- 6 to 8 tablespoons ice water
- 1 cup fruit jam or filling of your choice
- 1 egg
- 1 tablespoon milk
- Powdered sugar for icing
Instructions
- Preheat your oven to 350°F (175°C).
- In a bowl, mix flour, salt, and sugar.
- Cut in butter until mixture resembles coarse crumbs.
- Stir in ice water, a tablespoon at a time, until mixture forms a ball.
- Roll out dough on a floured surface to about 1/8 inch thick.
- Cut into rectangles, about 3×4 inches.
- Spread filling on half of the rectangles.
- Cover with remaining rectangles and seal edges with a fork.
- Beat egg and milk together; brush over the tops of the pop tarts.
- Bake for 20-25 minutes until golden brown.
- Let cool and drizzle with icing made from powdered sugar and water.
Notes
- Use any fruit jam you prefer.
- Store leftovers in an airtight container.
- Feel free to add sprinkles on top of icing.
Nutrition
- Serving Size: 1 pop tart
- Calories: 250
- Sugar: 10g
- Sodium: 200mg
- Fat: 12g
- Saturated Fat: 7g
- Unsaturated Fat: 4g
- Trans Fat: 0g
- Carbohydrates: 30g
- Fiber: 1g
- Protein: 3g
- Cholesterol: 30mg
Keywords: Homemade Pop Tarts, Pie Crust, Dessert