
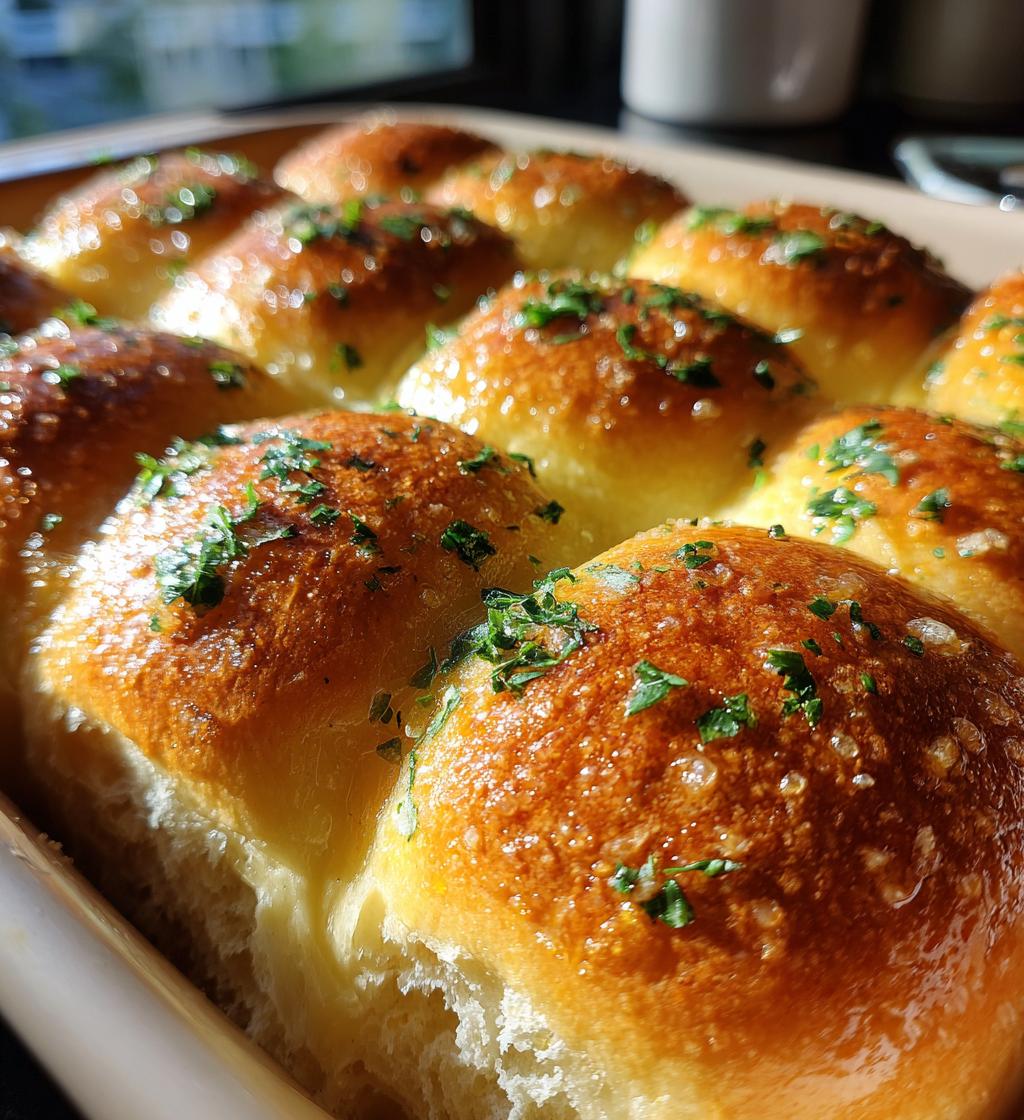
Oh my goodness, let me tell you about the joy of baking soft and fluffy homemade garlic dinner rolls! I can hardly contain my excitement because these little beauties are the perfect addition to any meal. The smell of garlic wafting through the kitchen as they bake is simply heavenly! Trust me, there’s just something so comforting about warm, pillowy rolls fresh out of the oven, ready to be slathered in butter. Plus, they’re surprisingly easy to make, even for beginners! With just a handful of simple ingredients, you’ll create rolls that are not only delicious but also make your family and friends feel right at home. So, let’s dive into this delightful recipe together, and I promise, you won’t be able to resist sneaking one (or two) while they’re still warm!
Ingredients List
To whip up these incredible homemade garlic dinner rolls, you’ll need the following ingredients. Trust me, they’re all super easy to find!
- 2 cups all-purpose flour – This is the base for our soft rolls!
- 1/2 cup warm milk – Make sure it’s warm, not hot, to help the yeast activate.
- 1/4 cup sugar – Just a touch to sweeten the dough and help it rise.
- 1/4 cup unsalted butter, melted – This adds that rich flavor and buttery goodness.
- 1 teaspoon salt – Essential for enhancing all those delicious flavors.
- 2 teaspoons active dry yeast – The magic ingredient that makes our rolls rise!
- 2 cloves garlic, minced – Because we’re making garlic rolls, of course!
- 1 egg – This will help bind everything together and add moisture.
- 1 tablespoon fresh parsley, chopped – For a pop of color and freshness.
Gather these ingredients, and you’re on your way to making the fluffiest, most flavorful rolls! Don’t worry if you need to substitute any, just keep the spirit of the recipe alive!
How to Prepare Instructions
Alright, let’s get our hands a little messy and start making these scrumptious homemade garlic dinner rolls! Follow these steps, and you’ll be amazed at how simple and satisfying it is!
- First, grab a bowl and combine the warm milk, sugar, and yeast. Give it a gentle stir and let it sit for about 5 minutes. You’ll know it’s ready when it gets all frothy and bubbly – that’s the yeast doing its magic!
- Next, add the melted butter, egg, minced garlic, and salt to your yeast mixture. Mix it all up until it’s well combined. The smell at this point is just divine!
- Now, gradually add in the flour, mixing until a dough begins to form. Don’t rush it; let it come together nicely!
- It’s kneading time! Flour your countertop and transfer the dough onto it. Knead for about 5 minutes until it’s smooth and elastic. If the dough is too sticky, sprinkle a little extra flour as needed.
- Once your dough is ready, place it in a greased bowl and cover it with a clean kitchen towel. Let it rise in a warm spot for about 1 hour, or until it has doubled in size. This is when the magic happens!
- Preheat your oven to 375°F (190°C) while you’re waiting. The anticipation is real!
- After the dough has risen, punch it down gently to release the air. Then, divide the dough into small balls – about the size of a golf ball – and place them in a greased baking dish. Just make sure to leave a little space between each roll for them to rise again.
- Let the rolls rise for another 30 minutes. They should puff up beautifully during this time!
- Finally, pop those rolls in the oven and bake for about 20 minutes, or until they’re golden brown and smell irresistible. Keep an eye on them; nothing worse than overbaked rolls!
- As soon as they come out of the oven, brush them with some melted butter and sprinkle with fresh parsley for that gorgeous finish. Serve warm, and watch everyone devour them!
And there you have it! Follow these steps, and you’ll have soft, fluffy garlic dinner rolls that will impress anyone at your table. Enjoy every bite!
Why You’ll Love This Recipe
Let me tell you, there are so many reasons to get excited about making these homemade garlic dinner rolls. They’re not just any rolls; they’re a game-changer! Here’s why you’ll absolutely adore this recipe:
- Quick preparation time: With just a little bit of hands-on time, you’ll have these rolls rising and baking in no time!
- Soft and fluffy texture: Each bite is like a little cloud of yum! These rolls are incredibly light and airy.
- Delicious garlic flavor: The garlic adds a savory punch that complements any meal. Trust me, your taste buds will thank you!
- Versatile for any meal: Whether it’s a cozy dinner, a holiday feast, or just a regular weeknight, these rolls fit right in!
- Perfect for gatherings: They’re a crowd-pleaser! Everyone loves warm, homemade rolls, and they’re great for sharing.
So, what are you waiting for? Dive into this recipe and experience the love that goes into each roll!
Tips for Success
Making the perfect homemade garlic dinner rolls is all about those little details! Here are some of my top tips to ensure your rolls turn out fluffy and flavorful every single time:
- Don’t rush the yeast: Make sure your milk is warm but not too hot – around 110°F (43°C) is perfect. If it’s too hot, it can kill the yeast, and we definitely don’t want that!
- Knead with love: Kneading is essential for developing the gluten, which gives the rolls their structure. Aim for about 5 minutes of kneading until the dough is smooth and elastic. If it feels sticky, sprinkle a little more flour, but don’t go overboard!
- Perfect rising conditions: Allow the dough to rise in a warm, draft-free area. I often turn on my oven for a minute or two and then turn it off, placing the dough inside with the door slightly ajar. This creates a cozy environment for the dough to double in size!
- Shape them well: When you’re dividing the dough into balls, try to keep them uniform in size. This ensures they bake evenly. If you want them to be extra fluffy, make sure they’re touching in the baking dish!
- Keep an eye on the oven: Every oven is a little different! Start checking your rolls around the 15-minute mark. You want them golden brown and smelling heavenly but not overbaked!
- Brush with melted butter: Right after they come out of the oven, brush the tops with melted butter for that irresistible shine and flavor. It’s the finishing touch that takes these rolls to the next level!
Follow these tips, and you’ll be on your way to impressing everyone with your delicious homemade garlic dinner rolls. Happy baking!
Nutritional Information Section
When it comes to the nutrition of these delightful homemade garlic dinner rolls, it’s good to keep in mind that values can vary based on the specific ingredients and brands you choose. That said, here’s a general idea of what you can expect per roll:
- Calories: 150
- Fat: 5g
- Saturated Fat: 3g
- Unsaturated Fat: 2g
- Trans Fat: 0g
- Carbohydrates: 22g
- Fiber: 1g
- Sugar: 3g
- Protein: 4g
- Sodium: 150mg
- Cholesterol: 20mg
Always remember to check the labels of your ingredients for the most accurate information. Enjoy these rolls guilt-free, knowing they’re not only delicious but can fit into a balanced diet!
FAQ Section
I know you might have a few questions about making these amazing homemade garlic dinner rolls, so let’s tackle some common ones together!
Can I use whole wheat flour?
Absolutely! You can substitute whole wheat flour for all-purpose flour, but keep in mind that the rolls may be a bit denser. For the best results, I recommend using half whole wheat and half all-purpose flour. This way, you still get that fluffy texture while adding some whole grain goodness!
How do I store leftovers?
Leftover rolls can be stored in an airtight container at room temperature for about 2-3 days. If you want to keep them longer, place them in the fridge for up to a week. Just remember, they taste best when warmed up a bit before serving!
Can I freeze these rolls?
You bet! These homemade garlic dinner rolls freeze beautifully. Just let them cool completely, then wrap each roll tightly in plastic wrap and place them in a freezer bag. They’ll keep for about 2 months. To enjoy, simply thaw them in the fridge overnight and warm them in the oven for that fresh-baked taste!
What if my dough doesn’t rise?
Oh no! If your dough doesn’t rise, it could be due to the yeast being old or the milk being too hot or cold. Make sure your yeast is fresh and your milk is warm (not hot!) to give it the best chance to activate. If it doesn’t rise, don’t worry; you can always try again!
Can I add other flavors to the rolls?
Definitely! Feel free to get creative by adding herbs like rosemary or thyme, or even some cheese for a cheesy garlic roll experience. Just remember to balance the flavors so the garlic still shines through!
I hope these tips help you on your journey to making the perfect garlic dinner rolls. Keep those questions coming, and happy baking!
Storage & Reheating Instructions
Now that you’ve made these scrumptious homemade garlic dinner rolls, you might be wondering how to store any leftovers (if there are any!). Here’s how to keep them fresh and delicious!
First off, let the rolls cool completely before storing them. This prevents condensation from forming in your container, which can make them soggy. Place the rolls in an airtight container at room temperature, and they should stay fresh for about 2-3 days. If you live in a particularly warm or humid climate, it’s better to pop them in the fridge to keep them from going stale.
If you want to keep them for longer, freezing is a great option! Just wrap each roll tightly in plastic wrap, and then place them in a freezer bag. They’ll stay good for about 2 months in the freezer. When you’re ready to enjoy them again, simply let them thaw in the fridge overnight.
For reheating, I recommend warming them in the oven to maintain that soft, fluffy texture. Preheat your oven to 350°F (175°C), then place the rolls on a baking sheet and cover them with aluminum foil to keep them from drying out. Heat for about 10-15 minutes, and they’ll be warm and ready to devour! You can also microwave them for about 15-20 seconds, but be careful not to overdo it, or they might become tough.
With these simple storage and reheating tips, you can enjoy your delicious garlic dinner rolls for days to come! Happy munching!
Serving Suggestions
Now that you’ve baked up a batch of those delightful homemade garlic dinner rolls, let’s talk about what to serve them with! These rolls are so versatile and can elevate almost any meal. Here are some of my favorite pairings that will make your dining experience even more scrumptious:
- Hearty Soups: Picture this: a warm bowl of creamy tomato soup or a rich chicken noodle soup alongside those fluffy rolls. The perfect combo for dipping and soaking up all that deliciousness!
- Salads: A fresh garden salad or a zesty Caesar salad pairs wonderfully with garlic rolls. The lightness of the salad balances out the rich garlic flavor, making it a delightful meal!
- Grilled Meats: Serve your rolls alongside grilled chicken or steak. The savory garlic flavor complements the charred goodness of grilled meats beautifully!
- Pasta Dishes: Think spaghetti with marinara or a creamy alfredo. Those rolls can be the ultimate sidekick for sopping up sauce and adding that comforting touch to your pasta night!
- Stews and Casseroles: Whether it’s a hearty beef stew or a cheesy casserole, garlic rolls are the perfect companion to soak up all those flavors. Trust me, they make every bite a little more special!
Feel free to mix and match these suggestions based on your meal plans. No matter what you choose, I guarantee those homemade garlic dinner rolls will be the star of the show! Enjoy every delicious bite!
For more delicious recipes, check out our recipe collection!
For more information on the benefits of garlic, visit Healthline.
Print
Homemade Garlic Dinner Rolls: 5 Steps to Pure Bliss
- Prep Time: 15 minutes
- Cook Time: 20 minutes
- Total Time: 1 hour 35 minutes
- Yield: 12 rolls 1x
- Category: Bread
- Method: Baking
- Cuisine: American
- Diet: Vegetarian
Description
Soft and fluffy homemade garlic dinner rolls.
Ingredients
- 2 cups all-purpose flour
- 1/2 cup warm milk
- 1/4 cup sugar
- 1/4 cup unsalted butter, melted
- 1 teaspoon salt
- 2 teaspoons active dry yeast
- 2 cloves garlic, minced
- 1 egg
- 1 tablespoon fresh parsley, chopped
Instructions
- In a bowl, combine warm milk, sugar, and yeast. Let it sit for 5 minutes.
- Add melted butter, egg, minced garlic, and salt to the yeast mixture.
- Gradually add flour and mix until a dough forms.
- Knead the dough on a floured surface for about 5 minutes.
- Place the dough in a greased bowl and cover. Let it rise for 1 hour.
- Preheat the oven to 375°F (190°C).
- Divide the dough into small balls and place them in a greased baking dish.
- Let the rolls rise for another 30 minutes.
- Bake for 20 minutes or until golden brown.
- Brush with melted butter and sprinkle with parsley before serving.
Notes
- Store leftovers in an airtight container.
- Reheat before serving for best results.
Nutrition
- Serving Size: 1 roll
- Calories: 150
- Sugar: 3g
- Sodium: 150mg
- Fat: 5g
- Saturated Fat: 3g
- Unsaturated Fat: 2g
- Trans Fat: 0g
- Carbohydrates: 22g
- Fiber: 1g
- Protein: 4g
- Cholesterol: 20mg
Keywords: homemade garlic dinner rolls