
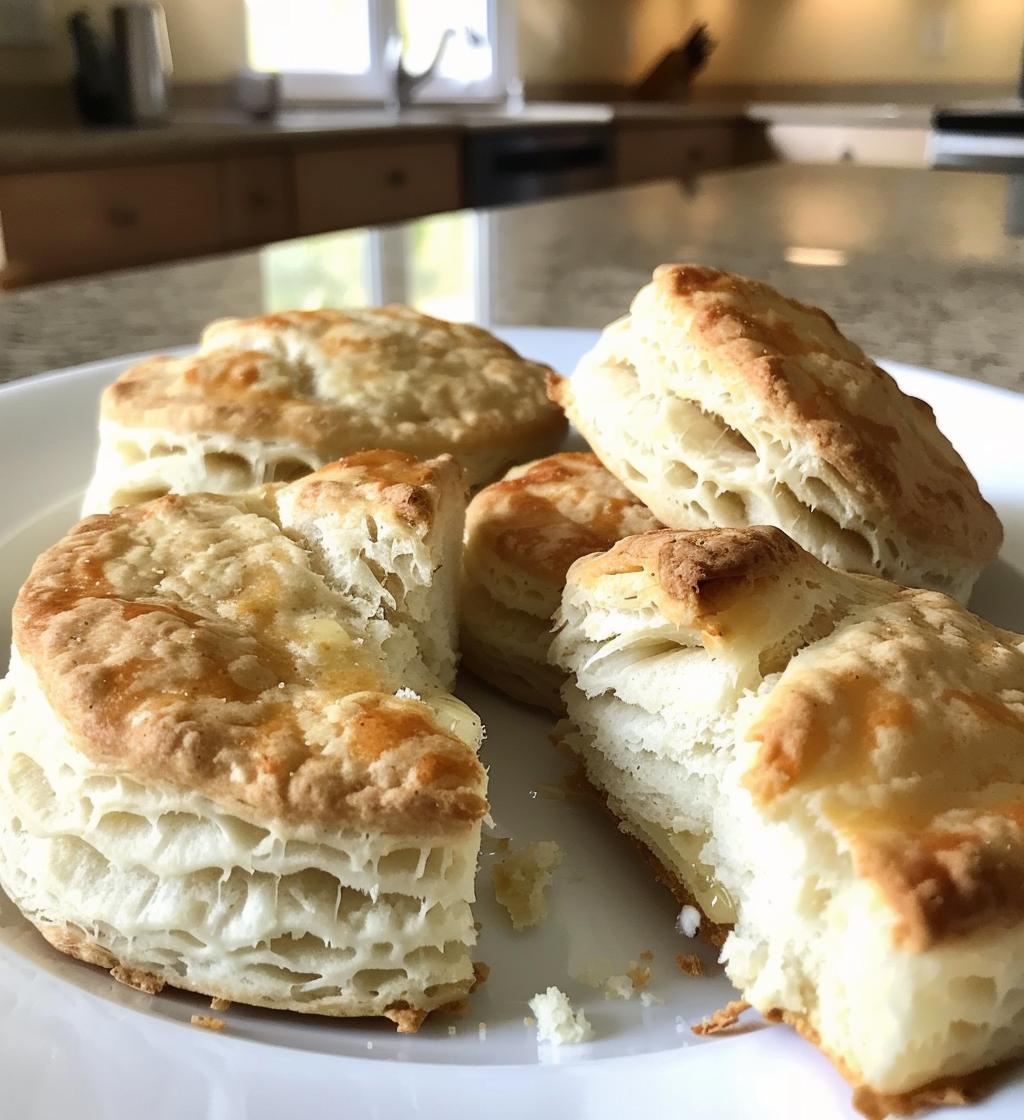
There’s something truly magical about the smell of homemade buttermilk biscuits wafting through the kitchen. It’s like a warm hug on a plate! These biscuits are the epitome of comfort food—fluffy, buttery, and just begging to be slathered with your favorite jam or a pat of melting butter. Trust me, once you try making these from scratch, you’ll never want to go back to the store-bought versions. They’re surprisingly easy to whip up and perfect for breakfast, brunch, or as a side for any meal. Get ready to impress your family and friends with the ultimate in biscuit goodness!
Ingredients List
- 2 cups all-purpose flour: This is the base for your biscuits. Make sure to spoon and level the flour when measuring to avoid packing it in.
- 1 tablespoon baking powder: This is what makes your biscuits rise and become fluffy. It’s essential for that light texture.
- 1/2 teaspoon baking soda: A little boost to the baking powder, baking soda helps with color and browning. It’s also important for that perfect biscuit fluffiness.
- 1 teaspoon salt: Don’t skip the salt! It enhances all the flavors and balances the richness of the butter.
- 1/2 cup unsalted butter: Make sure it’s cold and cubed! This is key for flaky layers. I like to cut it straight from the fridge to keep it nice and chilled.
- 3/4 cup buttermilk: The star of the show! Buttermilk gives these biscuits that rich, tangy flavor and helps them rise beautifully. It’s best if it’s also cold when you add it.
How to Prepare Homemade Buttermilk Biscuits
Making homemade buttermilk biscuits is a delightful process that fills your kitchen with warmth and buttery goodness. Let’s dive into the steps to create these fluffy treasures!
Step 1: Preheat the Oven
First things first, you’ll want to preheat your oven to 450°F (230°C). This step is crucial! A hot oven helps your biscuits rise beautifully, giving them that perfect fluffy texture. Trust me, you don’t want to skip this!
Step 2: Mix the Dry Ingredients
In a large bowl, combine the flour, baking powder, baking soda, and salt. Whisk them together until they’re well blended. This ensures that your biscuits will rise evenly and have that amazing lightness we all crave.
Step 3: Incorporate the Butter
Now, it’s time to add the cold, cubed butter. Using a pastry cutter or your fingers, mix the butter into the dry ingredients until the mixture resembles coarse crumbs. This cold butter is what creates those flaky layers, so keep it chilled!
Step 4: Add the Buttermilk
Next, pour in the buttermilk. Stir gently until just combined—don’t overmix! Overmixing can lead to tough biscuits, and we want them light and fluffy. Just a few folds and you’re good to go.
Step 5: Knead the Dough
Turn the dough out onto a floured surface. Gently knead it about 5-6 times until it comes together. Remember, you want to be gentle here—too much kneading can toughen the dough, and we’re not here for that!
Step 6: Roll and Cut the Biscuits
Roll out the dough to about 1-inch thickness. Use a biscuit cutter to cut out your biscuits. Don’t twist the cutter; just press straight down to keep the edges from sealing. Place them on a baking sheet, close together for soft sides or spaced apart for crisp edges!
Step 7: Bake the Biscuits
Finally, pop your biscuits in the oven and bake for 12-15 minutes. You’ll know they’re done when they’re golden brown on top and the kitchen smells heavenly. Serve them warm, and watch everyone flock to the table!
Tips for Success
Alright, let’s make sure your homemade buttermilk biscuits turn out perfectly! Here are my pro tips to help you achieve that fluffy, buttery goodness every time:
- Keep It Cold: This is super important! Make sure your butter and buttermilk are cold right before you use them. Cold ingredients help create those lovely flaky layers that we all love.
- Don’t Overmix: It can be tempting to keep mixing, but resist that urge! Stir just until the ingredients are combined. Overmixing will develop the gluten in the flour, leading to tougher biscuits. We want light and fluffy, not dense!
- Be Gentle with the Dough: When you knead the dough, do it gently and avoid overworking it. Just a few folds will do the trick. Remember, the more you handle it, the tougher it gets!
- Use a Sharp Cutter: When cutting out your biscuits, use a sharp biscuit cutter or glass. A dull cutter can seal the edges and prevent them from rising properly. Press straight down and lift—no twisting!
- Experiment with Flavors: Feel free to add your twist! Herbs, cheese, or spices can elevate your biscuits to the next level. Just keep the ratios in check so you don’t overpower that classic buttermilk flavor.
Follow these tips, and I promise your biscuits will be the talk of the table! Happy baking!
Nutritional Information
Here’s the estimated nutritional breakdown for one of these fluffy homemade buttermilk biscuits. Keep in mind that actual values may vary based on specific ingredients and serving sizes, but this gives you a good idea:
- Calories: 150
- Fat: 6g
- Saturated Fat: 4g
- Unsaturated Fat: 1g
- Trans Fat: 0g
- Cholesterol: 15mg
- Sodium: 300mg
- Carbohydrates: 20g
- Fiber: 1g
- Sugar: 1g
- Protein: 3g
These biscuits are not only delicious but also a comforting addition to any meal. Enjoy them guilt-free as a delightful treat!
FAQ Section
Got questions about making homemade buttermilk biscuits? Don’t worry, I’ve got you covered! Here are some common queries and my answers to help you bake with confidence:
Can I use milk instead of buttermilk?
While you can substitute milk, the flavor and texture will differ. Buttermilk adds a tangy richness that makes these biscuits extra special. If you’re in a pinch, you can make a quick substitute by adding a tablespoon of vinegar or lemon juice to a cup of milk and letting it sit for a few minutes.
How do I know when my biscuits are done?
Look for a beautiful golden-brown color on top! They should also have a lovely aroma wafting through your kitchen. If you tap the bottom lightly, it should sound hollow. This is a good sign that they’re perfectly baked!
Can I make the dough ahead of time?
Yes, you can! Just prepare the dough, wrap it tightly in plastic wrap, and refrigerate it for up to 2 hours. When you’re ready to bake, roll it out and cut your biscuits as usual. Just be sure to keep an eye on the baking time, as they may need a couple of extra minutes.
Why are my biscuits not rising?
Oh no! If your biscuits aren’t rising, it could be due to a few reasons: your baking powder or baking soda might be old and inactive, or you might have overmixed the dough. Remember, a gentle touch goes a long way, and always check the expiration dates on your leavening agents!
How should I store leftover biscuits?
Store any leftover biscuits in an airtight container at room temperature for up to 2 days. If you want to keep them longer, you can freeze them by wrapping them tightly in plastic wrap and placing them in a freezer-safe bag. They’ll be great for a quick breakfast or snack!
Why You’ll Love This Recipe
- Quick and Easy: With just a few simple ingredients and minimal prep time, you can whip up these biscuits in under 30 minutes!
- Fluffy Texture: The combination of cold butter and buttermilk creates irresistibly fluffy layers that just melt in your mouth.
- Versatile: Perfect for breakfast, brunch, or as a side for dinner, these biscuits pair wonderfully with just about anything.
- Homemade Goodness: There’s nothing quite like the taste of biscuits made from scratch. You’ll impress your family and friends with your baking skills!
- Customizable: Feel free to add herbs, cheese, or even spices to elevate the flavor. The possibilities are endless!
- Comfort Food: These biscuits are the ultimate comfort food, bringing warmth and nostalgia with every bite.
Storage & Reheating Instructions
So, you’ve got some leftover homemade buttermilk biscuits? No problem! Here’s how to store them properly and reheat them for that just-baked taste.
First things first, let your biscuits cool completely on a wire rack. Once they’re cool, you can store them in an airtight container at room temperature for up to 2 days. This keeps them soft and delicious. If you want to keep them longer, I recommend freezing them! Just wrap each biscuit tightly in plastic wrap and place them in a freezer-safe bag. They’ll stay fresh for up to 2 months.
When you’re ready to enjoy those frozen biscuits, simply remove the desired amount from the freezer and let them thaw in the fridge overnight. For a quick reheat, pop them in a preheated oven at 350°F (175°C) for about 10-15 minutes until they’re warmed through. If you’re in a rush, you can also microwave them for about 15-20 seconds, but I find that the oven gives them that wonderful crispy exterior and soft, fluffy inside we all adore. Trust me, it’s worth the extra time!
Print
Homemade Buttermilk Biscuits: 7 Steps to Fluffy Bliss
- Prep Time: 15 minutes
- Cook Time: 15 minutes
- Total Time: 30 minutes
- Yield: 12 biscuits 1x
- Category: Baking
- Method: Baking
- Cuisine: American
- Diet: Vegetarian
Description
Fluffy and buttery homemade buttermilk biscuits.
Ingredients
- 2 cups all-purpose flour
- 1 tablespoon baking powder
- 1/2 teaspoon baking soda
- 1 teaspoon salt
- 1/2 cup unsalted butter, cold and cubed
- 3/4 cup buttermilk
Instructions
- Preheat your oven to 450°F (230°C).
- In a bowl, mix flour, baking powder, baking soda, and salt.
- Add cold butter and mix until crumbly.
- Stir in buttermilk until just combined.
- Turn the dough onto a floured surface and knead gently.
- Roll out to 1-inch thickness and cut out biscuits.
- Place biscuits on a baking sheet and bake for 12-15 minutes.
- Serve warm.
Notes
- For flaky biscuits, handle the dough gently.
- Use cold ingredients for best results.
- Store leftovers in an airtight container.
Nutrition
- Serving Size: 1 biscuit
- Calories: 150
- Sugar: 1g
- Sodium: 300mg
- Fat: 6g
- Saturated Fat: 4g
- Unsaturated Fat: 1g
- Trans Fat: 0g
- Carbohydrates: 20g
- Fiber: 1g
- Protein: 3g
- Cholesterol: 15mg
Keywords: Homemade Buttermilk Biscuits