
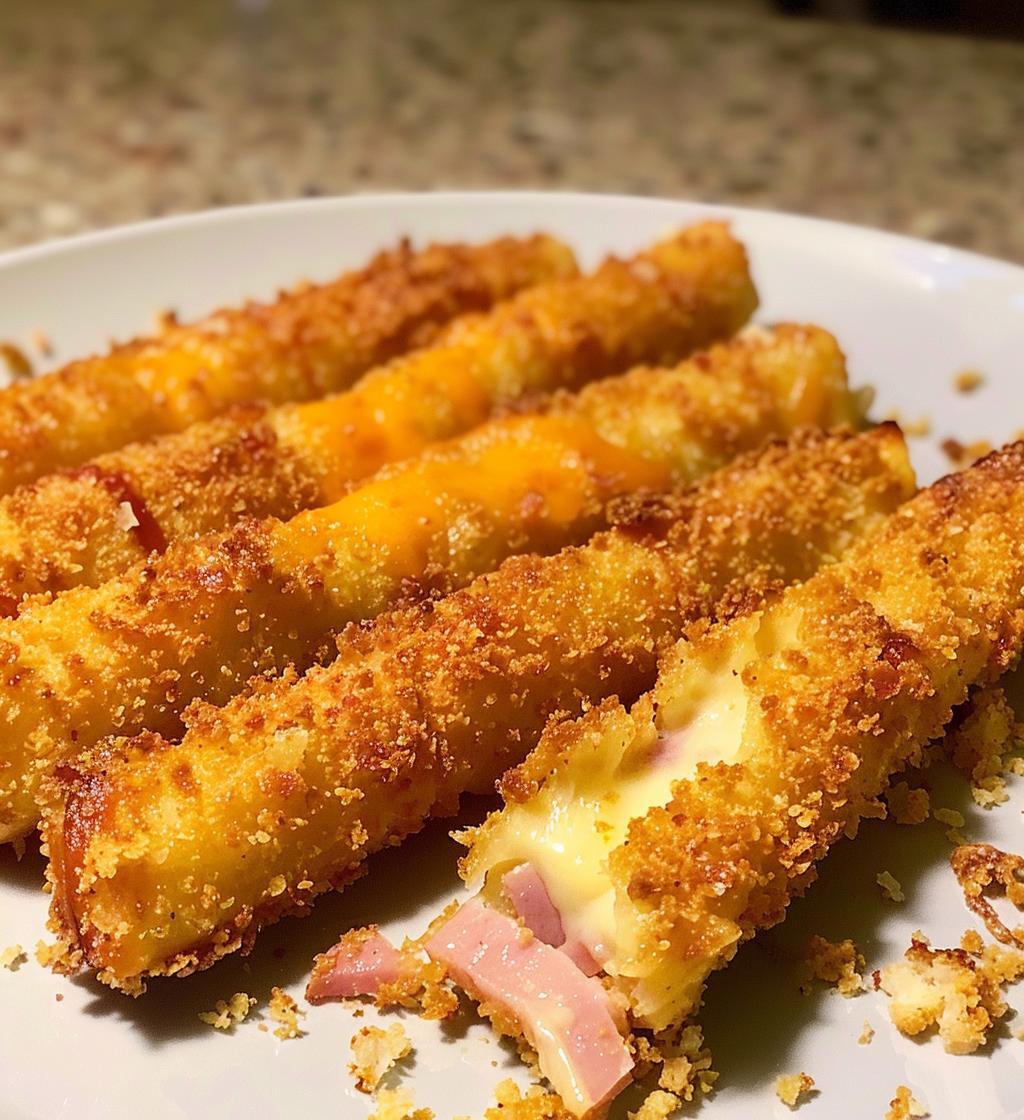
Oh my goodness, let me tell you about ham and cheese sticks! These little bites of joy are a total crowd-pleaser and the perfect snack for any occasion. I remember the first time I made them for a game night with friends—there was a moment of pure bliss when they came out of the frying pan, golden brown and oozing melted cheese! Ham and cheese sticks are not just delicious, but they’re also super easy to whip up. Whether you’re having a cozy night in or hosting a party, these savory treats are always a hit. Trust me, once you try making them, you’ll keep coming back for more. They’re just that good!
Ingredients List
- 8 slices of ham (I love using a nice, savory ham—your favorite deli ham works great!)
- 8 slices of cheese (Go for a melty cheese like cheddar or mozzarella—yum!)
- 1 cup of breadcrumbs (Choose plain or seasoned, depending on your preference!)
- 2 eggs (Beaten, for that perfect coating!)
- 1/2 cup of flour (This helps the breadcrumbs stick like magic!)
- Oil for frying (Any neutral oil will do, like vegetable or canola—just enough to cover the bottom of your pan)
How to Prepare Ham and Cheese Sticks
Getting started on these ham and cheese sticks is so easy and fun! I promise, you’ll be amazed at how quickly they come together. Just follow these simple steps, and you’ll be munching on your delicious creation in no time!
Step-by-Step Instructions
- First, lay out a slice of ham flat on a clean surface. This is where the magic begins!
- Next, place a slice of your favorite cheese right on top of the ham. Make sure it covers as much of the ham as possible.
- Now, roll the ham and cheese together tightly, like a little present! This way, the cheese won’t escape during frying.
- Repeat this process for all your ham and cheese slices. You’ll want to keep your workstation tidy—it’s easier that way!
- Set up your breading station: in one bowl, add the flour; in another, the beaten eggs; and in a third, your breadcrumbs. Easy peasy!
- Dredge each roll in the flour first, then dip it in the beaten eggs, and finally coat it with breadcrumbs. You might get a little messy, but that’s part of the fun!
- Heat oil in a frying pan over medium heat. You’ll know it’s ready when a breadcrumb sizzles when dropped in.
- Carefully place your rolls in the hot oil and fry until they’re golden brown on all sides. This usually takes about 3-4 minutes per side—just keep an eye on them!
- Once they’re golden and crispy, remove them from the oil and let them drain on paper towels. Trust me, the aroma will drive you wild!
- Serve warm and enjoy your crispy, cheesy delights!
Nutritional Information
Let’s talk numbers! Here’s the estimated nutritional breakdown for these delightful ham and cheese sticks, based on typical values. Keep in mind that actual values can vary depending on the specific ingredients and brands you use, but this will give you a good idea of what to expect!
- Serving Size: 2 sticks
- Calories: 250
- Fat: 15g
- Saturated Fat: 6g
- Unsaturated Fat: 8g
- Trans Fat: 0g
- Cholesterol: 150mg
- Sodium: 800mg
- Carbohydrates: 20g
- Fiber: 1g
- Sugar: 1g
- Protein: 12g
These ham and cheese sticks pack a punch of flavor while still being a snack you can enjoy without too much guilt. So go ahead, indulge a little!
Why You’ll Love This Recipe
- Quick and Easy: These ham and cheese sticks come together in just about 25 minutes, making them a perfect last-minute snack or appetizer.
- Delicious Flavor: The combination of savory ham and gooey melted cheese is absolutely irresistible—trust me, your taste buds will thank you!
- Versatile Snack: Whether it’s game day, a movie night, or just a cozy evening at home, these treats fit right in as a fun finger food.
- Customizable: You can easily switch up the cheese or add spices and herbs to match your cravings or dietary needs.
- Crowd-Pleaser: Everyone loves them! They’re always a hit at parties and gatherings—watch them disappear in no time!
- Perfect for Dipping: Pair them with your favorite dipping sauces like ranch, honey mustard, or marinara for an extra flavor kick.
Tips for Success
Alright, let’s make sure your ham and cheese sticks turn out absolutely perfect! Here are some of my tried-and-true tips that I swear by:
- Frying Temperature: Make sure your oil is hot enough before adding the rolls—aim for medium heat. If it’s too cool, they’ll soak up oil and become greasy instead of crispy. A breadcrumb should sizzle when it hits the oil!
- Don’t Overcrowd the Pan: Fry in batches if needed. Giving each stick enough room to fry evenly ensures they get that lovely golden color all around. Plus, it helps them cook faster!
- Choose the Right Cheese: While I love cheddar and mozzarella, feel free to experiment! Gouda, pepper jack, or even a sharp Swiss can add a unique twist to your ham and cheese sticks.
- Season Your Breadcrumbs: For an extra flavor boost, mix in some Italian seasoning, garlic powder, or even a pinch of cayenne pepper into your breadcrumbs. It adds a delightful zing!
- Make Ahead: You can prepare the rolls ahead of time, bread them, and keep them in the fridge for a couple of hours before frying. Just be sure to let them sit out for a few minutes to come to room temperature before frying for even cooking.
- Try Different Proteins: Don’t limit yourself to just ham! Turkey or even chicken can work well. You could also try adding a slice of pickle or jalapeño inside for a tangy surprise!
- Serve with Dipping Sauces: Don’t forget the dipping sauce! A creamy ranch or spicy sriracha mayo pairs perfectly with these sticks. Get creative and mix your favorite flavors!
With these tips in your back pocket, you’ll be a ham and cheese stick pro in no time! Happy cooking!
Variations on Ham and Cheese Sticks
Let’s get creative with these ham and cheese sticks! While the classic version is absolutely delicious, there are so many fun ways to mix it up and make it your own. Here are some variations I just love:
- Cheese Swap: Experiment with different types of cheese! Try creamy brie for a rich flavor, or go for pepper jack if you like a bit of heat. Havarti or gouda are also fantastic options!
- Add Herbs: Sprinkle some dried herbs like oregano, basil, or thyme into your breadcrumbs for an extra layer of flavor. Fresh herbs like chopped parsley or chives can also be mixed in for a fresh twist!
- Spicy Kick: For those who enjoy a bit of spice, add sliced jalapeños or a dash of hot sauce inside the roll before frying. It’ll give your ham and cheese sticks a delightful kick!
- Veggie Boost: Sneak in some veggies! Thinly sliced bell peppers or spinach can add a nice crunch and freshness to your rolls. Just make sure they’re not too thick so they roll up easily!
- Sweet and Savory: Try adding a thin layer of fig jam or honey mustard inside the ham before you roll it up. The sweetness pairs beautifully with the salty ham and creamy cheese!
- Different Proteins: Switch out the ham for turkey, chicken, or even roast beef. Each protein brings its own flavor and texture, making the sticks a whole new experience!
- Gluten-Free Option: For a gluten-free version, use gluten-free breadcrumbs and a gluten-free flour alternative. It’s just as tasty and perfect for those with dietary restrictions!
The possibilities are endless! So, don’t be afraid to play around and find your favorite combinations. Happy experimenting!
Storage & Reheating Instructions
Got some leftover ham and cheese sticks? No problem! Storing them properly is key to keeping that delicious flavor and texture intact. Here’s how I like to do it:
- Storage: Allow your ham and cheese sticks to cool completely before storing them. Once they’re cool, place them in an airtight container. They can be kept in the refrigerator for up to 3 days. Just make sure to separate layers with parchment paper to prevent them from sticking together!
- Freezing: If you want to save them for later, you can freeze these bad boys! Wrap each stick tightly in plastic wrap or aluminum foil, and then place them in a freezer-safe bag. They can be frozen for up to 2 months. Just remember to label them with the date so you know when to use them!
Now, when it comes to reheating, you’ll want to restore that crispy exterior:
- Oven Method: Preheat your oven to 375°F (190°C). Place the ham and cheese sticks on a baking sheet lined with parchment paper. Bake for about 10-12 minutes, or until heated through and crispy again. This method keeps them nice and crunchy!
- Air Fryer Method: If you have an air fryer, this is a fantastic way to reheat them! Set it to 350°F (175°C) and air fry for about 5-7 minutes until they’re hot and crispy. It’s super quick and gives them that fresh-fried taste!
- Microwave Method: If you’re in a hurry, you can use the microwave, but be warned—they won’t be as crispy. Just heat them for about 30 seconds to 1 minute, depending on your microwave’s power. They’ll still taste great, just a little softer!
Follow these tips, and you’ll be able to enjoy your ham and cheese sticks just like they were freshly made. Happy snacking!
Serving Suggestions
Now that you’ve got these scrumptious ham and cheese sticks ready to go, let’s talk about how to elevate your snacking experience! The right accompaniments can really take these tasty bites to the next level. Here are some of my favorite ideas to serve alongside them:
- Dipping Sauces: A must-have! I love pairing these sticks with creamy ranch dressing, zesty honey mustard, or a tangy marinara sauce for dipping. You could even whip up a spicy sriracha mayo for a little kick!
- Fresh Veggies: Add some crunch with a side of fresh veggie sticks like carrots, cucumbers, or bell peppers. They not only add color to your plate but also provide a refreshing contrast to the richness of the ham and cheese.
- Fruit Platter: A selection of sliced apples, grapes, or strawberries can bring a lovely sweetness that complements the savory flavors of the sticks. Trust me, the combination is heavenly!
- Cheese Board: Get a little fancy and create a mini cheese board! Add some assorted cheeses, crackers, and nuts. It makes for a beautiful presentation and gives everyone the chance to mix and match flavors.
- Pickles: I love serving these sticks with dill pickles or pickled jalapeños on the side. The tanginess really cuts through the richness of the cheese and ham, making each bite even more satisfying!
- Salad: Serve them alongside a light salad—something simple like a mixed greens salad with a vinaigrette can be the perfect palate cleanser between bites!
With these serving suggestions, you’ll have a delightful spread that’ll impress your family and friends. Enjoy those ham and cheese sticks to the fullest!
Print
Ham and Cheese Sticks: 8 Irresistible Snack Ideas
- Prep Time: 15 minutes
- Cook Time: 10 minutes
- Total Time: 25 minutes
- Yield: 4 servings 1x
- Category: Snack
- Method: Frying
- Cuisine: American
- Diet: Gluten Free
Description
Ham and cheese sticks are a tasty snack made with savory ham and melted cheese, wrapped in a crispy coating.
Ingredients
- 8 slices of ham
- 8 slices of cheese
- 1 cup of breadcrumbs
- 2 eggs
- 1/2 cup of flour
- Oil for frying
Instructions
- Lay a slice of ham flat on a clean surface.
- Place a slice of cheese on top of the ham.
- Roll the ham and cheese together tightly.
- Repeat for all slices.
- Set up a breading station with flour, beaten eggs, and breadcrumbs.
- Dredge each roll in flour, dip in eggs, and coat with breadcrumbs.
- Heat oil in a frying pan over medium heat.
- Fry the rolls until golden brown on all sides.
- Remove and drain on paper towels.
- Serve warm.
Notes
- Use your favorite type of cheese.
- Adjust seasoning to taste.
- Serve with dipping sauce if desired.
Nutrition
- Serving Size: 2 sticks
- Calories: 250
- Sugar: 1g
- Sodium: 800mg
- Fat: 15g
- Saturated Fat: 6g
- Unsaturated Fat: 8g
- Trans Fat: 0g
- Carbohydrates: 20g
- Fiber: 1g
- Protein: 12g
- Cholesterol: 150mg
Keywords: ham and cheese sticks, snack, appetizer