
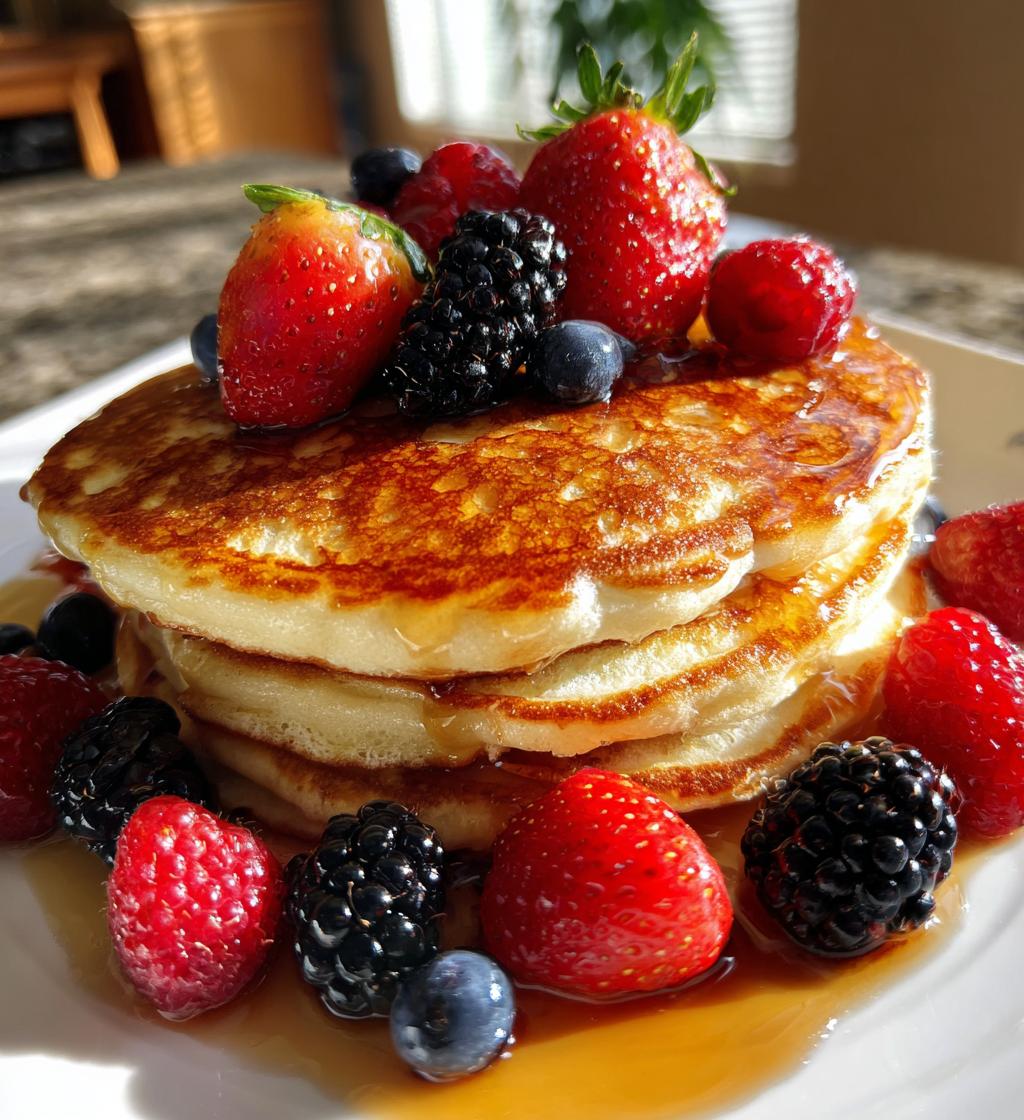
There’s something magical about waking up to a stack of warm, fluffy buttermilk pancakes. I still remember those Sunday mornings at my grandma’s house, where the smell of pancakes wafted through the air, luring me from my room. Every bite was a cloud of deliciousness, and I’ve spent years trying to recreate that perfect moment in my own kitchen. These are truly the fluffiest buttermilk pancakes you’ll ever make—light, airy, and oh-so-satisfying! Trust me, they’re the kind of pancakes that make you want to linger at the breakfast table just a little longer. The secret? A few simple ingredients and a little love. So, grab your mixing bowl and let’s get started on a breakfast that’s bound to become a favorite in your home, just like it is in mine. You won’t regret it!
Ingredients List
Getting the ingredients right is key to achieving the fluffiest buttermilk pancakes. Here’s what you’ll need:
- 1 cup all-purpose flour
- 2 tablespoons sugar
- 1 tablespoon baking powder
- 1/2 teaspoon baking soda
- 1/4 teaspoon salt
- 1 cup buttermilk
- 1 large egg
- 2 tablespoons melted butter
Make sure to measure everything accurately—this will help you get those light, airy pancakes we all crave! I always use fresh buttermilk for the best flavor and texture, so trust me, it’s worth it. Now that you’ve got your ingredients ready, you’re one step closer to pancake perfection!
How to Prepare Fluffiest Buttermilk Pancakes
Now that you’ve got your ingredients all set, let’s dive into making the fluffiest buttermilk pancakes! It’s a straightforward process, and I promise you’ll have a stack of deliciousness in no time. Just follow these steps, and don’t worry if it gets a little messy—that’s part of the fun!
Step-by-Step Instructions
Mixing Dry Ingredients
Start by grabbing a large mixing bowl and combine 1 cup of all-purpose flour, 2 tablespoons of sugar, 1 tablespoon of baking powder, 1/2 teaspoon baking soda, and 1/4 teaspoon salt. Give it a good whisk until everything’s blended together. This step lays the foundation for your pancakes, so make sure the baking powder is fresh—trust me, it makes a difference! Now, here’s the crucial part: once you add the wet ingredients, don’t overmix! It’s okay if there are a few lumps. Overmixing can lead to dense pancakes, and we’re aiming for fluffy here!
Combining Wet Ingredients
In another bowl, whisk together 1 cup of buttermilk, 1 large egg, and 2 tablespoons of melted butter. Mix it until it’s well combined and smooth. This mixture is where the magic happens, so take your time to incorporate everything nicely without going overboard. When mixing the wet ingredients, I like to use a fork—it just feels right! Once it’s all mixed, gently fold this into your dry ingredients. Remember, lumps are okay; we want to keep that airy texture!
Cooking the Pancakes
Now, it’s time to cook! Heat a non-stick skillet over medium heat. I usually give it a couple of minutes to warm up nicely. Once it’s hot, pour about 1/4 cup of batter onto the skillet for each pancake. You’ll want to watch closely as bubbles start to form on the surface after about 2-3 minutes. This is your cue that it’s time to flip! Gently turn them over and let them cook for another 1-2 minutes until they’re golden brown. Oh, the smell will be amazing! Keep an eye on them; every stove is a little different, so adjust the heat as needed to prevent burning. And voilà! You’re just a few steps away from pancake heaven!
Nutritional Information
Let’s talk about the numbers behind these fluffiest buttermilk pancakes! While I believe that indulging in a delicious stack is all about enjoyment, it’s always nice to have a little insight into what you’re serving up. Here’s an estimated breakdown per serving (which is about 2 pancakes):
- Calories: 320
- Fat: 10g
- Saturated Fat: 5g
- Unsaturated Fat: 3g
- Trans Fat: 0g
- Cholesterol: 60mg
- Sodium: 400mg
- Carbohydrates: 50g
- Fiber: 1g
- Sugar: 5g
- Protein: 8g
Keep in mind, these values are approximate and can vary based on the specific brands of ingredients you use. Whether you’re enjoying them on a special occasion or a cozy weekend morning, knowing what’s in your pancakes can help you savor every delightful bite even more! Now, let’s keep the pancake party going!
Tips for Success
To ensure you whip up the fluffiest buttermilk pancakes, I’ve got some pro tips that will make all the difference! First, always check the freshness of your baking powder. Old baking powder can lead to flat pancakes, and we definitely want to avoid that! You can do a quick test by adding a teaspoon of baking powder to a bit of water—if it bubbles, you’re good to go!
Next, make sure your ingredients are at room temperature. This helps the batter mix together more easily and results in a better texture. And here’s a little secret: keep your pancakes warm in a low oven while you finish cooking the rest. Just set it to about 200°F (93°C) and lay them out in a single layer on a baking sheet. This way, every pancake stays warm and fluffy until it’s time to serve. Trust me, these little tricks will elevate your pancake game to a whole new level!
Variations
If you’re ready to get creative with your fluffiest buttermilk pancakes, I’ve got some delicious ideas that will take them to a whole new level! One of my favorite ways to jazz them up is by adding fresh blueberries. Just fold in a cup of berries right into the batter before cooking—oh, the burst of flavor when you bite into a pancake is simply divine!
Feeling a little indulgent? How about tossing in some chocolate chips? Just sprinkle them on top of the batter after you pour it onto the skillet, and let them melt into gooey deliciousness. You could even experiment with different types of chocolate—dark, milk, or white chocolate chips all work wonderfully!
For those who love a little spice in their life, try adding a teaspoon of ground cinnamon to the dry ingredients. It gives your pancakes a warm, cozy flavor that’s perfect for chilly mornings. You could also mix in some pumpkin puree and a sprinkle of nutmeg for a seasonal twist that’s absolutely scrumptious!
And don’t forget about nuts! Chopped pecans or walnuts can add a delightful crunch and a nutty flavor that pairs beautifully with the fluffy pancakes. Just remember to adjust the quantity to your taste! The possibilities are endless, so don’t be afraid to experiment and make these pancakes your own. Happy cooking!
Serving Suggestions
Now that you’ve stacked up your fluffy buttermilk pancakes, let’s talk about the delicious toppings that will take them over the top! First and foremost, you can’t go wrong with classic maple syrup. There’s just something magical about that sweet, golden goodness drizzled over warm pancakes. It’s a must-have in my house!
If you’re feeling a bit fruity, fresh berries are a fantastic choice. Strawberries, blueberries, or raspberries add a pop of color and a burst of flavor that pairs perfectly with the fluffy texture. Just slice them up and scatter them on top, or even make a quick berry compote if you’re feeling fancy!
Whipped cream is another indulgent option that brings a lightness to every bite. You can either use store-bought or whip up some at home—it’s super easy! Just beat some heavy cream with a bit of sugar until it’s fluffy and billowy. Trust me, nothing feels quite as special as a dollop of homemade whipped cream on your pancakes.
If you want to elevate your pancake game even further, consider adding a sprinkle of powdered sugar or a drizzle of chocolate or caramel sauce. Oh, the decadence! You could also add some chopped nuts for a delightful crunch—walnuts or pecans work beautifully here.
And hey, if you’re looking to turn breakfast into a brunch feast, serve your pancakes alongside some crispy bacon or sausage links. The sweet and savory combo is always a crowd-pleaser! Whatever you choose, make sure to enjoy every delicious bite—you’ve earned it! Happy feasting!
Storage & Reheating Instructions
So, you’ve whipped up a glorious stack of the fluffiest buttermilk pancakes, and now you’re left with some delicious leftovers—lucky you! Storing them properly is key to keeping that light, airy texture intact. First things first, let them cool down completely before you store them. This helps prevent condensation, which can make them soggy. Once they’re cool, layer them between sheets of parchment paper in an airtight container. This way, they won’t stick together, and you can easily grab a few for a quick breakfast later!
If you want to keep them for a longer time, you can also freeze them! Just wrap each pancake individually in plastic wrap, then place them in a freezer-safe bag or container. They’ll last for about 2 months in the freezer. When you’re ready to enjoy them, simply pop them in the toaster or microwave. For the toaster, set it to medium, and for the microwave, heat them in 30-second intervals until warmed through. This method keeps them fluffy and prevents them from getting rubbery.
And here’s a little tip: if microwaving, place a damp paper towel over the pancakes while heating. This helps retain moisture and keeps them from drying out. Trust me, you’ll be amazed at how good they taste even after being stored! Enjoy those pancakes any time you crave them, because who wouldn’t want a cozy breakfast treat ready to go? Happy storing!
FAQ Section
Can I use whole wheat flour instead of all-purpose?
Absolutely, you can use whole wheat flour! Just keep in mind that it will change the texture and flavor a bit. Whole wheat flour tends to create denser pancakes compared to the light and airy ones you get with all-purpose flour. If you want to try it, I recommend doing a mix—maybe half whole wheat and half all-purpose—to keep some of that fluffiness while adding a bit of whole grain goodness. You’ll still get a delicious pancake without sacrificing too much on texture!
How do I know when the pancakes are cooked?
Great question! You’ll know your pancakes are cooked when you start to see bubbles forming on the surface, usually after about 2-3 minutes on the first side. When those bubbles appear, it’s time to flip! After flipping, let them cook for another 1-2 minutes. The pancakes should be golden brown and slightly puffed up. If you’re unsure, you can always lift one up gently with a spatula to peek underneath. Perfectly cooked pancakes should be fluffy and spring back when lightly pressed!
Can I freeze leftover pancakes?
Yes, you can definitely freeze leftover pancakes! It’s super easy! Just let them cool completely, then wrap each pancake individually in plastic wrap. After that, place them in a freezer-safe bag or container. They’ll stay good in the freezer for about 2 months. When you’re ready to enjoy them again, you can pop them straight into the toaster or microwave. If using the microwave, just cover them with a damp paper towel and heat them in 30-second intervals until warmed through. Trust me, you’ll be amazed at how fluffy they still are after freezing!
Print
Fluffiest Buttermilk Pancakes: 5 Steps to Pure Comfort
- Prep Time: 10 minutes
- Cook Time: 15 minutes
- Total Time: 25 minutes
- Yield: 4 servings 1x
- Category: Breakfast
- Method: Grilling
- Cuisine: American
- Diet: Vegetarian
Description
Fluffiest buttermilk pancakes that are light and airy.
Ingredients
- 1 cup all-purpose flour
- 2 tablespoons sugar
- 1 tablespoon baking powder
- 1/2 teaspoon baking soda
- 1/4 teaspoon salt
- 1 cup buttermilk
- 1 large egg
- 2 tablespoons melted butter
Instructions
- In a bowl, mix the flour, sugar, baking powder, baking soda, and salt.
- In another bowl, whisk together buttermilk, egg, and melted butter.
- Add the wet ingredients to the dry ingredients and stir until just combined.
- Heat a non-stick skillet over medium heat and pour batter for each pancake.
- Cook until bubbles form, then flip and cook until golden brown.
Notes
- Do not overmix the batter.
- Serve with maple syrup or fresh fruit.
- Keep pancakes warm in the oven until serving.
Nutrition
- Serving Size: 2 pancakes
- Calories: 320
- Sugar: 5g
- Sodium: 400mg
- Fat: 10g
- Saturated Fat: 5g
- Unsaturated Fat: 3g
- Trans Fat: 0g
- Carbohydrates: 50g
- Fiber: 1g
- Protein: 8g
- Cholesterol: 60mg
Keywords: fluffiest buttermilk pancakes