
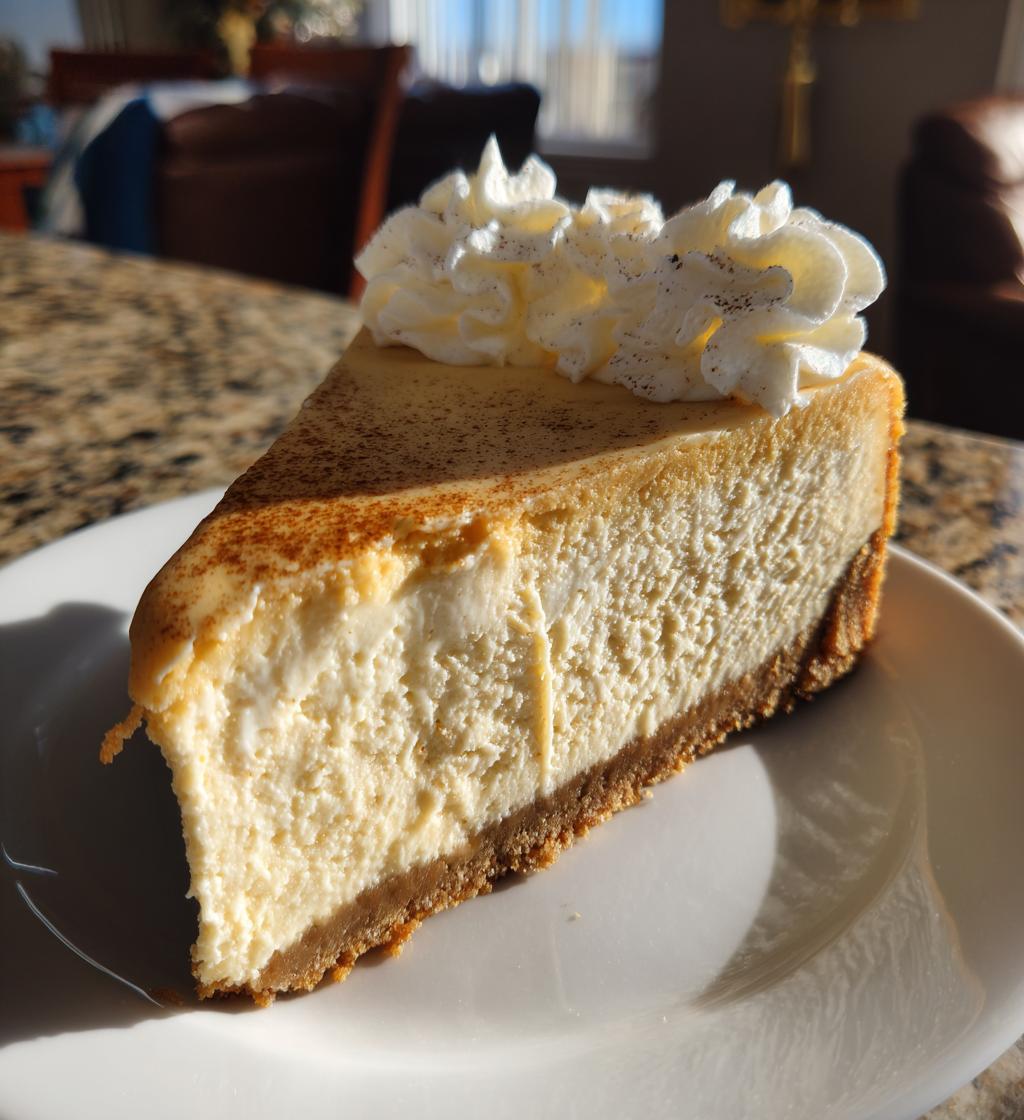
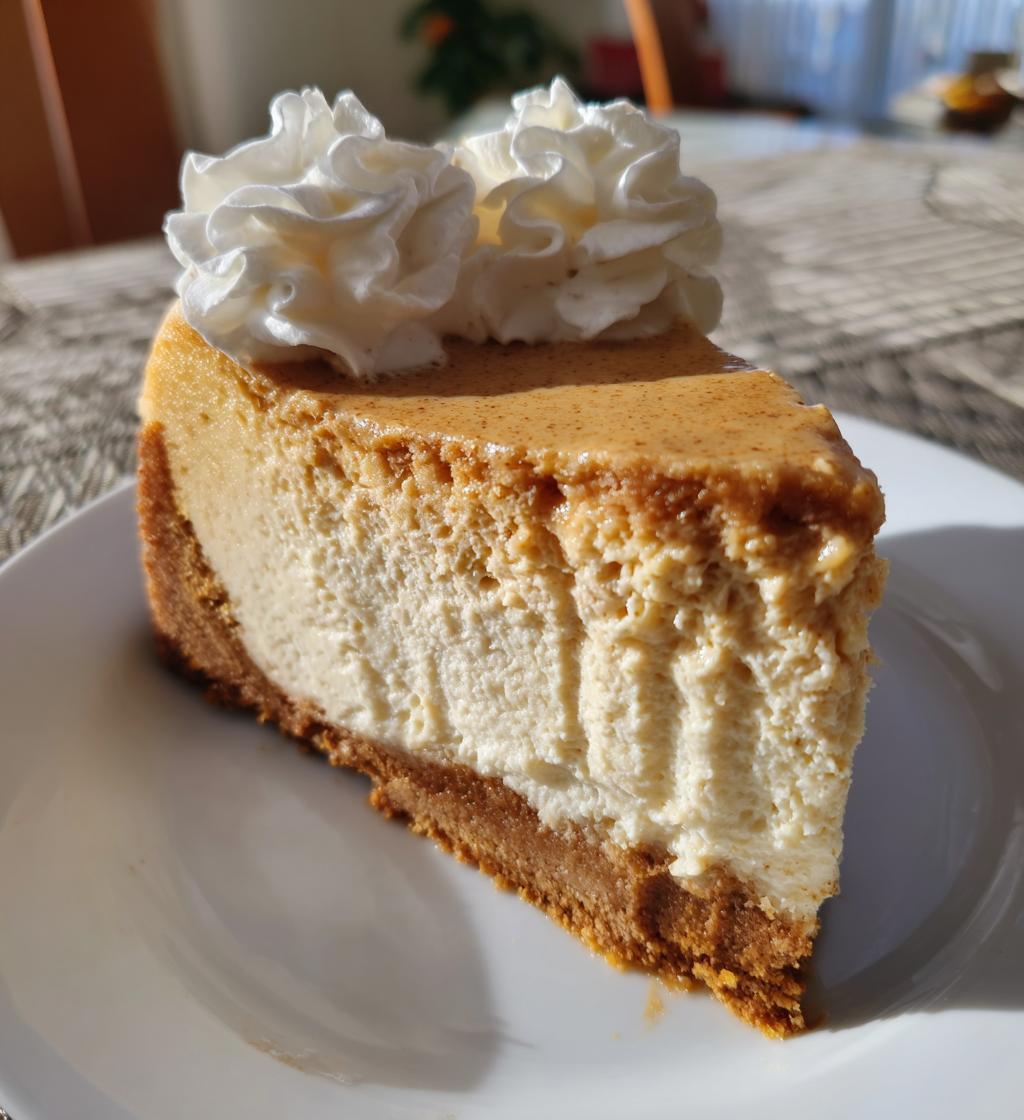
Let me tell you, there’s something truly magical about a slice of coffee cheesecake. It’s rich, creamy, and oh-so-satisfying, with that wonderful coffee flavor that wraps around you like a cozy blanket. This recipe is special to me because it brings back memories of lazy Sunday afternoons spent with friends, savoring every bite while sipping a hot cup of joe. The combination of the buttery graham cracker crust and the smooth, velvety filling makes this dessert a total showstopper. Trust me, once you try this coffee cheesecake, you’ll never want to go back! Whether it’s for a special occasion or just because you deserve a treat, this cheesecake is the perfect indulgence to satisfy your sweet tooth and coffee cravings all in one bite.
Ingredients List
Gathering the right ingredients is key to making my delightful coffee cheesecake! Here’s what you’ll need:
- 1 1/2 cups graham cracker crumbs: This forms the deliciously buttery crust. I like to crush mine finely for that perfect texture!
- 1/2 cup sugar: This adds just the right amount of sweetness to the crust and balances the rich filling.
- 1/2 cup butter, melted: The magic glue that holds the crust together. Make sure it’s unsalted for the best flavor!
- 4 (8 ounce) packages cream cheese, softened: This is the star of the show! Softening it beforehand ensures a smooth, creamy filling without lumps.
- 1 cup sugar: We’re going to need this for the filling to sweeten up that luscious cream cheese!
- 3 eggs: They help bind everything together and create that rich texture we all love.
- 1 cup brewed coffee, cooled: This is where the magic happens! Use your favorite brew, and let it cool down to room temperature before adding it to the mix.
- 1 teaspoon vanilla extract: A little splash of vanilla enhances the flavors beautifully.
- 1 tablespoon all-purpose flour: This helps stabilize the cheesecake and gives it a lovely structure.
Having these ingredients prepped and ready to go will make your cheesecake-making experience smooth and enjoyable! Trust me, the end result is worth every bit of prep work.
How to Prepare Instructions
Now, let’s dive into the step-by-step magic of creating your coffee cheesecake! Don’t worry, it’s easier than it sounds, and I’ll guide you through every delicious moment.
- Preheat your oven: Set it to 325°F (160°C) so it’s nice and toasty by the time you’re ready to bake.
- Make the crust: In a bowl, mix together the graham cracker crumbs, 1/2 cup sugar, and melted butter. Stir until everything is well combined and looks like wet sand. Then, press this mixture firmly into the bottom of a 9-inch springform pan. It should be compact and even—this is your delicious base!
- Prepare the filling: In a large bowl, beat the softened cream cheese with an electric mixer until it’s smooth and creamy. This is where your cheesecake starts to shine!
- Add the sugar: Gradually mix in 1 cup of sugar until it’s fully incorporated. You want that sweetness to blend in perfectly.
- Incorporate the eggs: Add the eggs one at a time, mixing well after each addition. This helps create that rich, velvety texture we all love in a cheesecake.
- Mix in the coffee: Stir in your cooled brewed coffee, vanilla extract, and flour until everything is just combined. Be careful not to overmix; a gentle hand is key here!
- Pour and bake: Carefully pour the cream cheese mixture over your prepared crust in the springform pan. It should look beautiful! Pop it into the preheated oven and bake for 50-60 minutes. You’ll know it’s done when the center is set but still has a slight jiggle—don’t worry, it’ll firm up as it cools.
- Cool it down: Once baked, remove the cheesecake from the oven and let it cool completely in the pan. This can take a couple of hours, so be patient! After it’s cooled, cover it and pop it in the refrigerator for at least 4 hours (or overnight if you can wait!).
And there you have it! Follow these steps, and you’ll be well on your way to a deliciously creamy coffee cheesecake. Just imagine that first bite—trust me, it’s worth every moment spent in the kitchen!
Why You’ll Love This Recipe
Let me share why this coffee cheesecake is my go-to dessert! Honestly, it checks all the boxes for an amazing treat. Here’s what makes it so special:
- Easy to follow: With straightforward steps, even beginners can whip up this cheesecake without any fuss!
- Rich flavor: The combination of creamy cheese and bold coffee creates a flavor explosion that coffee lovers will adore.
- Perfect for gatherings: Whether it’s a birthday, holiday, or just a casual get-together, this cheesecake is sure to impress your guests!
- Can be made ahead of time: You can prepare it a day in advance, giving you more time to enjoy your event without stress.
- Decadent yet balanced: While it’s indulgent, the coffee flavor adds just the right amount of bitterness to balance the sweetness.
- Customizable: Feel free to play around with flavors or toppings to make it your own—chocolate shavings, anyone?
Trust me, once you taste this coffee cheesecake, you’ll understand why it’s a favorite in my kitchen!
Tips for Success
Now, let’s talk about some pro tips to ensure your coffee cheesecake turns out absolutely perfect! I’ve learned a thing or two along the way, and I want to share these gems with you so you can avoid any potential pitfalls.
- Soften your cream cheese: This is crucial! Make sure your cream cheese is at room temperature before you start. It’ll blend much easier, preventing lumps in your filling. I usually take it out of the fridge at least an hour before I start making my cheesecake.
- Don’t rush the cooling process: After baking, let your cheesecake cool completely in the pan before transferring it to the fridge. This helps it set properly and avoids cracking on the surface. Trust me, patience is key here!
- Check for doneness: It’s easy to overbake a cheesecake. The center should be set but still have a slight jiggle when you take it out. It’ll firm up as it cools in the fridge, so don’t worry if it looks a little underdone.
- Use a water bath: If you want to take it to the next level, consider baking your cheesecake in a water bath. This helps maintain a consistent temperature and moisture level, resulting in a creamier texture. Just wrap the outside of your springform pan in aluminum foil to prevent leaks!
- Give it time to chill: For the best flavor and texture, let your cheesecake chill in the refrigerator for at least 4 hours, but overnight is even better! This allows the flavors to meld beautifully.
- Experiment with flavors: Feel free to play with the coffee you use! Different roasts can bring out unique flavors in your cheesecake. A dark roast gives a bold taste, while a lighter roast can add a brighter note.
With these tips in your back pocket, you’ll be well on your way to a coffee cheesecake that’s not only delicious but also a stunning centerpiece for any occasion. Happy baking!
Variations
One of the best things about this coffee cheesecake is how versatile it can be! If you’re feeling adventurous or just want to mix things up a bit, here are some fun variations to consider:
- Chocolate Coffee Cheesecake: Add 1/2 cup of melted chocolate or cocoa powder to the filling for a rich chocolate twist. Just imagine that luscious chocolate and coffee flavor dancing together!
- Mocha Delight: For an extra coffee kick, incorporate 1 tablespoon of instant coffee granules into the filling. It’ll intensify that coffee flavor and give it a delightful mocha essence!
- Nutty Coffee Cheesecake: Fold in 1/2 cup of finely chopped nuts, like walnuts or hazelnuts, into the cream cheese mixture for added crunch and flavor. It’s a delightful surprise in every bite!
- Spiced Coffee Cheesecake: Sprinkle in some cinnamon or nutmeg to the filling for a warm, spicy note that’s perfect for fall or winter gatherings. It adds a cozy element that pairs beautifully with coffee.
- Caramel Swirl: Before baking, drizzle caramel sauce over the top of the cream cheese mixture and use a knife to swirl it gently for a stunning marbled effect. The sweetness of the caramel will complement the coffee perfectly!
- Flavorful Coffee Variants: Experiment with flavored coffee! Use vanilla, hazelnut, or even pumpkin spice coffee for a unique spin that can elevate your cheesecake to a whole new level.
Feel free to mix and match these variations to suit your taste or the occasion. Each twist will give your coffee cheesecake a fresh personality while still keeping that beloved creamy texture. Enjoy being creative in the kitchen!
Storage & Reheating Instructions
Storing your coffee cheesecake properly is key to keeping that rich, creamy texture intact for later enjoyment! Here’s how to do it right:
- Refrigeration: Once your cheesecake has cooled completely, wrap it tightly in plastic wrap or cover it with aluminum foil. This helps prevent any odors from the fridge from seeping in and keeps it nice and fresh. It can be stored in the refrigerator for up to 5 days.
- Freezing: If you want to save some for a later date, you can freeze your cheesecake! Just slice it into individual pieces, wrap each slice tightly in plastic wrap, and then place them in an airtight container or freezer bag. This way, you can enjoy a slice whenever the craving hits! It’ll keep well for up to 2 months.
- Thawing: When you’re ready to indulge in that frozen slice of coffee cheesecake, simply remove it from the freezer and let it thaw in the refrigerator overnight. This ensures it defrosts gently and retains its delicious texture.
- Serving: No reheating is necessary—serve your cheesecake chilled straight from the fridge! If you’d like to dress it up a bit, add a dollop of whipped cream or a drizzle of chocolate sauce just before serving.
By following these storage tips, you can savor every bite of your coffee cheesecake long after it’s been made. Enjoy every creamy, dreamy moment!
Nutritional Information Section
As we indulge in this delicious coffee cheesecake, it’s always good to be aware of what we’re enjoying! Here’s an estimated breakdown of the nutritional information per slice, based on typical values:
- Calories: 300
- Fat: 18g
- Saturated Fat: 10g
- Unsaturated Fat: 5g
- Trans Fat: 0g
- Cholesterol: 80mg
- Sodium: 300mg
- Carbohydrates: 30g
- Fiber: 1g
- Sugar: 20g
- Protein: 5g
Keep in mind that these values are estimates and can vary based on specific ingredient brands and measurements. Don’t let numbers deter you from enjoying this rich treat—after all, a little indulgence is good for the soul! Enjoy your slice of coffee cheesecake with a smile!
FAQ Section
Got questions about making this scrumptious coffee cheesecake? Don’t worry, I’ve got you covered! Here are some common queries I often hear, along with my trusty answers:
Can I use decaf coffee?
Absolutely! If you prefer a little less caffeine, decaf coffee works just as well. You’ll still get that delicious coffee flavor without the jitters!
How long does the cheesecake need to set?
Patience is key here! After baking, let your cheesecake cool completely in the pan, then refrigerate it for at least 4 hours. If you can wait overnight, even better! This helps the flavors meld and the texture become perfectly creamy.
Can I freeze coffee cheesecake?
Yes, you can! Just slice it into individual pieces and wrap each slice tightly in plastic wrap before placing them in an airtight container. It’ll keep well in the freezer for up to 2 months. When you’re ready to enjoy, let it thaw in the refrigerator overnight.
Can I use flavored coffee?
Definitely! Using flavored coffee, like hazelnut or vanilla, can add an exciting twist to your cheesecake. Just choose your favorite, and let it shine!
Why is my cheesecake cracking?
Cracks can happen if the cheesecake bakes too long or if it cools too quickly. Make sure to keep an eye on the baking time and let it cool gradually in the oven. If you’re worried, a water bath can help prevent cracking by keeping the temperature even.
I hope these FAQs help you feel more confident about making your coffee cheesecake! It’s such a delightful treat, and I can’t wait for you to try it!
Print
Coffee Cheesecake: 7 Decadent Steps to Pure Bliss
- Prep Time: 30 minutes
- Cook Time: 60 minutes
- Total Time: 4 hours 90 minutes
- Yield: 12 servings 1x
- Category: Dessert
- Method: Baking
- Cuisine: American
- Diet: Vegetarian
Description
A rich and creamy coffee cheesecake with a graham cracker crust.
Ingredients
- 1 1/2 cups graham cracker crumbs
- 1/2 cup sugar
- 1/2 cup butter, melted
- 4 (8 ounce) packages cream cheese, softened
- 1 cup sugar
- 3 eggs
- 1 cup brewed coffee, cooled
- 1 teaspoon vanilla extract
- 1 tablespoon all-purpose flour
Instructions
- Preheat the oven to 325°F (160°C).
- Mix graham cracker crumbs, 1/2 cup sugar, and melted butter in a bowl.
- Press the mixture into the bottom of a 9-inch springform pan.
- In a large bowl, beat cream cheese until smooth.
- Add 1 cup sugar and blend until combined.
- Add eggs one at a time, mixing well after each addition.
- Stir in cooled coffee, vanilla extract, and flour.
- Pour the cream cheese mixture over the crust.
- Bake for 50-60 minutes or until the center is set.
- Cool completely before refrigerating for at least 4 hours.
Notes
- Serve chilled.
- Top with whipped cream if desired.
Nutrition
- Serving Size: 1 slice
- Calories: 300
- Sugar: 20g
- Sodium: 300mg
- Fat: 18g
- Saturated Fat: 10g
- Unsaturated Fat: 5g
- Trans Fat: 0g
- Carbohydrates: 30g
- Fiber: 1g
- Protein: 5g
- Cholesterol: 80mg
Keywords: coffee cheesecake