
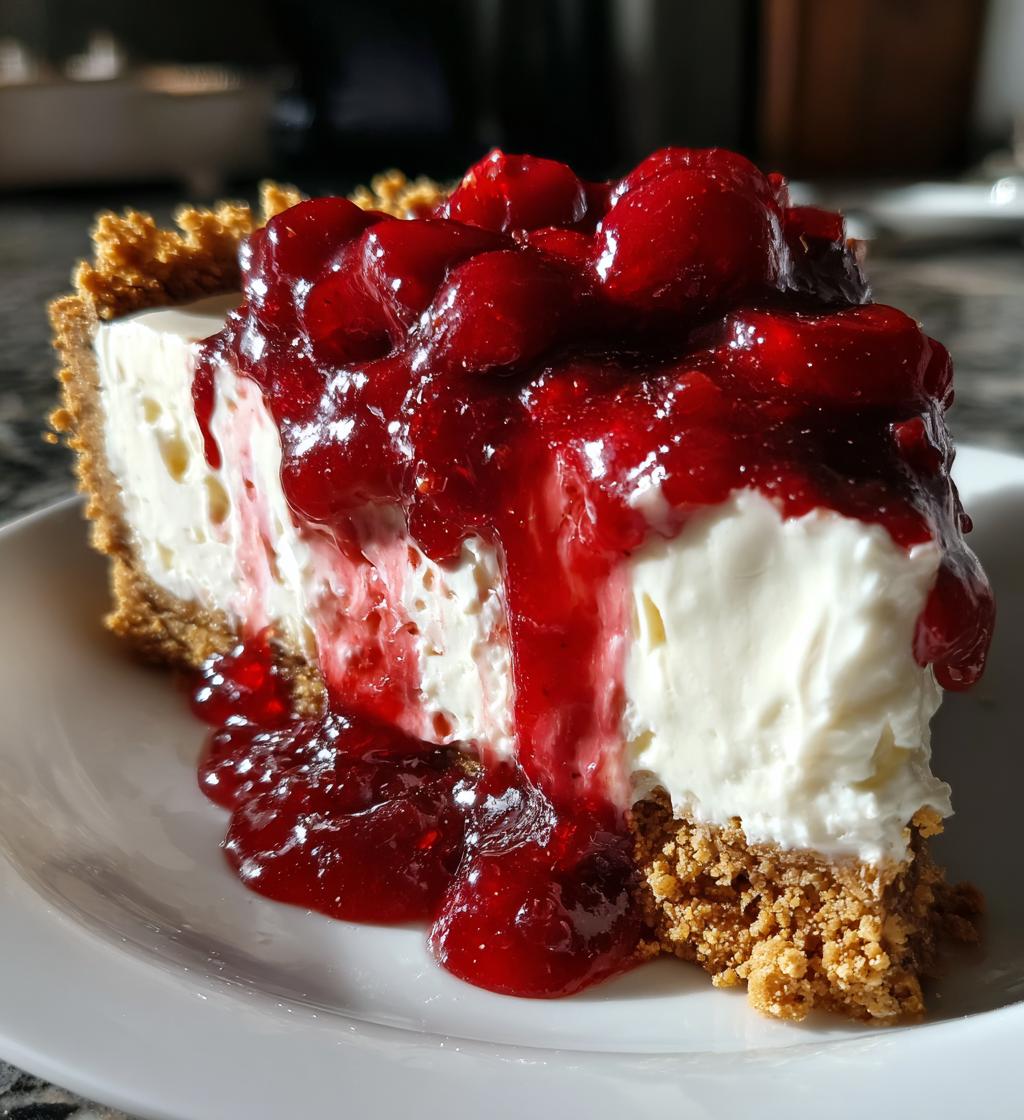
Oh my goodness, let me tell you about the pure joy that is *cherry yum yum*! If you’re anything like me, desserts hold a special place in your heart, and this one is no exception. There’s just something magical about the combination of creamy layers and the tart sweetness of cherries that makes my taste buds dance. I remember the first time I made this dessert for a family gathering; everyone was raving about it, and I felt like a superstar chef! The best part? It’s a no-bake recipe, which means I get to skip the oven and still create something that looks and tastes like a million bucks. Seriously, if you’re looking for a quick and impressive dessert that’s sure to impress, this cherry yum yum is your answer. You can whip it up in no time, and it’s always a crowd-pleaser. Trust me, once you try it, you’ll be adding it to your list of go-to treats!
Why You’ll Love This Recipe
- No-bake delight: This cherry yum yum comes together without ever turning on the oven, making it a breeze for those hot summer days or whenever you’re in a hurry!
- Quick prep time: You can whip this up in just 20 minutes! Seriously, it’s that simple. In no time, you’ll have a delicious dessert ready to chill.
- Layers of flavor: The combination of the creamy filling and tart cherry topping is a flavor explosion that’ll have everyone asking for seconds (or thirds!).
- Perfect for any occasion: Whether it’s a barbecue, potluck, or just a cozy night in, this dessert fits right in and impresses every time.
- Customizable: Feeling adventurous? You can swap out the cherry filling for your favorite fruits to create new variations that keep things exciting!
- Crowd-pleaser: I can’t tell you how many compliments I’ve received after serving this! It’s a guaranteed hit with kids and adults alike.
Ingredients List
Here’s what you’ll need to create this delicious *cherry yum yum*! I promise these ingredients are super simple, and you might even have most of them in your pantry already!
- 1 can cherry pie filling: This is the star of the show! Sweet and slightly tart, it adds that vibrant cherry flavor that makes this dessert so irresistible.
- 1 cup crushed graham crackers: These will form the base of your dessert, giving it that delightful crunch and a hint of sweetness.
- 1/2 cup unsalted butter, melted: This will bind your graham cracker crust together. Make sure it’s melted for easy mixing!
- 8 oz cream cheese, softened: This creamy goodness is what makes the filling rich and luscious. Let it sit out for a bit to soften before mixing.
- 1 cup powdered sugar: For that perfect sweetness without the graininess. It blends beautifully into the cream cheese!
- 1 cup whipped topping: This adds a light and airy texture to the filling. You can use store-bought or whip your own if you’re feeling fancy!
- 1 tsp vanilla extract: A splash of vanilla elevates the flavor and ties everything together beautifully.
Gather these ingredients, and let’s get ready to create something delicious!
How to Prepare *Cherry Yum Yum*
Preheat and Prepare the Crust
First things first, let’s get that oven preheated to 350°F (175°C). Now, I know it’s a no-bake dessert, but trust me, we still want to set the stage for our graham cracker crust! In a bowl, mix the crushed graham crackers with the melted butter until everything is well combined. The mixture should look like wet sand—this is crucial for getting that perfect texture. Now, take this delicious mixture and press it into the bottom of a baking dish. You want it nice and compact; I usually use the bottom of a glass to really press it down. This gives you a sturdy base that will hold all those creamy layers later on!
Prepare the Cream Cheese Mixture
Now onto the fun part! In a large bowl, beat the softened cream cheese until it’s smooth and creamy. You really want to make sure there are no lumps here, so take your time—about 2-3 minutes should do the trick. Next, add in the powdered sugar and vanilla extract. Mix until everything is beautifully combined and velvety. You should see a luscious, thick mixture that’s just begging to be spread over that graham cracker crust. And don’t forget to taste a little—yum!
Assemble the Layers
Time to layer it all together! Start by gently spreading the cream cheese mixture over your crust. Use a spatula to smooth it out evenly; you want every bite to have that delightful creaminess. Once that’s done, it’s time for the cherry pie filling! Pour it over the cream cheese layer, and use a spoon to spread it out evenly. The vibrant red cherries will look so inviting, and trust me, you’ll want to make sure every inch is covered for that perfect bite!
Chill and Serve
Now, here comes the hardest part—waiting! Cover your dish and pop it in the refrigerator for at least 2 hours. This chilling time is essential because it helps the layers set and come together beautifully. Once it’s all chilled and ready, slice it into squares and serve! I like to garnish with a bit of extra whipped topping or even some fresh cherries on top for a little flair. You’re in for a treat, so grab a fork and dig in!
Tips for Success
Alright, let’s talk about how to make your *cherry yum yum* absolutely perfect! I’ve got a few pro tips up my sleeve that will help you nail this dessert every time.
- Room temperature cream cheese: Make sure your cream cheese is softened to room temperature before mixing. This helps achieve that silky smooth texture that makes the filling so dreamy. If you forget to take it out ahead of time, a quick 15-second zap in the microwave can do the trick—just watch it closely!
- Don’t rush the chilling: I know the waiting can be tough, but chilling for at least two hours is crucial. This allows the layers to set properly and makes slicing a breeze. If you try to cut it too soon, you might end up with a gooey mess, and we don’t want that!
- Experiment with fillings: While cherry pie filling is a classic, don’t be afraid to mix it up! You can easily swap in blueberry, strawberry, or even a mix of fruits for some fun variations. Each fruit brings its own unique flavor, and it’s a great way to keep things exciting!
- Storage tips: If you have leftovers (which is rare, trust me!), store them in an airtight container in the fridge for up to four days. Just remember, the longer it sits, the softer the crust might get, so try to eat it up fairly quickly!
- Presentation matters: When you’re ready to serve, a sprinkle of crushed graham crackers or a dollop of whipped topping on each slice can elevate the look! A fresh cherry on top is the icing on the cake—er, dessert!
With these tips, your *cherry yum yum* will not only taste incredible but will also look absolutely stunning! Happy baking!
Variations
One of the best things about *cherry yum yum* is how adaptable it is! You can easily switch things up and create a whole new dessert experience with just a few simple changes. Here are some of my favorite variations to inspire your creativity in the kitchen:
- Blueberry Bliss: Swap out the cherry pie filling for blueberry pie filling. The sweet and slightly tart blueberries make for a refreshing twist that’s perfect for summer gatherings!
- Peach Paradise: Use canned peach pie filling instead of cherries for a lovely, sweeter option. You could even add a sprinkle of cinnamon to the cream cheese mixture for a cozy, spiced flavor!
- Mixed Berry Medley: Combine different fruit fillings like strawberries, raspberries, and blackberries for a colorful, berry-packed version. This one is not only delicious but looks stunning on the table!
- Chocolate Cherry Delight: For a chocolate lovers’ version, mix in some cocoa powder into the cream cheese filling or even drizzle some chocolate syrup over the cherry layer. Yum!
- Nutty Banana: Instead of fruit filling, try layering sliced bananas with a drizzle of caramel sauce on top of the cream cheese mixture. It’s a decadent treat that adds a whole new dimension!
Feel free to get creative with your own combinations! The possibilities are endless, and each variation brings a unique flavor profile that’ll keep everyone guessing what delicious twist you’ll come up with next. Happy experimenting!
Nutritional Information
Now, let’s talk about the nutritional side of this delicious *cherry yum yum*! While it’s definitely a treat, it’s always good to know what’s in it. Here’s a rough estimate of the nutritional values per serving:
- Calories: 250
- Fat: 12g
- Saturated Fat: 7g
- Unsaturated Fat: 3g
- Trans Fat: 0g
- Cholesterol: 30mg
- Sodium: 150mg
- Carbohydrates: 30g
- Fiber: 1g
- Sugar: 18g
- Protein: 3g
Keep in mind that these values can vary depending on the specific ingredients you use, especially if you decide to make any tasty variations. It’s all about balance and enjoying dessert in moderation! So go ahead, indulge in a slice of *cherry yum yum*—you deserve it!
FAQ Section
Can I use fresh cherries instead of cherry pie filling?
Absolutely! Fresh cherries can be a delightful twist. Just make sure to pit and chop them, then mix with a bit of sugar and cornstarch to create a thick filling before layering it over the cream cheese mixture.
How long does *cherry yum yum* need to chill?
It’s best to chill it for at least 2 hours, but if you can wait longer, even better! This helps the layers set perfectly, so it’s easier to slice and serve.
Can I make this dessert ahead of time?
Definitely! *Cherry yum yum* is perfect for making a day in advance. Just keep it covered in the fridge until you’re ready to serve. It might even taste better the next day as the flavors meld together!
What if I don’t have graham crackers?
No worries! You can use crushed cookies like Oreos or vanilla wafers for a different flavor profile. Just remember to adjust the amount of sugar based on the sweetness of the cookies.
Can I freeze *cherry yum yum*?
While it’s best enjoyed fresh, you can freeze it! Just cover it tightly in plastic wrap and then foil. To serve, thaw it in the fridge overnight. The texture might change a little, but it’ll still be delicious!
Storage & Reheating Instructions
So, you’ve made your delightful *cherry yum yum*, and now you’re wondering how to keep those delicious layers fresh for later. No problem! Here’s how to store your leftovers properly so you can enjoy them even after the main event.
First off, make sure you cover your dessert tightly with plastic wrap or transfer it to an airtight container before popping it in the fridge. It’ll keep well for up to four days, though I have to warn you, it usually doesn’t last that long in my house! Just remember, the longer it sits, the softer that graham cracker crust might become, so try to enjoy it within a couple of days for the best texture.
Now, as for reheating—*cherry yum yum* is best served chilled, so there’s really no need to heat it up. Just slice a piece straight from the fridge, and you’re good to go! If you want to get a little creative, you could top it with a warm chocolate or caramel sauce right before serving, but honestly, it’s already perfect as is.
With these simple storage tips, you can savor every last bite of your *cherry yum yum* for days to come. Enjoy!
What to Serve with *Cherry Yum Yum*
When it comes to serving *cherry yum yum*, I believe in creating a delightful experience that complements the creamy, fruity goodness of this dessert. Here are some of my favorite pairings that elevate the whole meal:
- Grilled Chicken Salad: A light, refreshing salad with grilled chicken, mixed greens, and a tangy vinaigrette balances the sweetness of *cherry yum yum* beautifully. It’s a perfect contrast that keeps things feeling fresh!
- BBQ Ribs: If you’re in the mood for a hearty meal, serving this dessert alongside some smoky BBQ ribs is a match made in heaven. The rich flavors of the ribs paired with the lightness of the cherry dessert create an unforgettable combination.
- Cheese Platter: A selection of cheeses, especially creamy ones like brie or goat cheese, alongside some crackers and fruits can be a fantastic appetizer before diving into *cherry yum yum*. The cheese adds a savory touch that balances the sweetness.
- Ice Cream: For an extra indulgent treat, consider serving a scoop of vanilla or chocolate ice cream on the side. The cold creaminess complements the cherry layers and adds a delightful richness to each bite!
- Fresh Fruit Salad: A light fruit salad made with seasonal fruits can add a refreshing element to your meal. Think berries, melons, and citrus to keep things bright and vibrant!
These pairings not only enhance the enjoyment of *cherry yum yum* but also create a well-rounded dining experience that everyone will love. So go ahead, mix and match to your heart’s content, and enjoy every delicious moment!
Print
Delicious Cherry Yum Yum: 5 Layers of Comfort
- Prep Time: 20 minutes
- Cook Time: 0 minutes
- Total Time: 2 hours 20 minutes
- Yield: 8 servings 1x
- Category: Dessert
- Method: No-bake
- Cuisine: American
- Diet: Vegetarian
Description
A delicious cherry dessert with creamy layers.
Ingredients
- 1 can cherry pie filling
- 1 cup crushed graham crackers
- 1/2 cup unsalted butter, melted
- 8 oz cream cheese, softened
- 1 cup powdered sugar
- 1 cup whipped topping
- 1 tsp vanilla extract
Instructions
- Preheat your oven to 350°F (175°C).
- Mix crushed graham crackers with melted butter.
- Press the mixture into the bottom of a baking dish.
- In a bowl, beat cream cheese until smooth.
- Add powdered sugar and vanilla extract to the cream cheese and mix well.
- Fold in the whipped topping.
- Spread the cream cheese mixture over the graham cracker crust.
- Pour cherry pie filling over the cream cheese layer.
- Chill for at least 2 hours before serving.
Notes
- Use fresh cherries for a different flavor.
- Store leftovers in the refrigerator.
- Can substitute with other fruit fillings.
Nutrition
- Serving Size: 1 slice
- Calories: 250
- Sugar: 18g
- Sodium: 150mg
- Fat: 12g
- Saturated Fat: 7g
- Unsaturated Fat: 3g
- Trans Fat: 0g
- Carbohydrates: 30g
- Fiber: 1g
- Protein: 3g
- Cholesterol: 30mg
Keywords: cherry yum yum, dessert, no-bake dessert, cherry dessert