
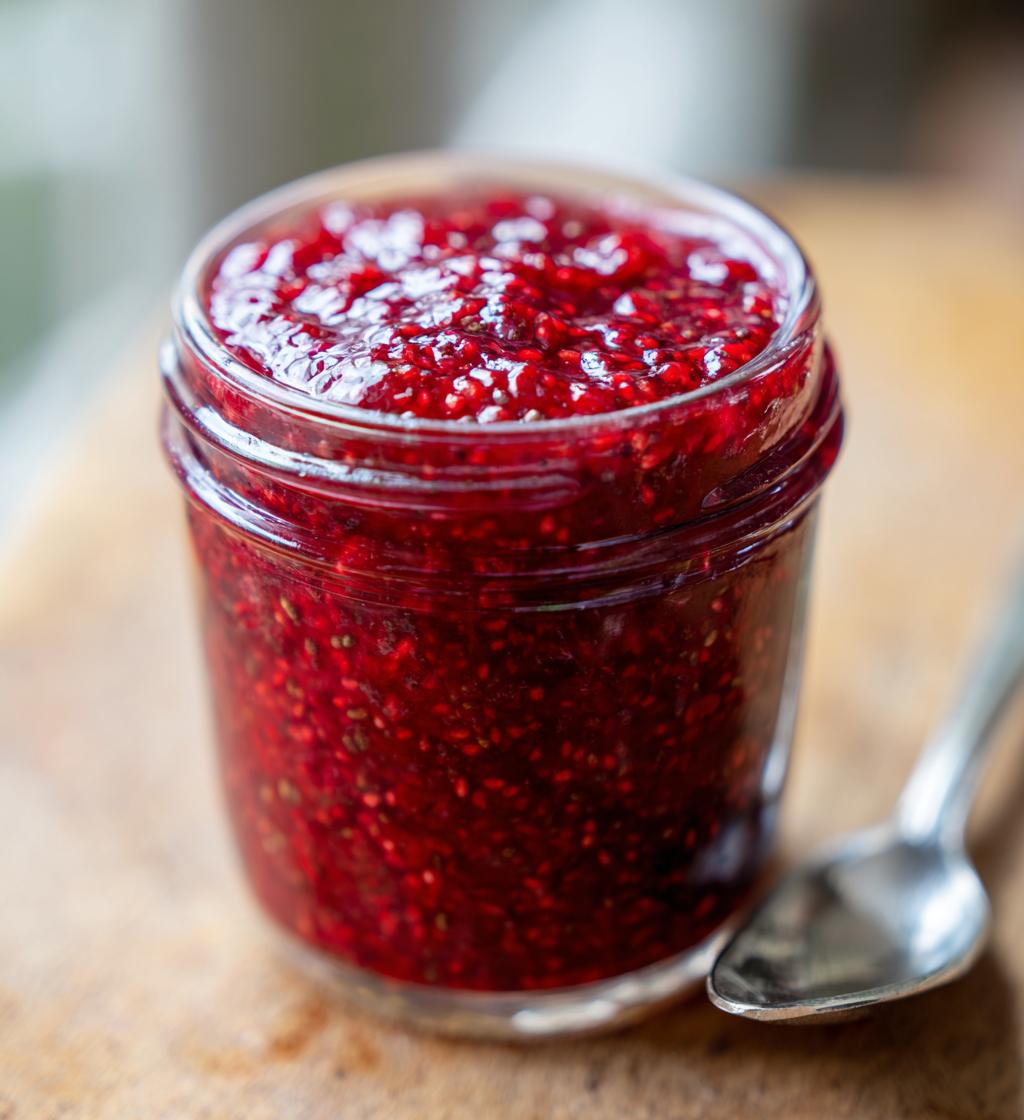
Hey there, fellow food lovers! If you’re looking for a simple, healthy, and absolutely delicious spread, you’ve got to try my raspberry chia jam! It’s so easy to whip up, and you only need a handful of ingredients. Seriously, you can make this beautiful jam in just 15 minutes! And the best part? It’s packed with nutrients and a burst of fruity flavor that’s perfect for spreading on toast, dolloping on yogurt, or even adding to desserts.
This raspberry chia jam is not just tasty; it’s also vegan and made with wholesome ingredients. The chia seeds do their magic by thickening the jam and adding a delightful texture. Oh, and did I mention that it’s customizable? You can adjust the sweetness to your liking, so it fits perfectly in your healthy lifestyle. Trust me, once you taste this jam, you’ll want to keep a jar in your fridge at all times!
Ingredients List
Gather these simple, wholesome ingredients to make your raspberry chia jam. Each one plays a crucial role in creating that perfect balance of flavor and texture!
- 2 cups fresh raspberries: The star of the show! You can also use frozen raspberries if fresh ones aren’t available.
- 1/4 cup maple syrup: This adds a lovely sweetness to your jam. Feel free to adjust the amount based on your taste preference!
- 1/4 cup chia seeds: These tiny seeds not only help thicken the jam but also pack a nutritional punch with fiber and protein.
- 1 tablespoon lemon juice: A splash of lemon juice brightens up the flavors and balances the sweetness beautifully.
How to Prepare Raspberry Chia Jam
Making this raspberry chia jam is a breeze, and I’m here to guide you through it step-by-step. You’ll see just how simple it is to create this luscious spread that’s not only healthy but also bursting with flavor. Let’s get started!
Step 1: Cook the Raspberries
First things first, grab a medium saucepan and toss in those fresh raspberries along with the maple syrup. Set your heat to medium and let them mingle for about 5 minutes. You’ll want to stir occasionally to help the raspberries break down and release their juices. The aroma will be heavenly, and you’ll start to see it transform into a beautiful mixture!
Step 2: Add Chia Seeds and Lemon Juice
Once your raspberries are all soft and syrupy, take the saucepan off the heat. Now, it’s time to stir in the chia seeds and the splash of lemon juice. Trust me, this step is crucial! The chia seeds work their magic by thickening the jam, giving it that perfect spreadable consistency.
Step 3: Let it Sit
Now comes the hard part—waiting! Let the mixture sit for about 10 minutes. During this time, the chia seeds will absorb the liquid and thicken the jam up nicely. You can use this time to clean up your workspace or maybe even daydream about all the delicious ways you’ll use your raspberry chia jam!
Step 4: Store the Jam
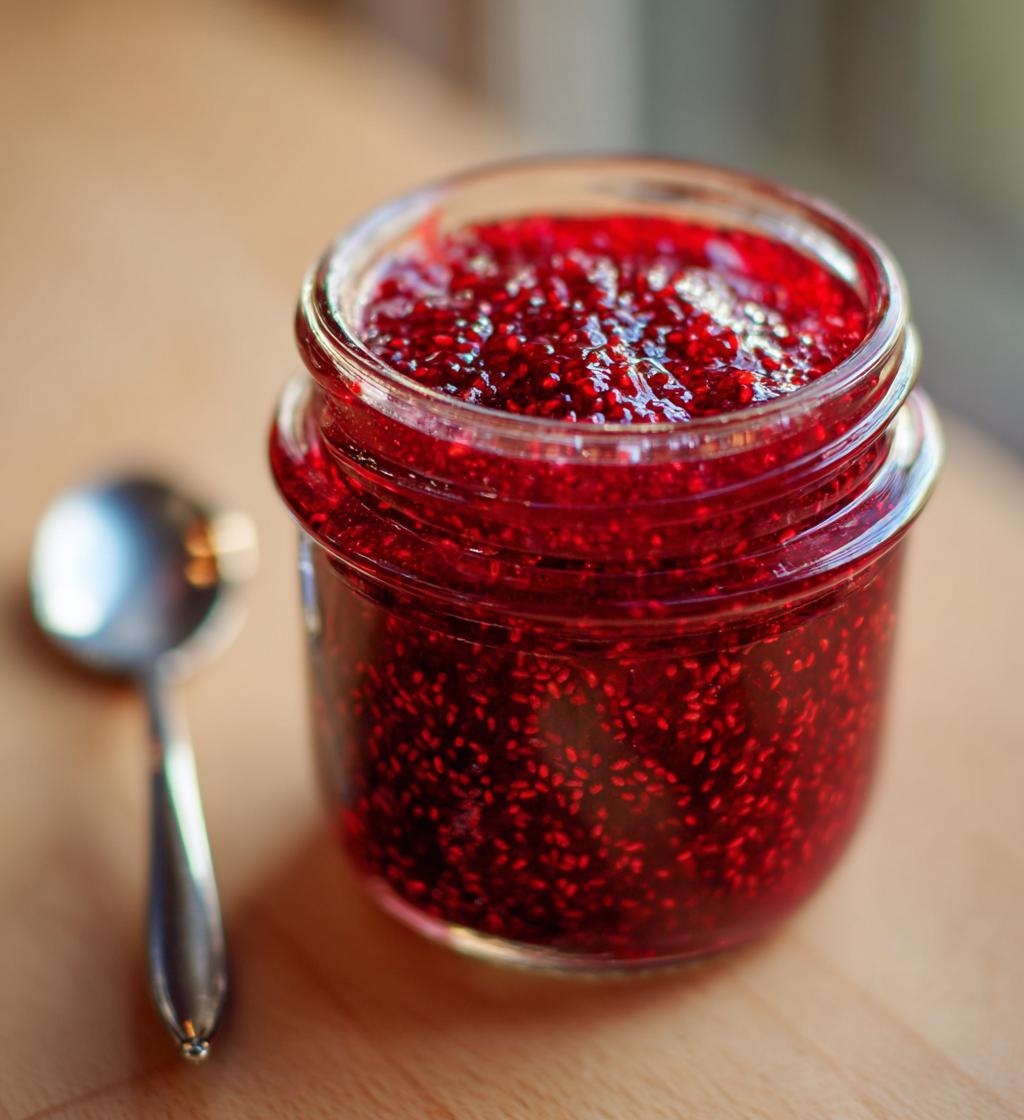
Once the jam has thickened to your liking, it’s time to transfer it to a clean jar. Just scoop it all in, seal it up, and pop it in the fridge. It’ll stay fresh for up to two weeks, though I doubt it’ll last that long—you’ll be too busy enjoying it on everything from toast to desserts!
Why You’ll Love This Recipe
- Healthy and Nutritious: Packed with antioxidants from the raspberries and fiber from the chia seeds, this jam is a guilt-free delight!
- Quick and Easy: You can whip this up in just 15 minutes, making it a fantastic last-minute addition to your breakfast or snack.
- Versatile Spread: Perfect on toast, stirred into yogurt, or even drizzled over desserts—this jam fits into any meal beautifully!
- Customizable Sweetness: Adjust the maple syrup to your taste, so you can make it as sweet or as subtle as you like!
- Vegan-Friendly: With all plant-based ingredients, this jam fits perfectly into a vegan lifestyle.
- No Preservatives: Unlike store-bought jams, mine is free from artificial additives and packed with real fruit goodness.
Tips for Success
Here are some of my top tips to make sure your raspberry chia jam turns out absolutely perfect every time! Trust me, a little extra attention can go a long way in achieving that ideal flavor and texture.
- Sweetness Adjustment: If you like your jam a bit sweeter, don’t hesitate to add a touch more maple syrup. Start with a teaspoon or so and taste as you go. You can always add more, but it’s hard to take it out once it’s in!
- Frozen Raspberries: If fresh raspberries aren’t available, feel free to use frozen ones! They work just as well and can be a great time-saver. Just let them thaw a bit before cooking, and they’ll break down beautifully.
- Experiment with Flavors: Want to mix things up? Try adding a pinch of cinnamon or a splash of vanilla extract to your raspberry chia jam. It adds a lovely depth of flavor that’s simply divine!
- Consistent Texture: If you find your jam is not thickening enough, you can let it sit a little longer. The chia seeds need time to absorb liquid, so don’t rush this step.
- Check for Freshness: Always use fresh ingredients for the best taste. If your raspberries look a bit sad, it might be worth it to grab a new batch for that vibrant flavor!
Variations
One of the best things about this raspberry chia jam is how versatile it is! You can easily tweak the flavors to keep things exciting. Here are some fun variations you might want to try:
- Mixed Berry Jam: Swap out some of the raspberries for blueberries, strawberries, or blackberries. The mix of berries adds a beautiful color and flavor complexity!
- Citrus Twist: Add the zest of an orange or lemon along with the lemon juice for a zesty kick that brightens the jam even more. It’s refreshing and delicious!
- Spiced Jam: Sprinkle in a pinch of cinnamon or nutmeg while cooking for a warm, spiced flavor that’s perfect for spreading on toast during colder months.
- Peach or Apricot Addition: Toss in some chopped fresh peaches or apricots during the cooking process for a sweet, summery vibe. They pair wonderfully with raspberries!
- Maple Vanilla: Swap out the maple syrup for honey (if not strictly vegan) or add a splash of vanilla extract to the mix for a rich, sweet flavor that’s simply irresistible.
- Herb-Infused: For a unique twist, try adding a few sprigs of fresh basil or mint while cooking. Strain them out before storing, and you’ll have a refreshing herbal jam!
Feel free to mix and match these ideas to create your perfect raspberry chia jam. The possibilities are endless, and I can’t wait for you to discover your new favorite flavor combination!
Storage & Reheating Instructions
Storing your raspberry chia jam is super easy! Once you’ve made this delightful spread, you’ll want to keep it fresh so you can enjoy it for days to come. Here’s how to do it:
First, make sure to transfer any leftovers into a clean, airtight jar or container. This helps keep the jam from absorbing any weird fridge odors and ensures it stays fresh. You can store it in the refrigerator for up to two weeks—though I doubt it’ll last that long with how delicious it is!
Now, if you find yourself with a bit of leftover jam (lucky you!), and you want to keep it around even longer, you can freeze it! Just spoon the jam into freezer-safe containers or ice cube trays. If using ice cube trays, once frozen, pop the jam cubes into a zip-top freezer bag. This way, you can grab a little bit whenever you need it. It’ll keep well in the freezer for up to two months.
When you’re ready to use your frozen raspberry chia jam, just thaw it overnight in the fridge. There’s no need to reheat it since it’s perfect to enjoy straight from the jar on toast or yogurt. But if you prefer it warmed, you can gently heat it on the stovetop over low heat, stirring until it reaches your desired temperature. Just be careful not to overcook it—this jam is best enjoyed fresh and fruity!
Nutritional Information
So, you might be wondering just how healthy this raspberry chia jam really is! Here’s a quick rundown of the nutritional values you can expect per tablespoon. Keep in mind that these are estimates based on the ingredients used, but it gives you a good idea of what you’re enjoying!
- Calories: 30
- Fat: 1g
- Saturated Fat: 0g
- Unsaturated Fat: 0g
- Trans Fat: 0g
- Carbohydrates: 7g
- Sugar: 4g
- Fiber: 1g
- Protein: 1g
- Sodium: 0mg
- Cholesterol: 0mg
With all those vibrant raspberries and nutrient-rich chia seeds, you can feel great about slathering this jam on everything! Enjoy the fruity goodness without the guilt, and know you’re treating yourself to something wholesome and delicious.
FAQ Section
Got questions about making your raspberry chia jam? Don’t worry, I’ve got you covered! Here are some of the most common inquiries I hear, along with my best answers to help you succeed in the kitchen.
Can I use a different sweetener instead of maple syrup?
Absolutely! If you’re not a fan of maple syrup, you can use honey (if you’re not strictly vegan), agave syrup, or even coconut sugar. Just remember to adjust the amount to your taste, as some sweeteners may be sweeter than others!
How long does the raspberry chia jam last?
Your homemade jam will stay fresh in the fridge for up to two weeks. Just make sure to keep it in a sealed jar to maintain its deliciousness! If you want to keep it longer, feel free to freeze it.
Can I use frozen raspberries?
You bet! Frozen raspberries work just as well as fresh ones in this recipe. Just let them thaw a bit before cooking, and you’ll be good to go. It’s a great way to enjoy this jam year-round!
Is it necessary to let the jam sit to thicken?
Yes! Giving the jam a 10-minute sit time is crucial for allowing the chia seeds to absorb the liquid and achieve that perfect jammy consistency. Don’t skip this step if you want a nice thick spread!
Can I double or halve the recipe?
Definitely! You can easily adjust the quantities to make more or less jam. Just keep the same ratios, and you’ll still end up with a delightful spread. Just make sure you have a suitably sized saucepan!
What if my jam isn’t thickening enough?
If you find your jam is still too runny after letting it sit, don’t panic! You can simmer it on the stovetop for a few more minutes to help it thicken further. Just keep stirring, and it should come together beautifully!
Can I add other fruits to this jam?
Absolutely! Feel free to experiment with other fruits like strawberries, blueberries, or even peaches. Just keep in mind that different fruits may alter the sweetness and texture, so adjust accordingly!
How should I store the jam?
Once your raspberry chia jam is cooled, transfer it to a clean, airtight jar. Store it in the fridge for up to two weeks, or freeze it for longer storage. Just remember to label it, so you know what deliciousness awaits inside!
Can I use this jam in baking?
For sure! This jam can be a delightful filling for pastries, cakes, or even as a topping for pancakes. The fruity flavor adds a nice touch to many baked goods, so feel free to get creative!
Print
Raspberry Chia Jam: A Simple 15-Minute Vegan Delight
- Prep Time: 10 minutes
- Cook Time: 5 minutes
- Total Time: 15 minutes
- Yield: 1 cup 1x
- Category: Spread
- Method: Stovetop
- Cuisine: American
- Diet: Vegan
Description
This raspberry chia jam is a healthy and easy spread. It’s perfect for toast, yogurt, or desserts.
Ingredients
- 2 cups fresh raspberries
- 1/4 cup maple syrup
- 1/4 cup chia seeds
- 1 tablespoon lemon juice
Instructions
- In a medium saucepan, combine raspberries and maple syrup over medium heat.
- Cook for about 5 minutes, stirring occasionally until raspberries break down.
- Remove from heat and stir in chia seeds and lemon juice.
- Let the mixture sit for 10 minutes to thicken.
- Transfer to a jar and refrigerate.
Notes
- Use fresh or frozen raspberries.
- Adjust sweetness by adding more or less maple syrup.
- Store in the fridge for up to two weeks.
Nutrition
- Serving Size: 1 tablespoon
- Calories: 30
- Sugar: 4g
- Sodium: 0mg
- Fat: 1g
- Saturated Fat: 0g
- Unsaturated Fat: 0g
- Trans Fat: 0g
- Carbohydrates: 7g
- Fiber: 1g
- Protein: 1g
- Cholesterol: 0mg
Keywords: raspberry chia jam, healthy jam, vegan spread