

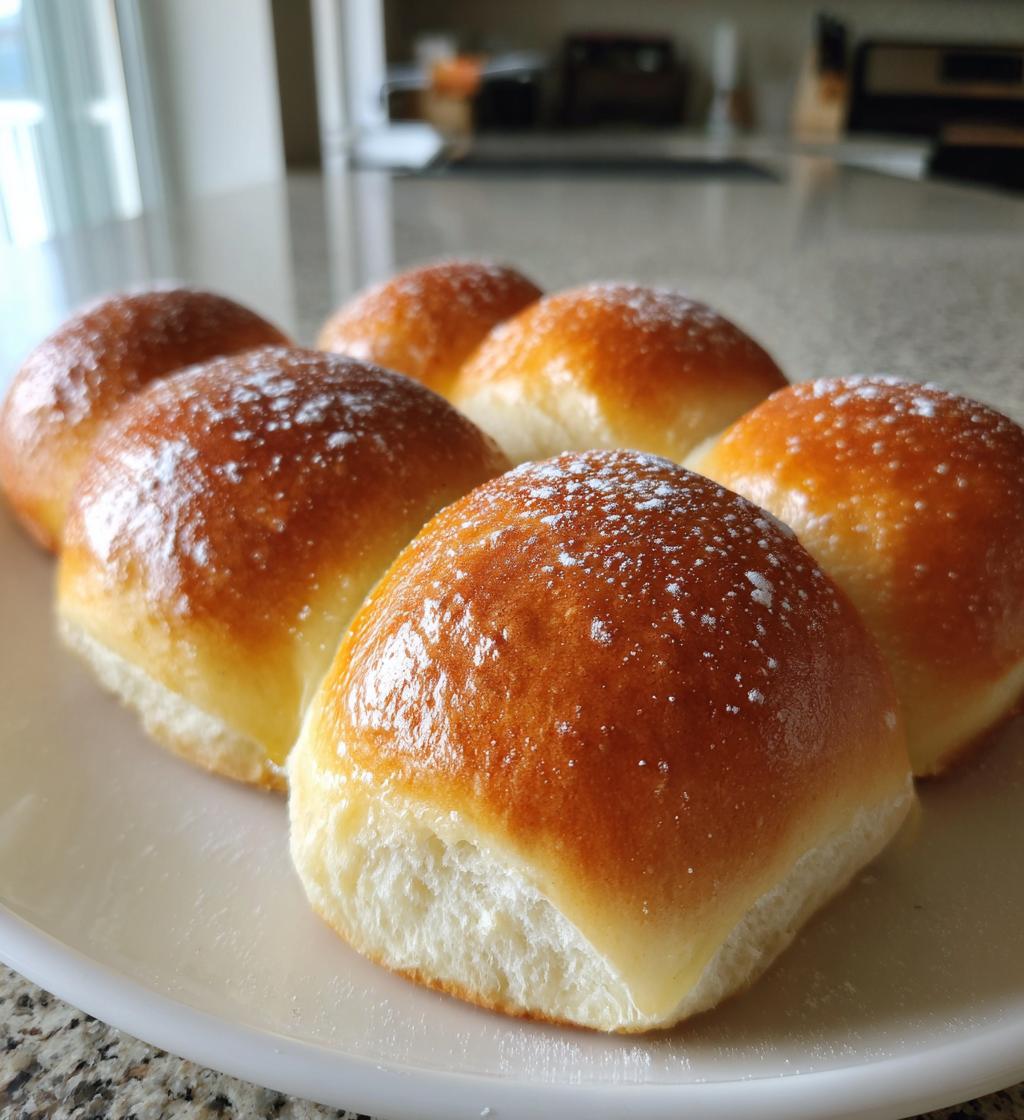
There’s something magical about the smell of freshly baked bread wafting through the house, isn’t there? It’s like a warm hug that wraps around you, inviting you to the table. My old fashioned yeast rolls are the epitome of that comfort! Soft, fluffy, and just begging to be slathered with butter, these rolls are perfect for any meal, whether it’s a casual family dinner or a festive holiday gathering. I remember my grandma making these rolls for Sunday dinners, filling the kitchen with love and laughter. Everyone would gather around the table, eagerly waiting for those golden-brown beauties to come out of the oven. Trust me, once you try making these rolls, they’ll become a cherished part of your family’s traditions too!
Ingredients List
To make my scrumptious old fashioned yeast rolls, you’ll need just a few simple ingredients that come together to create that soft, fluffy texture we all love. Here’s what you’ll need:
- 4 cups all-purpose flour
- 1 packet (2 1/4 tsp) active dry yeast
- 1 cup warm milk (about 110°F or 43°C)
- 1/4 cup sugar
- 1/4 cup unsalted butter, melted
- 1 tsp salt
- 2 large eggs
Make sure your milk is warm but not too hot—too much heat can kill the yeast! And don’t forget to have everything measured out and ready to go; it makes the process so much smoother. Happy baking!
How to Prepare Old Fashioned Yeast Rolls
Now that we’ve gathered our ingredients, let’s dive into the joy of making these old fashioned yeast rolls! I promise, the process is straightforward, and the result is utterly worth it. Ready? Let’s get rolling!
Step-by-Step Instructions
- First, grab a bowl and combine that warm milk with the sugar. It’s like a little science experiment! Add the active dry yeast and let it sit for about 5 minutes. This step is crucial; you want to see it get frothy and bubbly, which means your yeast is alive and kicking!
- While that’s doing its thing, take a large mixing bowl and whisk together the flour and salt. This helps distribute the salt evenly, which is key for flavor.
- Once your yeast mixture is bubbly and ready, stir in the melted butter and eggs. I find that mixing these wet ingredients together brings out a lovely richness in the rolls.
- Now, it’s time to combine the wet and dry mixtures. Gradually pour the yeast mixture into the flour mixture, stirring gently until it all comes together. Don’t rush this part; you want a nice, cohesive dough!
- Next, turn the dough out onto a lightly floured surface and knead it for about 5 minutes. This is where the magic happens! Kneading develops the gluten, making your rolls nice and fluffy. Just be careful not to over-knead—your dough should be smooth and elastic, not tough.
- Once you’ve kneaded it to perfection, place the dough in a greased bowl and cover it with a clean kitchen towel. Let it rise in a warm spot for about 1 hour, or until it’s doubled in size. This is my favorite part—seeing that dough puff up makes me giddy!
- After an hour, gently punch down the dough to release the air. Don’t worry; it won’t hurt its feelings! Divide the dough into 12 equal pieces and shape them into rolls. Place those beautiful rolls into a greased baking dish, cover them again, and let them rise for another 30 minutes.
- Finally, preheat your oven to 375°F (190°C). Once the rolls have risen nicely, pop them in the oven and bake for about 15-20 minutes, or until they’re golden brown. Oh, the smell that fills your kitchen will be heavenly!
And there you have it! Just a little time and love, and you’ll have the most delightful old fashioned yeast rolls ready to be devoured. Can’t wait for you to try them!
Tips for Success
Alright, let’s make sure your old fashioned yeast rolls turn out perfectly every time! I’ve picked up a few handy tips along the way that I’m excited to share with you. Trust me, these little nuggets of wisdom will elevate your roll game!
- Kneading Technique: When kneading, use the heel of your hand to push the dough away from you, then fold it back towards you. Keep it gentle but firm; you want to develop that gluten without overdoing it. If the dough feels sticky, sprinkle a little more flour on your work surface, but don’t go overboard. Too much flour can lead to dense rolls!
- Optimal Rising Conditions: Yeast loves warmth! If your kitchen is cold, consider placing the dough in a slightly warm oven (just turn it on for a minute, then turn it off) or near a sunny window. Covering the bowl with a towel traps warmth and moisture, helping your dough rise beautifully.
- Check Your Yeast: Always make sure your yeast is fresh! If it doesn’t bubble while proofing in the warm milk, it’s time to grab a new packet. Dead yeast means flat rolls, and nobody wants that!
- Don’t Overbake: Keep an eye on those rolls as they bake! Ovens can vary, so start checking around the 15-minute mark. They should be golden brown on top and sound hollow when tapped on the bottom. If you overbake them, your rolls will lose that soft, fluffy texture we’re after.
- Butter Brushing: After pulling the rolls out of the oven, brush the tops with melted butter for that extra touch of flavor and shine. It not only adds richness but also gives them a beautiful finish!
With these tips in your back pocket, you’re well on your way to making the most scrumptious old fashioned yeast rolls ever! Happy baking, and enjoy the delightful journey of bread-making!
Why You’ll Love This Recipe
Let me tell you, making old fashioned yeast rolls is one of the best decisions you can make in the kitchen! Here are just a few reasons why you’ll adore this recipe:
- Quick Preparation: With just a bit of kneading and rising time, these rolls come together faster than you might think. Perfect for a last-minute dinner idea!
- Delightful Flavor: They have that classic homemade taste that’s slightly sweet and buttery, making them irresistible. Seriously, one roll is never enough!
- Fluffy Texture: Each bite of these rolls is soft and airy, making them the perfect complement to any meal. You’ll be amazed at how light they are!
- Versatility: These rolls are great for any occasion—served alongside dinner, used for sliders, or even enjoyed with a dollop of jam for breakfast. The possibilities are endless!
- Family Favorite: Once you serve these rolls, they’ll quickly become a staple in your household. Everyone will be asking for seconds (and maybe thirds) at the dinner table!
- Homemade Goodness: There’s something incredibly satisfying about making bread from scratch. You’ll impress your family and friends, and the compliments will keep coming!
Trust me, after you whip up these old fashioned yeast rolls, they’ll be a regular feature at your meals. Get ready to enjoy some serious comfort food goodness!
Nutritional Information
When it comes to enjoying my old fashioned yeast rolls, it’s nice to know what you’re indulging in! Here’s a breakdown of the estimated nutritional information per roll:
- Calories: 120
- Fat: 4g
- Saturated Fat: 2g
- Unsaturated Fat: 1g
- Trans Fat: 0g
- Cholesterol: 30mg
- Sodium: 150mg
- Total Carbohydrates: 18g
- Fiber: 1g
- Protein: 3g
- Sugar: 3g
Keep in mind that these values are estimates and can vary depending on the specific ingredients you use. Enjoy these rolls in moderation, and savor every fluffy bite!
Storage & Reheating Instructions
Once you’ve baked a batch of my delicious old fashioned yeast rolls, it’s important to store them properly so they stay soft and fresh for as long as possible! Here’s how to do it:
- Storage: Allow the rolls to cool completely on a wire rack. Once cooled, place them in an airtight container. This helps keep that delightful fluffiness intact! If you don’t have an airtight container, you can also wrap them tightly in plastic wrap or aluminum foil. They’ll stay fresh at room temperature for up to 3 days.
- Freezing: Want to save some for later? You can freeze these rolls after they’ve cooled. Just wrap each roll individually in plastic wrap and then place them in a freezer-safe bag or container. They’ll keep well for up to 2 months. When you’re ready to enjoy them, simply thaw them in the refrigerator overnight or let them sit at room temperature for a few hours.
Now, let’s talk about reheating because there’s nothing like a warm roll fresh out of the oven!
- Oven Reheating: Preheat your oven to 350°F (175°C). Place the rolls on a baking sheet and cover them loosely with aluminum foil to prevent them from drying out. Heat for about 10-15 minutes or until warmed through. If you’d like, you can brush them with a little melted butter before reheating for that extra touch of flavor!
- Microwave Reheating: If you’re in a hurry, you can reheat a roll in the microwave! Just place one roll on a microwave-safe plate and cover it with a damp paper towel. Heat for about 15-20 seconds. Be careful not to overdo it, or you’ll end up with a tough roll instead of a soft one!
With these storage and reheating tips, you can enjoy your old fashioned yeast rolls anytime you crave that warm, homemade goodness. Happy eating!
FAQ Section
Got questions about making those delightful old fashioned yeast rolls? Don’t worry, I’ve got you covered! Here are some common inquiries I’ve encountered, along with my best answers to help you out:
Can I use instant yeast instead of active dry yeast?
Absolutely! You can substitute instant yeast for active dry yeast in a 1:1 ratio. The great thing about instant yeast is that you can mix it directly into the dry ingredients without proofing it first. Just skip that step and combine everything as usual!
What can I do if my dough isn’t rising?
If your dough isn’t rising, it could be due to a few factors. First, check if your yeast is fresh—if it doesn’t bubble in warm milk, it’s time for a new packet. Also, make sure your rising environment is warm enough; yeast loves warmth! If your kitchen is chilly, try placing the dough in a slightly warm oven or near a sunny window.
Can I make the dough ahead of time?
Yes, you can! If you want to prepare the dough in advance, go ahead and knead it, then let it rise until doubled in size. After that, you can punch it down and store it in the fridge for up to 24 hours. Just bring it back to room temperature and allow it to rise again before shaping and baking.
What’s the best way to serve these rolls?
These rolls are incredibly versatile! You can serve them warm as a side to your favorite soups or stews, use them for sliders, or even enjoy them with a spread of butter and jam for breakfast. They’re perfect for any meal, and I bet your family will love them no matter how you serve them!
Can I add herbs or cheese to the dough for extra flavor?
Absolutely! Feel free to customize your rolls by adding herbs like rosemary or thyme into the dough, or even mixing in shredded cheese for a cheesy twist. Just remember to adjust the flour slightly if you add extra ingredients to maintain the right dough consistency. Get creative!
Final Thoughts
I can’t wait for you to experience the joy of making these old fashioned yeast rolls! They’re truly a labor of love, and the satisfaction of pulling a batch of warm, fluffy rolls out of the oven is unmatched. I’d love to hear about your baking adventures, so don’t hesitate to drop a comment below! Have you made these rolls before? What variations did you try? Or maybe you’ve got some tips of your own to share? Let’s chat!
And remember, every time you bake these rolls, you’re not just making bread; you’re creating memories and bringing comfort to your table. So, grab your apron, roll up your sleeves, and let’s create some delicious moments together. Happy baking, my friends!
Print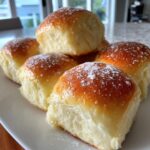
Old Fashioned Yeast Rolls: 7 Steps to Comfort Food Bliss
- Prep Time: 20 minutes
- Cook Time: 20 minutes
- Total Time: 1 hour 40 minutes
- Yield: 12 rolls 1x
- Category: Bread
- Method: Baking
- Cuisine: American
- Diet: Vegetarian
Description
Old fashioned yeast rolls are soft, fluffy, and perfect for any meal.
Ingredients
- 4 cups all-purpose flour
- 1 packet (2 1/4 tsp) active dry yeast
- 1 cup warm milk
- 1/4 cup sugar
- 1/4 cup unsalted butter, melted
- 1 tsp salt
- 2 large eggs
Instructions
- In a bowl, combine warm milk and sugar. Add yeast and let it sit for 5 minutes.
- In a large bowl, mix flour and salt.
- Add melted butter and eggs to the yeast mixture.
- Combine the wet and dry ingredients.
- Knead the dough for about 5 minutes until smooth.
- Place the dough in a greased bowl, cover, and let it rise for 1 hour.
- Punch down the dough and shape it into rolls.
- Place rolls in a greased baking dish and let them rise for 30 minutes.
- Bake at 375°F (190°C) for 15-20 minutes until golden brown.
Notes
- Store in an airtight container for freshness.
- Can be frozen after baking for later use.
- Brush with melted butter after baking for added flavor.
Nutrition
- Serving Size: 1 roll
- Calories: 120
- Sugar: 3g
- Sodium: 150mg
- Fat: 4g
- Saturated Fat: 2g
- Unsaturated Fat: 1g
- Trans Fat: 0g
- Carbohydrates: 18g
- Fiber: 1g
- Protein: 3g
- Cholesterol: 30mg
Keywords: old fashioned yeast rolls, soft rolls, homemade rolls