
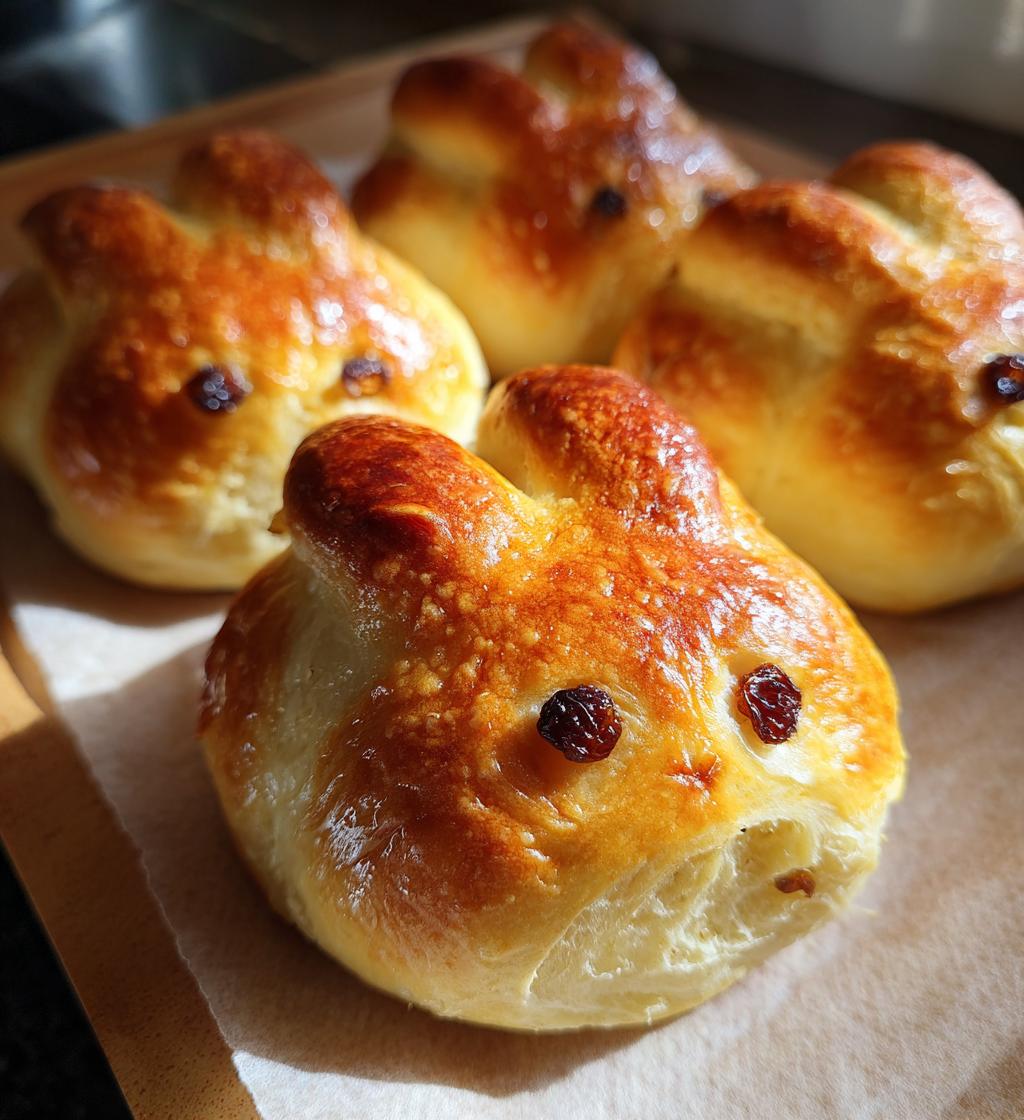
Oh my goodness, have you ever made bunny buns for Easter? They’re like little fluffy clouds that bring pure joy to the celebration! I remember the first time I made these adorable treats with my kids; we giggled as we shaped the dough and added raisins for eyes. The smell of them baking is just heavenly, filling the house with a warmth that makes everything feel festive. Trust me, when you pull those golden-brown bunny buns out of the oven, you’ll be met with squeals of delight! They’re perfect for brunch, an Easter egg hunt, or just to enjoy with your loved ones while sharing stories. So, let’s hop into this delightful recipe together!
Ingredients List
- 3 cups all-purpose flour
- 1/4 cup sugar
- 1 packet (about 2 1/4 teaspoons) instant yeast
- 1/2 teaspoon salt
- 1 cup warm milk (about 110°F or 43°C)
- 1/4 cup unsalted butter, melted
- 1 large egg
- 1/2 cup raisins (for eyes)
- 1 beaten egg (for egg wash)
How to Prepare Bunny Buns for Easter
Making bunny buns for Easter is a joyful process that you’ll absolutely love! Let’s hop right into it with these easy steps!
Step 1: Mix Dry Ingredients
First up, grab a big bowl and add 3 cups of all-purpose flour, 1/4 cup of sugar, 1 packet of instant yeast, and 1/2 teaspoon of salt. I like to whisk these together to ensure everything is evenly distributed. This step is crucial because it helps activate the yeast properly, giving your buns that fluffy texture we all adore!
Step 2: Combine Wet Ingredients
Now it’s time to add the fun stuff! Pour in 1 cup of warm milk (about 110°F or 43°C), 1/4 cup of melted unsalted butter, and 1 large egg into your dry mixture. Stir everything together with a wooden spoon or spatula until a dough starts to form. It should be slightly sticky but pull away from the sides of the bowl. Don’t worry if it seems a bit rough at this stage; we’ll smooth it out soon!
Step 3: Knead the Dough
Lightly flour your countertop and transfer the dough onto it. Now, it’s kneading time! Knead the dough for about 5 minutes, pushing it down and folding it over itself. You want it to become smooth and elastic. If it’s too sticky, sprinkle a bit more flour as you go. Trust me, this is where the magic happens!
Step 4: Let the Dough Rise
Once your dough is nice and smooth, place it in a greased bowl and cover it with a clean kitchen towel. Let it rise in a warm spot for about 1 hour. This step is super important because it allows the dough to double in size, making those buns light and airy!
Step 5: Shape the Bunny Buns for Easter
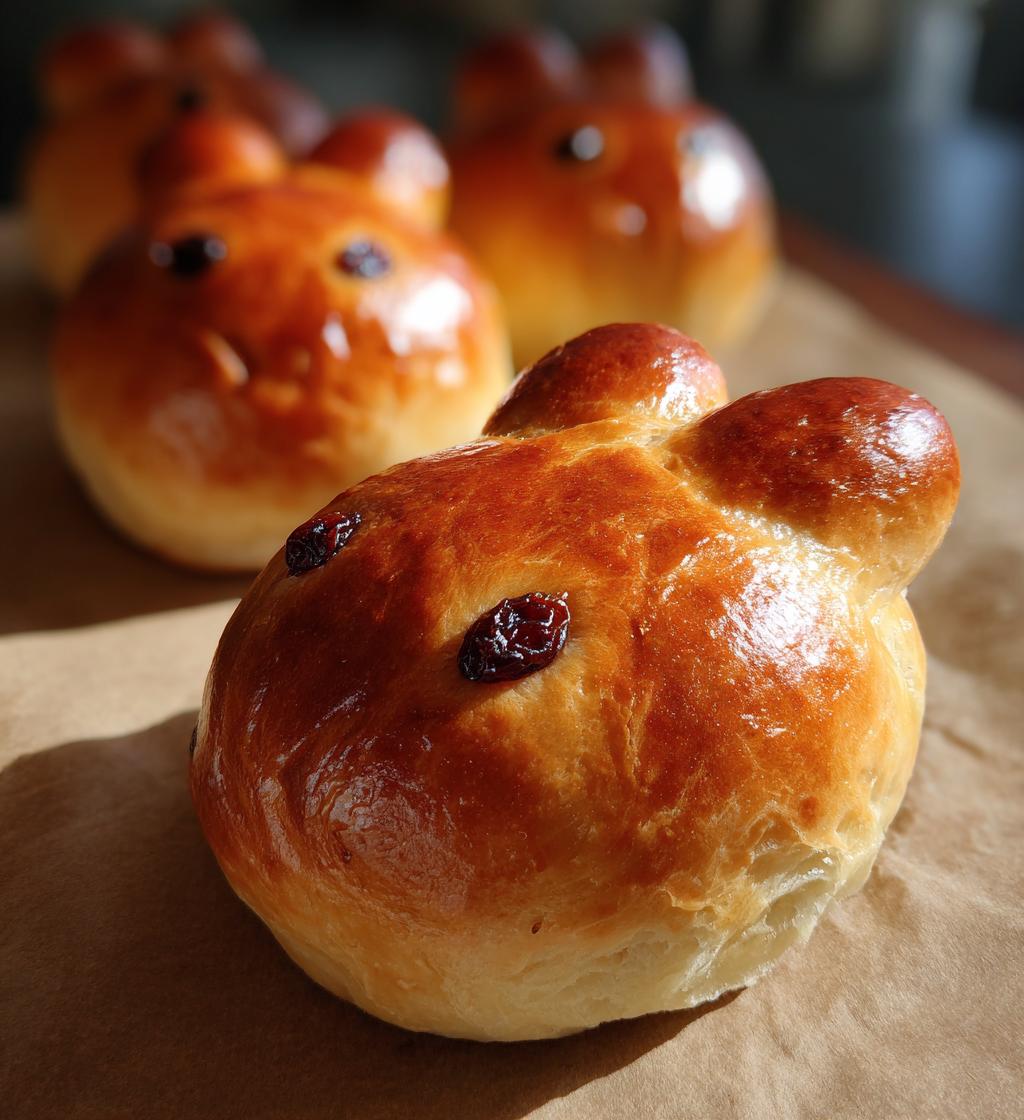
After the dough has risen, punch it down gently to release the air. Divide the dough into small balls—about 12 should do. Now, here’s the fun part: shape each ball into a bunny! You can form the body and head, and then take a small piece for the ears. Use raisins for the eyes by gently pressing them into the dough. They’ll look so cute!
Step 6: Final Rise and Bake
Place your adorable bunny buns on a baking sheet lined with parchment paper. Cover them again and let them rise for another 30 minutes. Preheat your oven to 350°F (175°C) while you wait. Once they’ve puffed up, brush the tops with the beaten egg for that golden sheen. Bake for about 15-20 minutes until they’re golden brown and smell heavenly! Let them cool slightly before serving, and prepare for the smiles!
Tips for Success
To make sure your bunny buns for Easter turn out absolutely perfect, I’ve got some handy tips to share! First, pay attention to the temperature of your ingredients—it’s crucial! The milk should be warm but not boiling; around 110°F (43°C) is ideal to activate the yeast without killing it. If the milk’s too hot, your buns will end up flat, and nobody wants that!
Also, if you’re feeling adventurous, swap out the raisins for chocolate chips for a sweeter twist! Kids love them, and honestly, who can resist a chocolate bunny? Another tip: when you’re kneading the dough, don’t be afraid to sprinkle a little extra flour if it feels too sticky. Just remember, a little stickiness is okay—it’s all part of creating that fluffy texture!
Lastly, if you have any leftovers (which is rare in my house!), store them in an airtight container. They can stay fresh for a few days, but trust me, they’re best enjoyed warm right out of the oven. Happy baking!
Nutritional Information Disclaimer
Hey there, before you dive into enjoying your delightful bunny buns for Easter, I just want to remind you that nutritional information can vary based on the specific ingredients and brands you use. So, while I’ve provided some general numbers for you, they aren’t set in stone. I encourage you to consider your own ingredients when calculating nutrition, especially if you’re watching calories or other dietary needs. It’s all about making these treats fit your lifestyle while enjoying every fluffy bite. Happy baking and eating!
FAQ Section
Can I make bunny buns for Easter in advance?
Absolutely! You can prepare the dough a day ahead. Just follow the steps up to the first rise, then cover the bowl tightly with plastic wrap and refrigerate it overnight. When you’re ready to bake, take the dough out, let it come to room temperature, and then shape those adorable bunny buns! This way, you can enjoy the fun of decorating them fresh on Easter morning!
What can I use instead of raisins for the eyes?
If raisins aren’t your thing, don’t worry! Chocolate chips make a fantastic alternative for those bunny eyes, adding a sweet surprise. You could also use mini marshmallows or even small candies if you want to get creative. The kids will love choosing their favorite toppings, and it adds a fun twist to the classic recipe!
How can I make bunny buns for Easter healthier?
To give your bunny buns a healthier spin, you can definitely swap out some ingredients! Try using whole wheat flour instead of all-purpose flour for a boost in fiber. You can also reduce the sugar a bit—maybe down to 2 tablespoons instead of 1/4 cup. If you want to cut back on fat, consider using applesauce instead of butter; it keeps them moist while lowering the calories. Just remember, you might need to adjust the flour slightly to get the right dough consistency. Happy baking with a healthier twist!
Serving Suggestions
Oh, the possibilities are endless when it comes to serving these adorable bunny buns for Easter! They’re not just cute; they’re also versatile and can be enjoyed in so many delightful ways. Picture this: a lovely Easter brunch spread with fresh fruit, scrambled eggs, and a side of your fluffy bunny buns. They make the perfect accompaniment to a warm, buttery dish, adding a touch of sweetness to the savory flavors.
If you’re hosting an Easter egg hunt, these bunny buns can be a delicious treat for the kids afterward. You could even set up a little decorating station with icing and sprinkles for them to personalize their buns! Trust me, it’ll keep them entertained and make the treats even more special.
For a cozy family gathering, serve the bunny buns warm with a dollop of butter or a drizzle of honey. You can also pair them with a light fruit compote to elevate the sweetness. And let’s not forget about dessert! Slice them in half and fill them with whipped cream and fresh strawberries for a delightful springtime dessert. Yum!
Whether you’re celebrating with family, friends, or a festive brunch, these bunny buns will surely be the star of the table. So, get creative and enjoy every fluffy bite during your Easter celebrations!
Storage & Reheating Instructions
So, you’ve made these adorable bunny buns for Easter and, if by some miracle, you have leftovers (which is rare in my home), storing them properly is key to keeping that fluffy goodness! First, let your buns cool completely on a wire rack. Once they’re cool, grab an airtight container—this is super important to keep them fresh. You can stack them gently, but try not to squish their cute shapes!
These bunny buns can be stored at room temperature for about 2-3 days. If you want to keep them longer, pop them in the fridge for up to a week. Just remember, they might lose a bit of their fluffiness in the fridge, but don’t worry! You can easily revive them.
When it’s time to enjoy them again, here’s my secret to reheating: preheat your oven to 350°F (175°C). Wrap the bunny buns in aluminum foil to keep them from drying out, and place them in the oven for about 10-15 minutes. This will warm them through while keeping that delightful soft texture. If you’re in a hurry, you can also microwave them for about 15-20 seconds, but I recommend the oven for the best results.
Trust me, a warm bunny bun with a pat of butter is pure bliss! Enjoy every last fluffy bite!
Print
Bunny Buns for Easter: 5 Steps to Pure Joy
- Prep Time: 20 minutes
- Cook Time: 20 minutes
- Total Time: 1 hour 40 minutes
- Yield: 12 bunny buns 1x
- Category: Baked Goods
- Method: Baking
- Cuisine: American
- Diet: Vegetarian
Description
Soft and fluffy bunny-shaped buns perfect for Easter celebrations.
Ingredients
- 3 cups all-purpose flour
- 1/4 cup sugar
- 1 packet instant yeast
- 1/2 teaspoon salt
- 1 cup warm milk
- 1/4 cup unsalted butter, melted
- 1 large egg
- 1/2 cup raisins (for eyes)
- 1 beaten egg (for egg wash)
Instructions
- In a bowl, mix flour, sugar, yeast, and salt.
- Add warm milk, melted butter, and egg. Stir until dough forms.
- Knead dough on a floured surface for about 5 minutes.
- Place dough in a greased bowl, cover, and let rise for 1 hour.
- Punch down the dough and divide into small balls.
- Shape each ball into a bunny and place on a baking sheet.
- Insert raisins for eyes.
- Cover and let rise for another 30 minutes.
- Preheat oven to 350°F (175°C).
- Brush buns with beaten egg and bake for 15-20 minutes.
- Let cool before serving.
Notes
- Ensure the milk is warm, not hot, to activate the yeast.
- You can use chocolate chips instead of raisins for eyes.
- Store leftovers in an airtight container.
Nutrition
- Serving Size: 1 bun
- Calories: 180
- Sugar: 5g
- Sodium: 150mg
- Fat: 6g
- Saturated Fat: 3g
- Unsaturated Fat: 2g
- Trans Fat: 0g
- Carbohydrates: 28g
- Fiber: 1g
- Protein: 4g
- Cholesterol: 30mg
Keywords: bunny buns for easter