
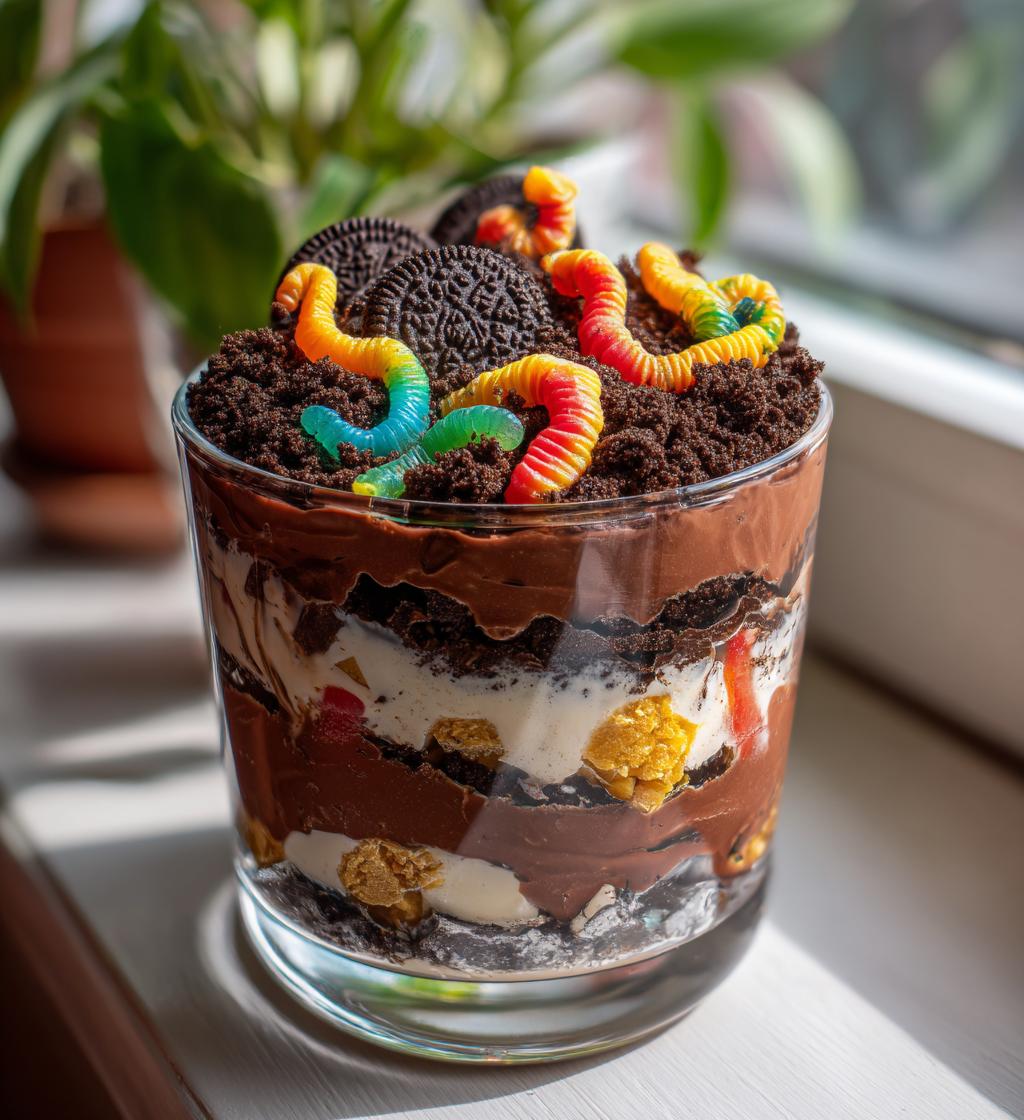
Oh my goodness, let me tell you about the Easter dirt cake! It’s one of those desserts that brings a huge smile to everyone’s face—kids and adults alike! I remember the first time I made it for an Easter gathering. The kids were giggling as I layered everything, and when it was finally time to serve, the excitement in the room was palpable. It looks like a fun little garden, with gummy worms peeking out and all that chocolate goodness resembling rich soil. Plus, it’s so easy to whip up! No baking required, just a bit of mixing and layering. It’s the perfect way to celebrate the holiday with a playful twist, and trust me, your family and friends will be talking about it long after the last slice is gone. Get ready for a delightful combo of flavors that just screams springtime fun!

Ingredients List
- 1 package (15.35 oz) chocolate sandwich cookies (Oreos, crushed)
- 1/2 cup unsalted butter, softened
- 1 package (8 oz) cream cheese, softened
- 1 cup powdered sugar
- 2 cups whipped topping (like Cool Whip)
- 1 package (4 oz) instant chocolate pudding mix
- 3 cups milk
- Gummy worms for decoration
- Edible grass (optional, for extra fun!)
How to Prepare Instructions
Getting ready to make this Easter dirt cake is so much fun! Let’s dive into the steps that will lead you to this playful and delicious dessert. Trust me, it’s easier than it looks!
Preparing the Cookie Base
First things first, you’ll want to crush those chocolate sandwich cookies. I usually pop them into a zip-top bag and use a rolling pin to crush them into fine crumbs. You want them to look like dirt, so don’t be shy! Once crushed, set aside about a cup of the crumbs for later—this will be your topping. Now, grab a dish (I love using a 9×13 inch one) and layer half of the remaining cookie crumbs at the bottom, pressing them down a bit to create a solid base.
Making the Cream Cheese Mixture
In a mixing bowl, beat together the softened cream cheese and butter until it’s nice and smooth—about 2 minutes is perfect. You want it to be creamy and free of lumps. Next, add in the powdered sugar and mix until it’s fully incorporated and fluffy. Then, gently fold in the whipped topping until everything is blended together. This step is crucial, as it gives the cake that light, airy texture. You’ll be left with a dreamy, creamy mixture that will be the heart of your cake!
Combining Ingredients
Now, let’s make the chocolate pudding! In another bowl, whisk together the instant chocolate pudding mix and milk. Keep whisking until it thickens up—this usually takes about 2 minutes. Once it’s thick, fold it into your cream cheese mixture. Make sure to mix thoroughly, so there are no streaks of pudding or cream cheese left. Everything should be beautifully combined, creating a rich, chocolatey filling!
Assembling the Cake
Now comes the fun part—layering! Start by spreading the pudding mixture evenly over the cookie base in your dish. Then, sprinkle the rest of your cookie crumbs on top, creating a lovely “dirt” layer. Finally, it’s time to decorate! Toss on those gummy worms and sprinkle some edible grass if you’re using it. It’ll look like a little garden, and I promise, it’ll be the star of your Easter celebration. Now, cover the dish and pop it in the fridge to chill for at least 2 hours. This helps everything set perfectly and makes it even more delicious!
Why You’ll Love This Recipe
- Quick and easy preparation—perfect for last-minute dessert needs!
- Fun for kids and adults alike; everyone loves digging into this playful treat!
- No baking required—just mix and layer for a stress-free dessert!
- Customizable with different ingredients; try different cookie flavors or add your favorite candies!
- Perfect for Easter celebrations, bringing a festive and whimsical touch to your gathering!
Tips for Success
Ah, the little touches that make your Easter dirt cake absolutely perfect! Here are my top tips to ensure your dessert turns out fabulously every time:
- Chill it well: Don’t skip the chilling time! I recommend letting the cake sit in the fridge for at least 2 hours, but if you can hold off for 4 hours or even overnight, it gets even better. The flavors meld beautifully, and the texture becomes that much creamier.
- Cookie substitutions: Feel free to get creative with your cookie base! While Oreos are classic, you can experiment with chocolate chip cookies, peanut butter cookies, or even graham crackers for a different flavor twist. Just keep in mind that the texture and taste will change a bit.
- Decorate like a pro: When it comes to decoration, the more, the merrier! Use a mix of gummy worms, chocolate rocks, and even edible flowers for a springtime vibe. It’s all about making it look like a whimsical garden!
- Make it your own: Want a different flavor? You could add a layer of crushed fruit, like strawberries or raspberries, in between the cookie base and the pudding mixture. It adds a lovely freshness that balances the richness!
- Leftover love: If you have leftovers (which is a rarity!), store them in an airtight container in the fridge for up to 3 days. Just note that the cookie crumbs may get a bit soggy, but it’ll still taste delicious!
With these tips, you’ll be making the most delightful Easter dirt cake that everyone will rave about long after the celebration is over. Enjoy the process and have fun with it!
Nutritional Information
Here’s a quick glance at the nutritional values for a slice of this delightful Easter dirt cake! Keep in mind that these values are estimates based on standard ingredient brands, so they might vary a bit:
- Calories: 250
- Fat: 15g
- Saturated Fat: 8g
- Trans Fat: 0g
- Cholesterol: 30mg
- Sodium: 250mg
- Carbohydrates: 28g
- Fiber: 1g
- Sugar: 15g
- Protein: 3g
This treat is rich and satisfying, making it a perfect indulgence for your Easter festivities! Enjoy every delicious bite!
FAQ Section
Can I use different cookie flavors for this recipe?
Absolutely! While Oreos are a classic choice, feel free to experiment with chocolate chip cookies, peanut butter cookies, or even graham crackers. Just keep in mind that the final taste and texture will vary a bit!
How long can I store leftovers?
If you happen to have any leftovers (which is rare with this dessert!), you can store them in an airtight container in the fridge for up to 3 days. Just remember, the cookie crumbs may get a little soggy, but it’ll still be delicious!
Can I make this dessert in advance?
Yes! This Easter dirt cake is perfect for making a day ahead. Just let it chill in the fridge overnight to let all the flavors meld together beautifully. It’ll be ready to impress your guests when you serve it!
Is there a gluten-free version?
Definitely! Simply substitute the chocolate sandwich cookies with gluten-free alternatives, like gluten-free chocolate cookies or even crushed gluten-free graham crackers. Just check the labels to ensure they meet your dietary needs!
What can I substitute for gummy worms?
If gummy worms aren’t your thing, no problem! You could use chocolate rocks, candy flowers, or even colorful sprinkles to decorate. Get creative and make it your own—the garden can have whatever fun toppings you like!
Storage & Reheating Instructions
Storing your Easter dirt cake properly is key to keeping it fresh and delicious! If you happen to have any leftovers (which I doubt, because it’s just so good!), here’s what you need to do:
- Refrigeration: Make sure to cover the dessert tightly with plastic wrap or transfer it to an airtight container. This will help keep it fresh and prevent any odors from seeping in from your fridge. It’ll last for up to 3 days in the refrigerator.
- Freezing: If you want to save it for a later date, you can freeze the cake! Just cut it into slices, wrap each slice in plastic wrap, and then place them in a freezer-safe bag. It should keep well for about a month. When you’re ready to enjoy it, simply thaw it in the fridge overnight.
As for reheating, there’s really no need to heat this dessert up! It’s best enjoyed chilled, so just serve it straight from the fridge. If you’ve frozen it, let it thaw completely before serving to get that perfect creamy texture back. Enjoy every bite of your Easter dirt cake!
Print
Easter Dirt Cake: 7 Reasons You’ll Fall in Love
- Prep Time: 30 minutes
- Cook Time: 0 minutes
- Total Time: 2 hours 30 minutes
- Yield: 12 servings 1x
- Category: Dessert
- Method: No-bake
- Cuisine: American
- Diet: Vegetarian
Description
A fun and tasty dessert that resembles dirt, perfect for Easter celebrations.
Ingredients
- 1 package chocolate sandwich cookies (Oreos)
- 1/2 cup butter, softened
- 1 package cream cheese (8 oz), softened
- 1 cup powdered sugar
- 2 cups whipped topping
- 1 package instant chocolate pudding mix (4 oz)
- 3 cups milk
- Gummy worms for decoration
- Edible grass (optional)
Instructions
- Crush the chocolate sandwich cookies into fine crumbs.
- In a bowl, beat the cream cheese and butter until smooth.
- Add powdered sugar and mix until incorporated.
- Fold in the whipped topping.
- In another bowl, whisk the chocolate pudding mix with milk until thickened.
- Combine the pudding with the cream cheese mixture.
- Layer half of the cookie crumbs at the bottom of a dish.
- Spread the pudding mixture over the crumbs.
- Top with the remaining cookie crumbs.
- Decorate with gummy worms and edible grass.
Notes
- Chill for at least 2 hours before serving.
- Use different cookie flavors for a twist.
- Store leftovers in the refrigerator.
Nutrition
- Serving Size: 1 slice
- Calories: 250
- Sugar: 15g
- Sodium: 250mg
- Fat: 15g
- Saturated Fat: 8g
- Unsaturated Fat: 5g
- Trans Fat: 0g
- Carbohydrates: 28g
- Fiber: 1g
- Protein: 3g
- Cholesterol: 30mg
Keywords: Easter dirt cake, chocolate dessert, no-bake dessert