
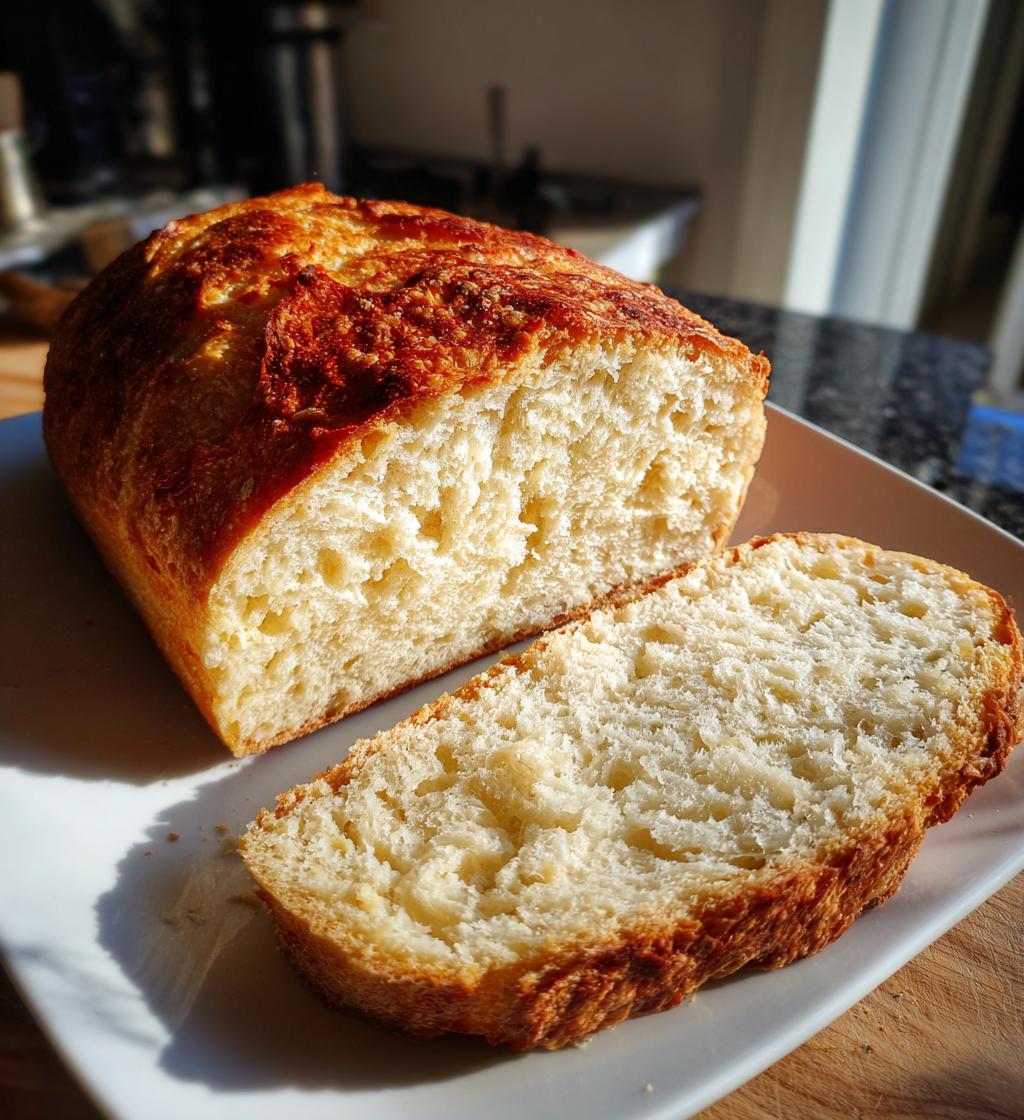
Oh wow, let me tell you about my new obsession—air fryer bread! Seriously, if you think making bread is a long, complicated process, think again! This quick and easy air fryer bread recipe is a total game changer. You won’t believe how effortlessly it comes together, and the best part? It’s done in a fraction of the time it takes to bake in a traditional oven!
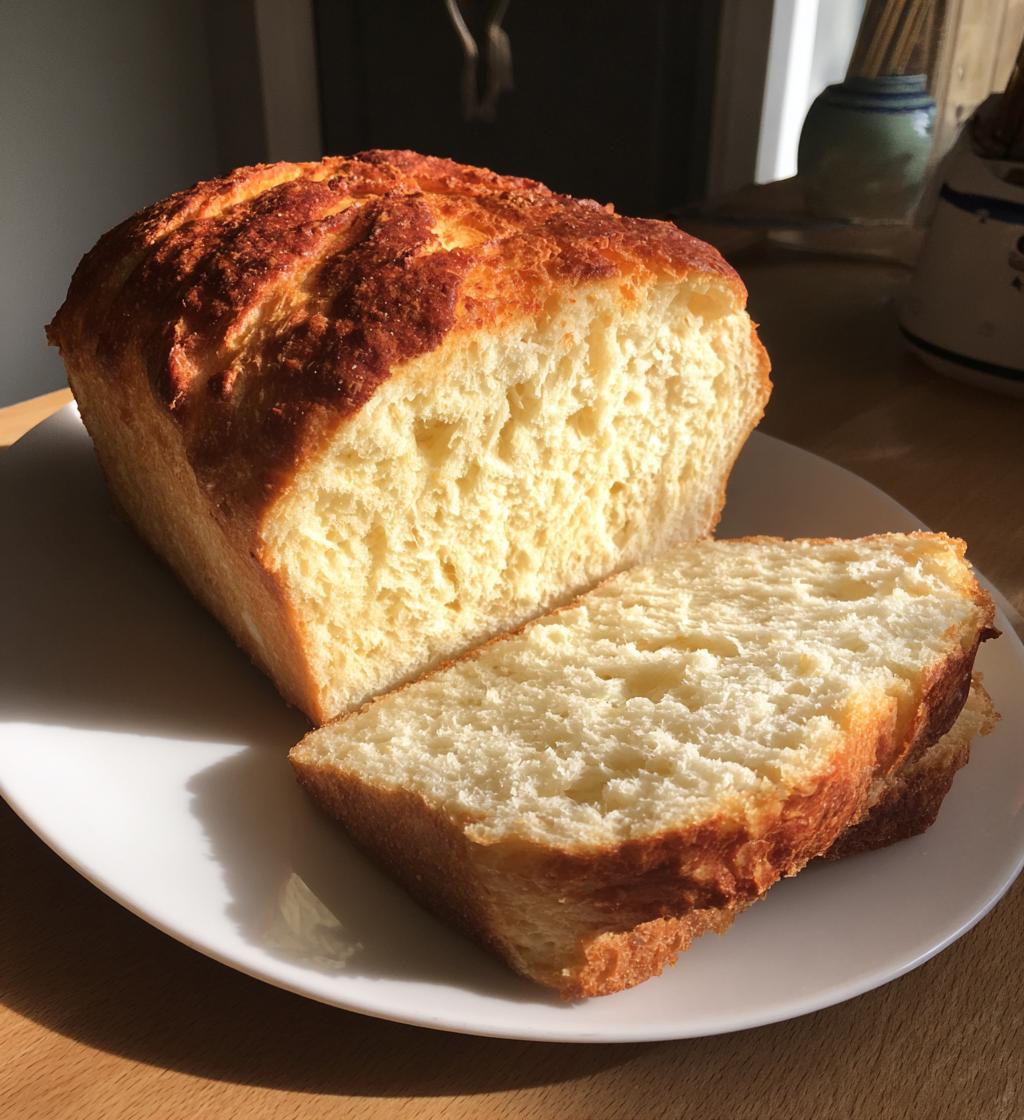
Using an air fryer not only speeds up the cooking process but also gives you that lovely, crispy crust without the need for preheating a big oven. You just mix a few simple ingredients, pop it in the fryer, and before you know it, you’ve got a delicious loaf of warm bread waiting for you. Trust me, the smell of freshly baked bread wafting through your kitchen is something you don’t want to miss! So let’s dive into this fabulous recipe that will have you making bread like a pro in no time!
Ingredients List
Gathering the ingredients for this air fryer bread is super simple! Here’s what you’ll need:
- 2 cups all-purpose flour
- 1 tablespoon baking powder
- 1 teaspoon salt
- 1 cup water
That’s it! Just four basic ingredients that you probably already have in your pantry. I love how straightforward this is. Feel free to measure everything out ahead of time to make the mixing process even smoother! It’s all about keeping things easy and enjoyable, right?
How to Prepare Air Fryer Bread
Now that you’ve got your ingredients ready, let’s get right into the fun part—making this fabulous air fryer bread! Don’t worry, it’s really straightforward, and I’ll walk you through it step-by-step. Just follow along, and you’ll have a delicious loaf in no time!
Step-by-Step Instructions
- Mix the Dry Ingredients: In a large mixing bowl, combine the 2 cups of all-purpose flour, 1 tablespoon of baking powder, and 1 teaspoon of salt. I like to whisk it all together to make sure everything is evenly distributed. This little step makes a big difference in the final flavor!
- Add Water: Next, pour in 1 cup of water. Now, here’s where the magic begins—grab a wooden spoon or your hands and mix until a dough starts to form. Don’t overthink it; just bring it together until you can see no dry flour. It should be a bit sticky, and that’s perfectly fine!
- Shape the Dough: Once you have your dough, lightly flour your countertop and turn it out. Gently shape it into a ball—nothing fancy here! Just a simple round shape will do. If the dough sticks too much, don’t be afraid to add a bit more flour to your hands.
- Preheat the Air Fryer: Now, preheat your air fryer to 350°F (175°C). This is important because it helps get that crust nice and crispy. If your air fryer has a preheat function, use that; if not, just let it run for about 5 minutes.
- Place in the Air Fryer: Carefully place your shaped dough ball in the air fryer basket. If you want, you can line the basket with parchment paper for easier cleanup, but it’s not necessary!
- Cook it Up: Set the timer for 25 minutes and let the air fryer work its magic. You’ll want to resist the urge to peek—trust me, the aroma will be incredible, and you don’t want to let that heat escape!
- Cool Before Slicing: Once the timer goes off, carefully remove the bread from the air fryer. It’ll be hot, so use tongs or a spatula. Let it cool on a wire rack or a plate for a few minutes before slicing. This helps the bread set up nicely and keeps it from getting gummy.
And there you have it! A beautifully baked loaf of air fryer bread, ready to be enjoyed. Just imagine slathering some butter on a warm slice—yum! Now, let’s move on to some tips to ensure your bread turns out perfect every time.
Tips for Success
Okay, let’s make sure your air fryer bread turns out absolutely perfect! Here are some tried-and-true tips that I’ve gathered over my baking adventures:
- Don’t Overmix: When you’re combining the ingredients, just mix until everything is combined. Overmixing can lead to a tough texture, and we definitely want that light, fluffy bread!
- Check Your Measurements: Accurate measurements are key, especially with flour. I recommend spooning the flour into your measuring cup and leveling it off with a knife—this helps prevent using too much flour, which can make your bread dense.
- Watch the Cooking Time: Every air fryer is a little different, so keep an eye on your bread as it cooks. If it looks golden brown and sounds hollow when tapped, it’s likely done! If it needs a bit more time, just add a couple of minutes.
- Experiment with Flavor: Feel free to add herbs, garlic powder, or even cheese into the dough for a fun twist! Just remember, if you add too many extras, you might need to adjust the liquid slightly.
- Let it Cool: I know it’s tempting, but let your bread cool before slicing. This helps it set and keeps it from falling apart! Plus, the waiting makes that first warm slice even more satisfying.
Following these tips will help you avoid common pitfalls and elevate your air fryer bread to the next level. Enjoy the process, and don’t be afraid to get a little creative!
Variations of Air Fryer Bread
Now that you’ve mastered the basics of air fryer bread, let’s have some fun with variations! This recipe is like a blank canvas, and you can totally personalize it to suit your taste buds. Here are some creative ideas to jazz up your bread:
- Herb-Infused Bread: Add a tablespoon or two of your favorite dried herbs like rosemary, thyme, or oregano into the dough. The aroma will be heavenly, and it pairs perfectly with soups and salads!
- Cheesy Delight: Mix in about ½ cup of shredded cheese, like cheddar or mozzarella, for a rich, cheesy flavor. You can sprinkle a little extra on top before cooking for a nice golden crust!
- Garlic Bread: For a savory twist, add minced garlic or garlic powder to the dough. You can even brush the finished bread with a mixture of melted butter and garlic for that classic garlic bread flavor.
- Sweet Cinnamon Bread: If you’re in the mood for something sweet, stir in a tablespoon of cinnamon and a tablespoon of sugar. You’ll get a delightful hint of sweetness that’s perfect for breakfast or a snack!
- Spicy Kick: For those who love a little heat, add some red pepper flakes or chopped jalapeños into the mix. It’s a fun way to spice things up and make your bread stand out!
These variations are super easy to incorporate, and they’ll take your air fryer bread to a whole new level! Don’t be shy—experiment and find your favorite combinations. The possibilities are endless, and each loaf can be a delightful surprise!
Storage & Reheating Instructions
So, you’ve made this delicious air fryer bread, and now you’re wondering how to store it? No worries, I’ve got you covered! Proper storage is key to keeping your bread fresh and tasty for as long as possible.
First off, once your bread has completely cooled, you’ll want to wrap it up tightly in plastic wrap or place it in an airtight container. This helps prevent it from drying out and keeps it soft. Trust me, there’s nothing worse than a stale slice of bread!
For maximum freshness, I recommend storing your air fryer bread at room temperature if you plan to eat it within a couple of days. If you think it’ll last longer, pop it in the refrigerator. Just keep in mind that refrigeration can sometimes change the texture a bit, so it’s best enjoyed fresh.
If you want to keep it for an even longer time, consider freezing it! Simply slice it up first, then wrap individual slices in plastic wrap and place them in a freezer-safe bag. This way, you can grab a slice whenever you need a quick bread fix! It’ll stay good for up to 3 months in the freezer.
When you’re ready to enjoy your stored bread, reheating is a breeze! If it’s at room temperature, you can pop it in the air fryer for just a couple of minutes at 350°F (175°C) to warm it up. If it’s frozen, let it thaw on the counter for a bit before reheating or use your air fryer straight from the freezer—just give it a few extra minutes. You’ll be amazed at how fresh it tastes!
Now you’re all set to store and reheat your air fryer bread like a pro! Enjoy every bite, whether it’s fresh from the fryer or reheated to perfection!
Nutritional Information
Now, let’s talk about the nutritional side of this delightful air fryer bread! It’s always good to know what you’re putting into your body, right? Here’s an estimate of the typical nutritional values per slice:
- Calories: 150
- Fat: 1g
- Saturated Fat: 0g
- Unsaturated Fat: 0g
- Trans Fat: 0g
- Cholesterol: 0mg
- Sodium: 200mg
- Carbohydrates: 30g
- Fiber: 1g
- Protein: 4g
- Sugar: 0g
This bread is not only simple to make but also provides a nice balance of carbohydrates and protein, making it a great addition to any meal. And remember, these values can vary slightly based on your specific ingredients and portion sizes, so keep that in mind! Enjoy your delicious air fryer bread without a hint of guilt!
FAQ Section
Can I use whole wheat flour instead of all-purpose flour?
Absolutely! You can substitute whole wheat flour for all-purpose flour, but keep in mind that it might result in a denser bread. If you do, consider adding a little more water to achieve the right consistency. Whole wheat flour has a wonderful nutty flavor that can really elevate your air fryer bread!
What if I don’t have baking powder?
No problem! You can create a substitute by combining 1/2 teaspoon of baking soda with 1 teaspoon of vinegar or lemon juice. This will give your dough the lift it needs to rise nicely. Just mix it in right before you add the water.
Can I make this recipe gluten-free?
Yes, you can! Just swap the all-purpose flour for a gluten-free flour blend. Make sure it’s a 1:1 substitute that includes xanthan gum for the best texture. Your air fryer bread will still turn out delicious!
How do I know when the bread is done cooking?
Great question! The best way to check is to tap the bottom of the loaf gently; if it sounds hollow, that’s a good sign it’s ready. You can also check its color—aim for a lovely golden-brown crust. If you’re unsure, an extra couple of minutes in the air fryer won’t hurt!
Can I add mix-ins like nuts or dried fruit?
Definitely! Feel free to get creative by adding in your favorite mix-ins. Just remember, if you’re adding a lot of extras, you might need to adjust the liquid slightly to keep the dough from becoming too dry. Nuts, dried cranberries, or even chocolate chips could make for a fun twist!
Why You’ll Love This Recipe
- Quick and easy—ready in about 35 minutes from start to finish!
- Perfectly crispy crust with a soft, fluffy inside—just like traditional bread!
- Uses minimal ingredients that you probably have on hand.
- Versatile recipe—customize with your favorite herbs, spices, or add-ins!
- No need to preheat a large oven, saving you time and energy.
- Ideal for beginners—simple steps that anyone can follow.
- Great for last-minute bread cravings—just whip it up and enjoy!
- Healthier option with less oil than pan-fried or baked breads.
- Perfect for sandwiches, toast, or just slathered with butter!
Air Fryer Bread: 7 Reasons You’ll Love This Quick Recipe
- Prep Time: 10 minutes
- Cook Time: 25 minutes
- Total Time: 35 minutes
- Yield: 1 loaf 1x
- Category: Baking
- Method: Air frying
- Cuisine: American
- Diet: Vegetarian
Description
Quick and easy air fryer bread recipe.
Ingredients
- 2 cups all-purpose flour
- 1 tablespoon baking powder
- 1 teaspoon salt
- 1 cup water
Instructions
- Mix flour, baking powder, and salt in a bowl.
- Add water and stir until a dough forms.
- Shape the dough into a ball.
- Preheat the air fryer to 350°F (175°C).
- Place the dough in the air fryer basket.
- Cook for 25 minutes.
- Let it cool before slicing.
Notes
- Store bread in an airtight container.
- Can add herbs for extra flavor.
Nutrition
- Serving Size: 1 slice
- Calories: 150
- Sugar: 0g
- Sodium: 200mg
- Fat: 1g
- Saturated Fat: 0g
- Unsaturated Fat: 0g
- Trans Fat: 0g
- Carbohydrates: 30g
- Fiber: 1g
- Protein: 4g
- Cholesterol: 0mg
Keywords: air fryer bread, quick bread, easy bread recipe