
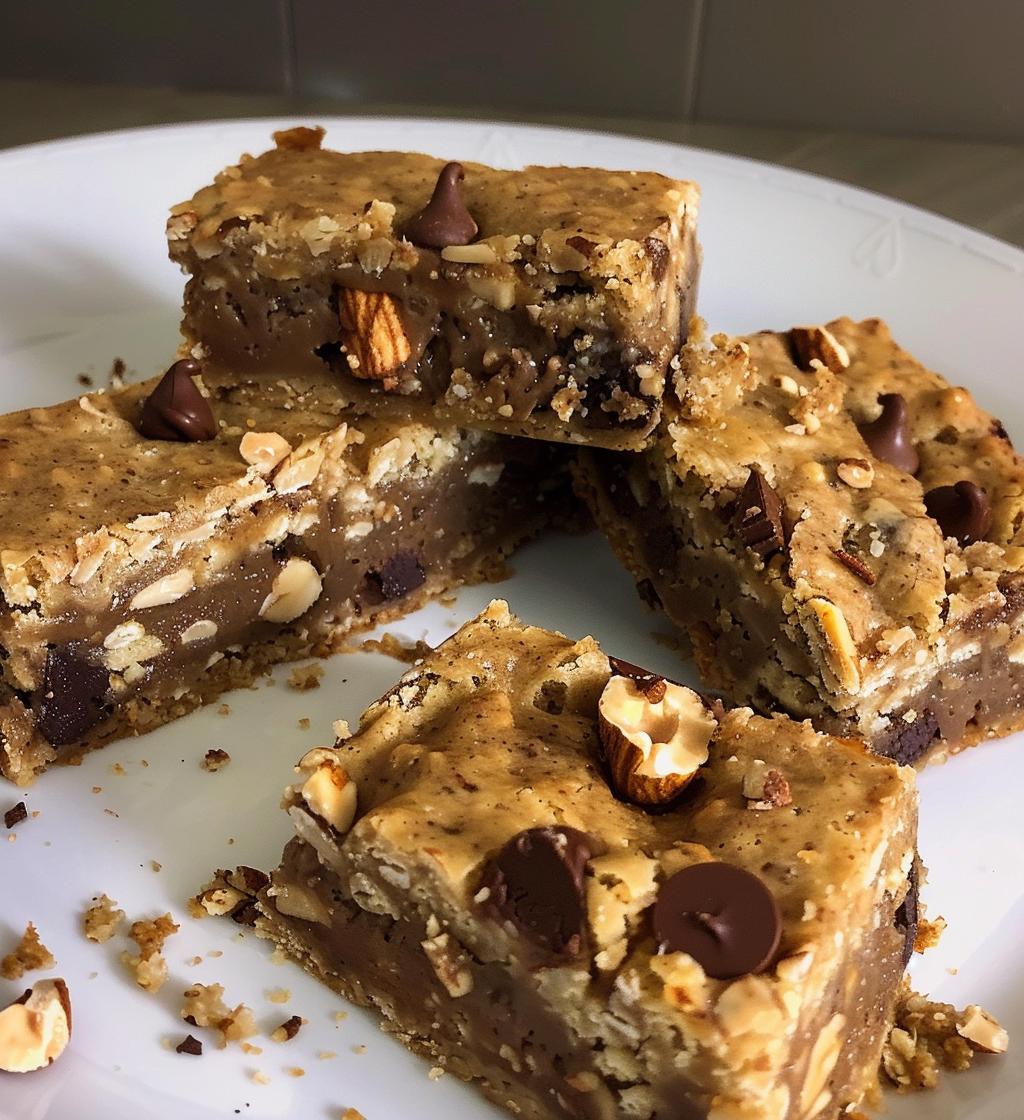
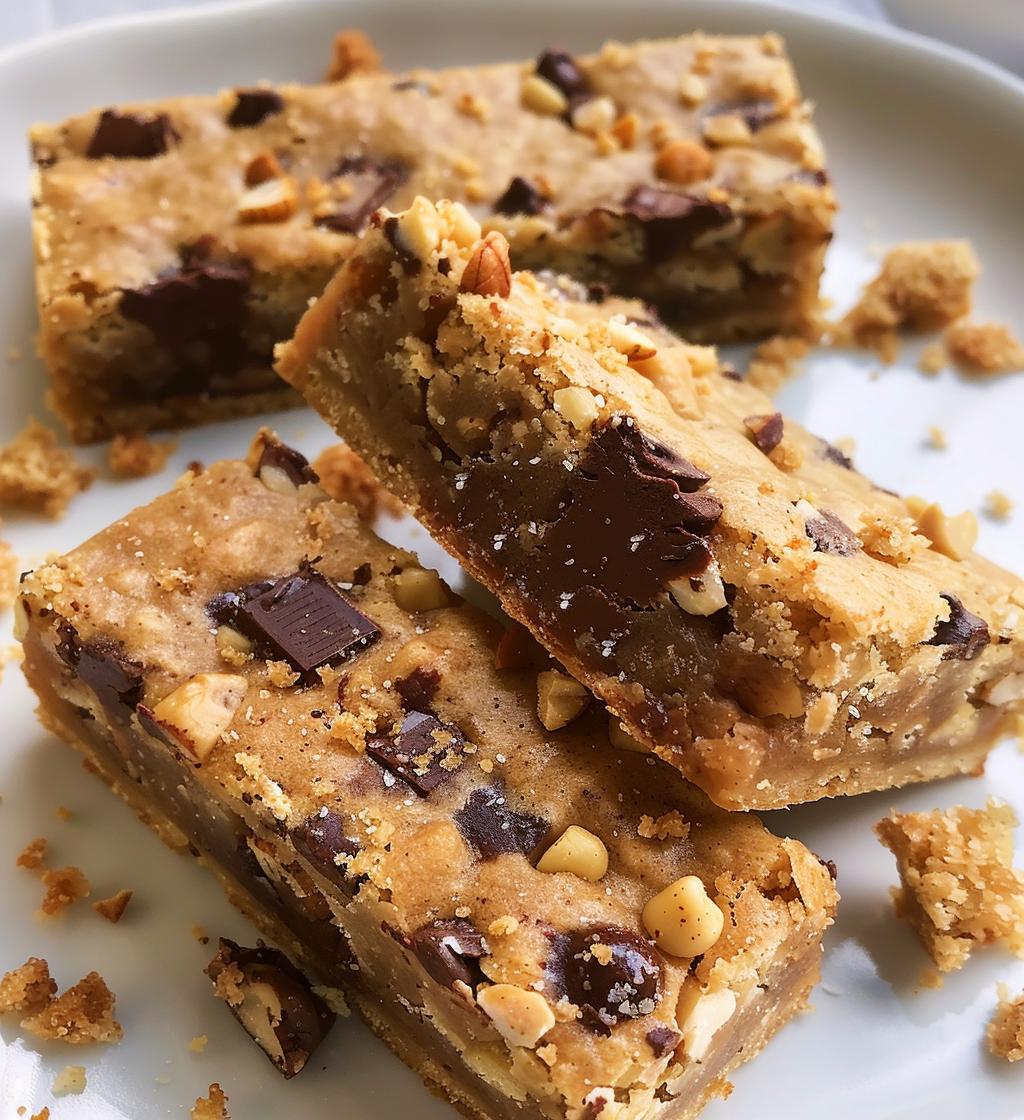
Ah, the holiday season! It’s that magical time of year when the air is filled with the sweet scent of baking, and every corner of my kitchen feels like a cozy winter wonderland. One of my absolute favorite things to whip up during this festive period is my delicious Christmas bars. Trust me, these bars are a delightful medley of flavors that perfectly capture the spirit of the holidays. With the rich taste of butter, the warm hug of brown sugar, and the gooey goodness of chocolate chips, each bite is like a little holiday celebration!
What I love most is how quick and easy they are to make. You could whip these up while your favorite holiday tunes play in the background—such a win! They’re perfect for sharing with friends and family, or even as a sweet treat for yourself after a long day of holiday shopping. Once you try them, you’ll understand why they’ve become a staple in my holiday baking repertoire. So, let’s get started and fill your home with those wonderful festive aromas!
Ingredients List
(Tip: You’ll find the full list of ingredients and measurements in the recipe card below.)
- 1 cup butter, softened
- 1 cup packed brown sugar
- 1 cup granulated sugar
- 2 cups all-purpose flour
- 1 cup oats
- 1 cup chocolate chips
- 1 teaspoon vanilla extract
- 1/2 teaspoon salt
- 1/2 teaspoon baking soda
- 1 cup chopped nuts (optional)
How to Prepare Instructions
Preheat the Oven
First things first, let’s get that oven preheated to 350°F (175°C). This step is super important because it ensures that your Christmas bars bake evenly and get that perfect golden color. Trust me, you don’t want to skip this part!
Cream the Butter and Sugars
In a large mixing bowl, cream together the softened butter, brown sugar, and granulated sugar. I usually mix them until it’s light and fluffy—about 2-3 minutes. The fluffier the mixture, the better your bars will turn out! You’ll want to really beat those sugars into the butter for a nice, creamy base.
Add the Vanilla Extract
Next, let’s add in that delicious vanilla extract. It adds such a warm flavor! Just pour it in and mix until it’s well incorporated. The smell is going to be heavenly—seriously, I could just sniff that mix all day!
Combine Dry Ingredients
In another bowl, combine your flour, oats, salt, and baking soda. It’s important to keep your dry ingredients separate from the wet ones until now. This helps ensure everything mixes evenly without any lumps. Give it a quick stir to combine them nicely!
Mix Wet and Dry Ingredients
Now, let’s gradually add those dry ingredients to the wet mixture. I like to do it in batches—this helps with the texture. Just fold them in gently until everything is combined. You want to avoid overmixing; we’re aiming for a nice, thick batter here!
Fold in Chocolate Chips and Nuts
Once you’ve got a lovely batter, it’s time to fold in the chocolate chips and the nuts if you’re using them. Gently fold them in to keep that texture nice and airy. Don’t worry if some chocolate chips don’t make it in; I always sneak a few for snacking later!
Spread and Bake
Now, spread the batter evenly in a greased baking pan. I like to use a spatula to make sure it’s nice and even. Pop it in the oven and bake for about 25-30 minutes. You’ll know it’s done when the edges are golden brown and a toothpick comes out clean from the center. Just don’t open the oven door too early, or those bars might sink!
Cool and Cut
Once they’re out of the oven, let the bars cool in the pan for a bit before cutting them. This is key! If you cut them too soon, they might crumble. I usually let them cool for about 10-15 minutes, then I slice them into bars. Now, you’re ready to enjoy those delightful Christmas bars!
Why You’ll Love This Recipe
- Quick Prep Time: You can whip these up in just 15 minutes! Perfect for those busy holiday schedules.
- Festive Flavors: With a blend of rich butter, brown sugar, and chocolate, these bars embody all the warm, cozy flavors of the season.
- Easy to Make: The straightforward steps make this recipe a breeze, even for beginner bakers. You’ll feel like a pro in no time!
- Great for Sharing: These Christmas bars are perfect for holiday gatherings, cookie exchanges, or just to brighten someone’s day with a sweet treat.
Tips for Success
To make sure your Christmas bars turn out absolutely perfect every time, here are some of my favorite pro tips:
- Room Temperature Butter: Make sure your butter is nice and soft before you start. It should be at room temperature so it creams beautifully with the sugars. If it’s too cold, your bars won’t have that lovely texture!
- Check for Doneness: Keep an eye on the baking time! Ovens can vary, so I like to check a couple of minutes early. The edges should be golden brown, and a toothpick inserted in the center should come out clean or with just a few moist crumbs.
- Mix It Up: Feel free to get creative! You can add dried fruits like cranberries or cherries for an extra festive touch, or even some spices like cinnamon or nutmeg to really amp up those holiday flavors.
- Chill Before Cutting: If you can wait, let the bars cool completely in the pan before cutting. This will help them set up nicely and make cutting easier without crumbling.
- Store Wisely: Keep your leftovers in an airtight container. If you want them to last even longer, you can freeze them! Just make sure to wrap them tightly in plastic wrap.
With these tips in your back pocket, you’re all set to make the best Christmas bars ever! Happy baking!
Nutritional Information
Let’s talk about the nutrition of these delightful Christmas bars! Each bar is packed with flavor, and while they’re definitely a treat, it’s good to know what you’re indulging in. Here’s a breakdown of the typical nutritional values per serving:
- Calories: 200
- Sugar: 12g
- Fat: 10g
- Saturated Fat: 6g
- Unsaturated Fat: 4g
- Trans Fat: 0g
- Carbohydrates: 26g
- Fiber: 2g
- Protein: 2g
- Cholesterol: 30mg
- Sodium: 150mg
Keep in mind that these values are estimates and can vary based on the specific ingredients you use. But don’t worry too much about the numbers—just enjoy every delicious bite of your homemade Christmas bars! Happy indulging!
Storage & Reheating Instructions
Once you’ve baked and enjoyed your delicious Christmas bars, you’ll want to make sure they stay fresh for as long as possible. The best way to store them is in an airtight container. This helps keep them moist and prevents them from drying out. I usually line the container with parchment paper before adding the bars to keep them from sticking together. If you have any leftovers (which is rare, but hey, it happens!), they can be stored at room temperature for about 3-4 days.
If you’d like to keep them longer, you can absolutely freeze them! Just wrap each bar tightly in plastic wrap and then place them in a freezer-safe container. They’ll stay good in the freezer for up to 2 months. When you’re ready to enjoy them again, simply take out the desired number of bars and let them thaw in the refrigerator overnight. No need to reheat; they’re just as delicious chilled! But if you prefer them warm, you can pop them in the microwave for about 10-15 seconds. Just a quick zap, and they’ll be ready to melt in your mouth!
With these storage tips, you can savor the joy of the holidays long after the baking is done. Happy snacking!
FAQ Section
Got questions about making these delightful Christmas bars? No worries, I’ve got you covered! Here are some common queries I hear, along with my answers to help you out:
Can I substitute the butter for something else?
Absolutely! If you’re looking for a healthier option, you can use coconut oil or even unsweetened applesauce. Just keep in mind that it might slightly change the texture and flavor, but it can still be delicious!
What if I don’t have brown sugar?
No problem! You can make a quick substitute by mixing granulated sugar with a little bit of molasses. For every cup of brown sugar you need, just combine 1 cup of granulated sugar with about 1 tablespoon of molasses. Mix it well, and you’re good to go!
Can I add different mix-ins?
Definitely! Feel free to swap in your favorite ingredients. Dried fruits like cranberries or cherries add a lovely festive touch, and you can even throw in some white chocolate chips or butterscotch chips for a fun twist. The sky’s the limit!
How should I store these bars for maximum freshness?
As mentioned earlier, storing them in an airtight container is key! If you want to keep them fresh and moist, make sure to line the container with parchment paper. They’ll stay tasty on the counter for about 3-4 days, but you can freeze them to enjoy later!
Can I make these bars gluten-free?
You sure can! Just replace the all-purpose flour with a gluten-free flour blend. Make sure to check that your oats are certified gluten-free as well. They’ll still taste amazing and everyone can enjoy them!
I hope these answers help you create the best Christmas bars ever! If you have any more questions, feel free to reach out. Happy baking!
Print
Christmas Bars: 7 Reasons You’ll Love This Festive Treat
- Prep Time: 15 minutes
- Cook Time: 30 minutes
- Total Time: 45 minutes
- Yield: 24 bars 1x
- Category: Dessert
- Method: Baking
- Cuisine: American
- Diet: Vegetarian
Description
Delicious Christmas bars filled with holiday flavors.
Ingredients
- 1 cup butter, softened
- 1 cup brown sugar
- 1 cup granulated sugar
- 2 cups all-purpose flour
- 1 cup oats
- 1 cup chocolate chips
- 1 teaspoon vanilla extract
- 1/2 teaspoon salt
- 1/2 teaspoon baking soda
- 1 cup chopped nuts (optional)
Instructions
- Preheat the oven to 350°F (175°C).
- In a bowl, cream together butter, brown sugar, and granulated sugar.
- Add vanilla extract and mix well.
- In another bowl, combine flour, oats, salt, and baking soda.
- Gradually add dry ingredients to the wet mixture.
- Fold in chocolate chips and nuts if using.
- Spread the mixture in a greased baking pan.
- Bake for 25-30 minutes or until golden brown.
- Let cool and cut into bars.
Notes
- Store in an airtight container.
- Best served fresh but can be frozen.
- Try adding dried fruits for extra flavor.
Nutrition
- Serving Size: 1 bar
- Calories: 200
- Sugar: 12g
- Sodium: 150mg
- Fat: 10g
- Saturated Fat: 6g
- Unsaturated Fat: 4g
- Trans Fat: 0g
- Carbohydrates: 26g
- Fiber: 2g
- Protein: 2g
- Cholesterol: 30mg
Keywords: christmas bars, holiday dessert, festive treats