
Oh, the magic of baking Christmas cookies decorated with icing! There’s just something about the smell of warm cookies wafting through the house that instantly fills me with holiday cheer. I can still remember the first time I baked with my grandma—she had this big, old mixing bowl that seemed to have its own personality, and we’d spend hours rolling out dough and cutting it into shapes. I can still hear her laughter as we sprinkled flour everywhere and made a delightful mess! Those cookies were always my favorite, but what made them truly special were the colorful icing and sprinkles that turned each one into a little masterpiece. Trust me, baking these cookies is not just about the end result; it’s about the joy, the memories, and the sweet anticipation of sharing them with friends and family. So, let’s dive into making the best Christmas cookies decorated with icing that will fill your home with love and sweetness this holiday season!

Ingredients for Christmas Cookies Decorated
Gathering the right ingredients is like setting the stage for a holiday performance! Here’s everything you’ll need to whip up these delightful cookies:
- 2 3/4 cups all-purpose flour: This is the foundation of our cookies. Make sure to spoon it into your measuring cup and level it off for accuracy!
- 1 teaspoon baking soda: This will give our cookies that perfect lift and a light texture.
- 1/2 teaspoon baking powder: Just a little extra boost for our cookie dough!
- 1 cup unsalted butter, softened: Let your butter sit out for a bit before baking—it should be soft but not melted. This is key for a creamy texture!
- 1 1/2 cups white sugar: Sweetness is essential! This will balance the flavors beautifully.
- 1 egg: This little guy helps bind everything together—don’t skip it!
- 1 teaspoon vanilla extract: The classic flavor that makes everything taste just right.
- 1 teaspoon almond extract: This adds a lovely depth of flavor that will wow your taste buds!
- 3 to 4 cups confectioners’ sugar: We’ll use this for our icing, and the amount can vary depending on how thick you want it.
- 2 tablespoons water: Just enough to mix with the confectioners’ sugar to create that perfect icing consistency.
- Food coloring (optional): If you want to jazz up your icing with some festive colors, this is where the fun begins!
- Sprinkles (optional): Because what’s a decorated cookie without a sprinkle or two (or a lot)?!
Now that you’ve got your ingredients ready, you’re all set to make some magical Christmas cookies decorated with icing! Let’s get to the fun part—baking!
How to Prepare Christmas Cookies Decorated
Alright, now it’s time to roll up your sleeves and get into the fun of baking these festive delights! Follow me through these steps, and we’ll have a batch of Christmas cookies decorated with icing ready in no time!
Prepping the Dough
First things first, let’s get that oven warmed up! Preheat your oven to 375°F (190°C). This is the perfect temperature for baking those cookies just right. While that’s heating up, grab a mixing bowl and combine 2 3/4 cups of all-purpose flour, 1 teaspoon of baking soda, and 1/2 teaspoon of baking powder. Whisk them together until they’re well blended—this step helps ensure there are no pesky lumps later on!
Mixing and Shaping
Now, let’s make that dough come to life! In a separate large bowl, cream together 1 cup of softened unsalted butter and 1 1/2 cups of white sugar until it’s smooth and fluffy—this is where the magic happens! I like to use an electric mixer for this part, but a good old-fashioned wooden spoon works too; just put some muscle into it! Once that’s mixed, beat in 1 egg, followed by 1 teaspoon of vanilla extract and 1 teaspoon of almond extract. Mix until everything is well combined.
Now, gradually add the dry flour mixture to the wet mixture, mixing it in slowly. Don’t rush this part! Once everything is combined, it’s time for the fun—roll the dough into small balls, about 1 inch in diameter, and place them on your baking sheets. Leave a little space between them, as they’ll spread out while baking!
Baking the Cookies
Pop those trays into your preheated oven and bake for about 8 to 10 minutes. Keep an eye on them! You’ll know they’re done when the edges are lightly golden, but the centers still look a little soft. Remember, they’ll continue to firm up as they cool, so don’t overbake! Once they’re out of the oven, let them cool on the baking sheets for a couple of minutes before transferring them to wire racks to cool completely.
Decorating the Cookies
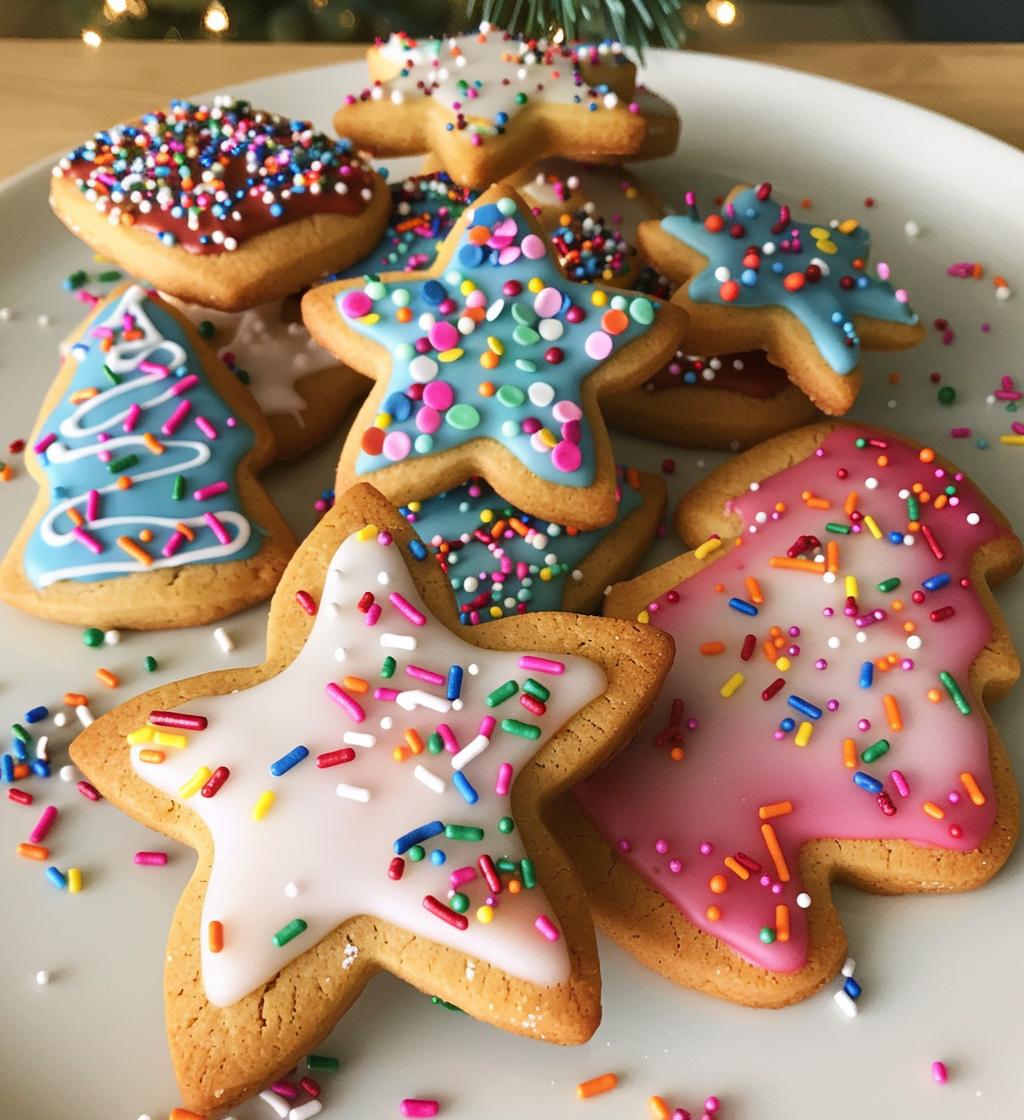
Okay, now for the grand finale—the decorating! In a medium bowl, mix 3 to 4 cups of confectioners’ sugar with 2 tablespoons of water until it’s smooth and spreadable. If you want to get creative, add a few drops of food coloring to brighten things up. Once your cookies are completely cooled, it’s time to let your imagination run wild! Use a piping bag or a simple spoon to drizzle that icing over the cookies. And don’t forget the sprinkles—go wild with those! They’re the finishing touch that makes these cookies truly festive.
There you go! Just follow these steps, and you’ll have a delicious batch of Christmas cookies decorated with icing that will be the highlight of your holiday festivities!
Tips for Success with Christmas Cookies Decorated
Now that we’ve baked and decorated our cookies, let’s make sure we nail every little detail! Here are my top tips for success that will elevate your Christmas cookies decorated with icing to the next level:
- Chill Your Dough: If your dough feels too soft or sticky, pop it in the fridge for about 30 minutes. This makes it easier to roll into balls and helps the cookies maintain their shape while baking.
- Experiment with Flavors: Don’t be afraid to switch things up! You can add a teaspoon of cinnamon or nutmeg to the dough for a warm, cozy flavor. Almond extract is a favorite of mine, but you could also try lemon or orange zest for a refreshing twist.
- Cookie Cutters Galore: Use different cookie cutters to create various shapes—think stars, trees, or even festive animals! It adds a fun element to your baking and makes each cookie unique.
- Perfect Icing Consistency: When mixing your icing, look for a smooth and spreadable texture. If it’s too thick, add a tiny bit more water. If it’s too runny, just sprinkle in a bit more confectioners’ sugar until you get that perfect drizzle.
- Get Creative with Decorations: Beyond just sprinkles, consider using edible glitter, chocolate chips, or even small candies to jazz things up! You can even pipe different designs or patterns—let your creativity shine!
- Drying Time: After decorating, allow your cookies to sit at room temperature until the icing dries completely—this helps prevent smudging and makes stacking them much easier.
- Storage Tips: Once your cookies are decorated, store them in an airtight container with a piece of parchment paper between layers. This keeps them fresh and prevents the icing from sticking to each other.
- Batch Variations: If you’re feeling adventurous, divide your dough and add different flavors or colors to each batch. You could have vanilla cookies, almond cookies, and even a fun red velvet batch—all decorated in one go!
Remember, baking is all about having fun and expressing your creativity! With these tips, you’ll be well on your way to making the most beautiful and delicious Christmas cookies decorated with icing that everyone will adore. Happy baking!
Storage & Reheating Instructions
Once you’ve baked and decorated your beautiful Christmas cookies, it’s important to store them properly so they stay fresh and delicious! Here’s how to keep your cookies in tip-top shape:
- Airtight Container: Place your cookies in an airtight container. This is crucial to keep them from drying out. I like to layer them with a piece of parchment paper in between to prevent them from sticking together, especially if you’ve gone a little sprinkle crazy!
- Room Temperature: Store your decorated cookies at room temperature if you plan to eat them within a week. They’ll stay nice and soft this way. Just make sure they’re in a cool, dry place away from direct sunlight!
- Refrigeration: If you want to keep them a bit longer, you can refrigerate them, but keep in mind that the icing might lose some of its shine. Just make sure they’re in a sealed container to avoid absorbing any fridge odors.
- Freezing for Later: Want to save some for after the holidays? No problem! You can freeze your cookies! Just make sure they’re completely cooled and then place them in a freezer-safe bag or container. They’ll keep well for up to three months. When you’re ready to enjoy them, just take them out and let them thaw at room temperature—no need to reheat!
As for reheating, if you prefer to warm them up a bit, pop them in the microwave for just a few seconds. Be careful not to overdo it—nobody wants a rubbery cookie! A quick zap will bring back that fresh-baked warmth without compromising the icing. Enjoy your festive treats whenever the craving strikes!
Nutritional Information
Alright, let’s talk about the nutritional side of these delightful Christmas cookies decorated with icing! Just a heads up, the nutrition values can vary based on the specific brands and ingredients you choose, so take this as a general guide rather than an exact science. Here’s what you can expect per cookie:
- Serving Size: 1 cookie
- Calories: 150
- Sugar: 10g
- Sodium: 50mg
- Fat: 7g
- Saturated Fat: 4g
- Unsaturated Fat: 2g
- Trans Fat: 0g
- Carbohydrates: 20g
- Fiber: 0g
- Protein: 2g
- Cholesterol: 20mg
So, indulge a bit, enjoy the sweet treats, and remember that the joy of baking and sharing these cookies is what truly counts during the holiday season!
FAQ about Christmas Cookies Decorated
Got questions about making these delightful Christmas cookies decorated with icing? No worries, I’ve got you covered! Here are some common questions and my answers to help you along the way:
Can I make the dough ahead of time?
Absolutely! You can prepare the dough in advance and refrigerate it for up to a week. Just make sure to wrap it tightly in plastic wrap to keep it fresh. When you’re ready to bake, let it sit at room temperature for a bit before rolling it out!
How should I store my decorated cookies?
Store your decorated cookies in an airtight container at room temperature. You can place a piece of parchment paper between layers to prevent sticking, especially if you’ve gone heavy on the sprinkles!
Can I freeze the cookies?
You bet! Once your cookies are completely cooled and decorated, just pop them in a freezer-safe container or bag. They’ll last for about three months in the freezer. When you’re ready to enjoy them, let them thaw at room temperature, and they’ll be just as delicious!
What can I use instead of almond extract?
If almond extract isn’t your thing, you can substitute it with more vanilla extract or try using a different flavoring like lemon or orange zest for a fresh twist. Just remember to keep it balanced!
Can I use whole wheat flour instead of all-purpose flour?
Yes, you can! Just keep in mind that whole wheat flour will give your cookies a denser texture. You might want to use a mix of both flours for a lighter cookie while still getting that whole grain goodness!
How do I know when the cookies are done baking?
Look for lightly golden edges with soft centers—this is the sweet spot! They’ll continue to firm up as they cool, so don’t worry if they seem a tad soft when you first take them out.
Can I use store-bought icing for decorating?
Sure! If you’re short on time, store-bought icing works perfectly. Just remember to have fun with it and add your own sprinkles or decorations to make them pop!
What if my icing is too thick?
If your icing ends up too thick, just add a tiny splash of water until you reach your desired consistency. It’s all about that smooth and spreadable texture!
Can I make these cookies gluten-free?
Yes, you can! Just substitute the all-purpose flour with a gluten-free flour blend that’s suitable for baking. Make sure it includes a binding agent like xanthan gum if your blend doesn’t already contain one.
And there you go! If you have more questions or need extra tips, feel free to reach out. Happy baking, and may your holiday season be filled with sweet treats and joyful memories!
Why You’ll Love This Recipe
- Easy to Make: With straightforward steps, these cookies are perfect for bakers of all skill levels. You’ll be amazed at how quickly you can whip up a batch!
- Festive Appeal: The vibrant icing and colorful sprinkles make these cookies a delightful addition to any holiday gathering—everyone loves a cookie that looks as good as it tastes!
- Customizable: Get creative with flavors and decorations! You can easily switch up the extracts or add different colors to the icing for a personal touch that reflects your style.
- Great for Sharing: These cookies are perfect for gifting or sharing with friends and family. They’re a sweet way to spread holiday cheer!
- Memorable Traditions: Baking these cookies can become a cherished holiday tradition. Gather the kids, friends, or family and create lasting memories together!
- Perfect for Any Occasion: While they’re great for Christmas, these decorated cookies can be adapted for any celebration—think birthdays, anniversaries, or just-because treats!

Christmas Cookies Decorated: 7 Sweet Traditions to Try
- Prep Time: 30 minutes
- Cook Time: 10 minutes
- Total Time: 40 minutes
- Yield: 24 cookies 1x
- Category: Dessert
- Method: Baking
- Cuisine: American
- Diet: Vegetarian
Description
Delicious Christmas cookies decorated with icing and sprinkles.
Ingredients
- 2 3/4 cups all-purpose flour
- 1 teaspoon baking soda
- 1/2 teaspoon baking powder
- 1 cup unsalted butter, softened
- 1 1/2 cups white sugar
- 1 egg
- 1 teaspoon vanilla extract
- 1 teaspoon almond extract
- 3 to 4 cups confectioners’ sugar
- 2 tablespoons water
- Food coloring (optional)
- Sprinkles (optional)
Instructions
- Preheat oven to 375°F (190°C).
- In a bowl, mix flour, baking soda, and baking powder.
- In another bowl, cream butter and sugar until smooth.
- Beat in egg and stir in vanilla and almond extract.
- Gradually mix in dry ingredients.
- Roll dough into balls and place on baking sheets.
- Bake for 8 to 10 minutes.
- Let cool on wire racks.
- Mix confectioners’ sugar with water to make icing.
- Decorate cookies with icing and sprinkles.
Notes
- Store cookies in an airtight container.
- Use different cookie cutters for various shapes.
- Allow icing to dry completely before stacking cookies.
Nutrition
- Serving Size: 1 cookie
- Calories: 150
- Sugar: 10g
- Sodium: 50mg
- Fat: 7g
- Saturated Fat: 4g
- Unsaturated Fat: 2g
- Trans Fat: 0g
- Carbohydrates: 20g
- Fiber: 0g
- Protein: 2g
- Cholesterol: 20mg
Keywords: christmas cookies, decorated cookies, holiday baking