

There’s something incredibly magical about making chocolate from scratch, don’t you think? I mean, the process is not just about creating a sweet treat; it’s about crafting something truly special with your own hands. When I first learned how to make chocolate, it felt like uncovering a secret treasure. The rich aroma of the cocoa beans roasting fills your kitchen with warmth, and the satisfaction of transforming simple ingredients into smooth, luscious chocolate is simply unbeatable. Plus, you can customize it to your heart’s desire! So, if you’re ready to dive into this delightful adventure, grab your cocoa beans, and let’s get started on this journey to homemade chocolate bliss. Trust me, once you taste your own creation, you’ll never want to go back to store-bought again!
Ingredients List
To whip up your very own homemade chocolate, you’ll need just a few simple ingredients. Here’s what you’ll gather:
- 1 cup cocoa beans: These are the heart of your chocolate, so choose high-quality beans for the best flavor.
- 1/2 cup sugar: This will sweeten your chocolate. Feel free to adjust according to your taste—more for sweeter chocolate, less for a darker bite!
- 1/4 cup cocoa butter: This adds that luscious, creamy texture we all love in chocolate. Melted, it will blend perfectly with your cocoa nibs.
- 1 teaspoon vanilla extract: It brings a warm, aromatic flavor that enhances your chocolate experience.
- Pinch of salt: Just a dash to balance the sweetness and elevate the overall taste.
How to Make Chocolate
Now that you’ve gathered your ingredients, let’s dive into the fun part—making chocolate! It might sound a bit daunting, but trust me, it’s all about following a few simple steps. Just think of it as a little adventure in your kitchen! Ready? Here we go!
Step-by-Step Instructions
- Roast the cocoa beans: Preheat your oven to 350°F (175°C). Spread your cocoa beans on a baking sheet and roast them for about 10 minutes. This step is crucial, as it really brings out that deep, chocolatey flavor! Keep an eye on them, though—burnt beans are a no-go!
- Cool and shell: Once roasted, let the beans cool for a few minutes. Then, gently crack the shells and remove them to get to those precious nibs. It’s a bit like unwrapping a gift!
- Grind the nibs: Toss the cocoa nibs into a food processor and blend them until they form a smooth paste. This takes a couple of minutes, so be patient—your arms might get a little tired, but it’s so worth it!
- Add the magic: Mix in the sugar, cocoa butter, vanilla extract, and salt to your cocoa paste. Blend until well combined.
- Melt it down: Set up a double boiler on your stove, and melt the mixture gently until it’s smooth and glossy. Stir occasionally to keep it silky!
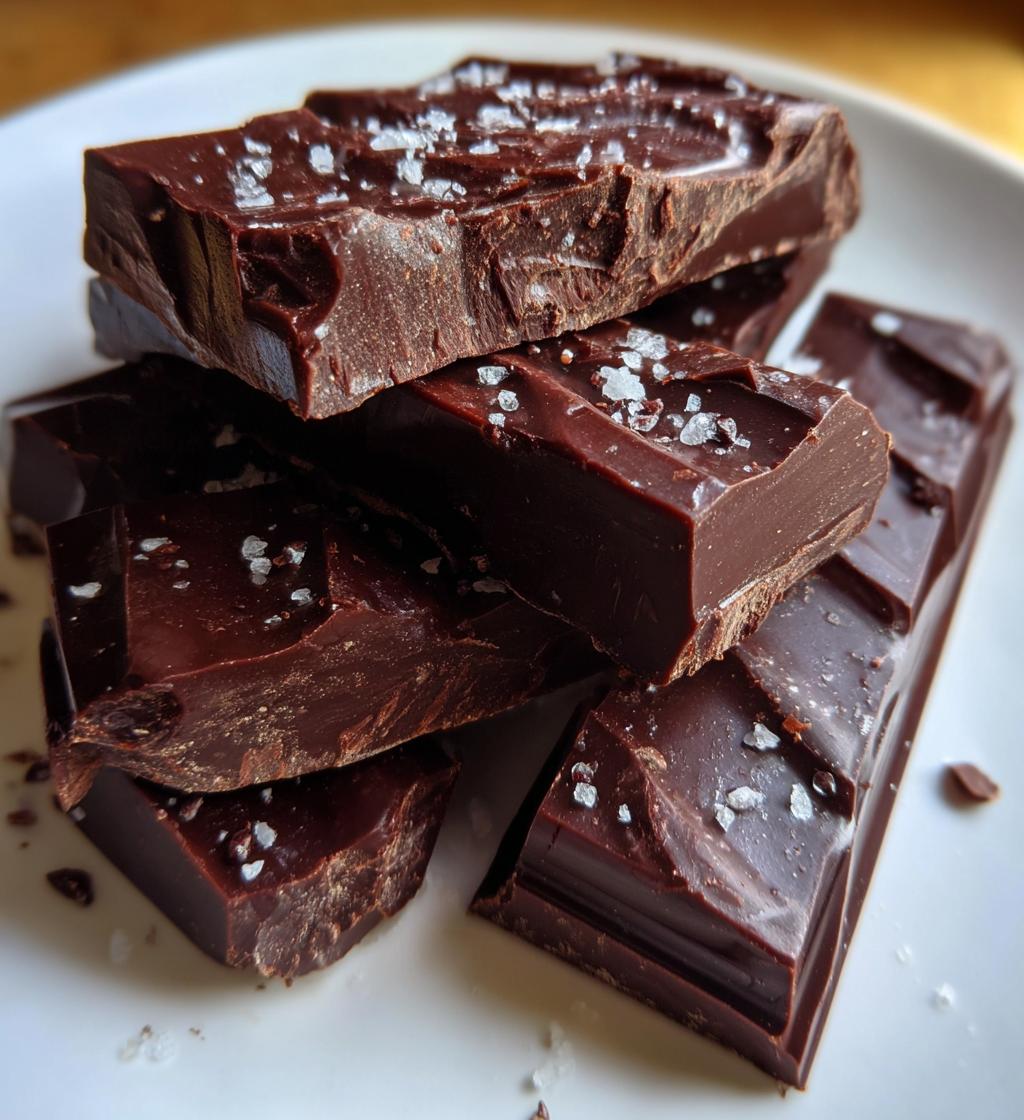
- Pour and cool: Once melted, pour your chocolate into molds. Let it cool at room temperature until set. This part is so satisfying as you see your creation take shape!
And just like that, you’ve made your very own chocolate! It’s a labor of love, but oh boy, the taste is out of this world!
Tips for Success
Making chocolate at home is a delightful experience, but there are a few tips that can really help you nail it! First off, always opt for high-quality cocoa beans; the flavor of your chocolate hinges on this. If you can, taste the beans before you buy—they should have a rich, deep aroma!
Don’t be shy about adjusting the sugar to suit your taste. If you love dark chocolate, try using less sugar for a more intense flavor. And remember, patience is key when grinding the nibs; a smooth paste is crucial for that luscious texture. Also, be careful not to overheat your chocolate while melting—it should be warm and silky, not boiling!
Finally, if your chocolate doesn’t set properly, it could be due to moisture. Make sure all your utensils are completely dry before you start. Happy chocolate making!
Nutritional Information
Keep in mind that nutritional values can vary quite a bit depending on the ingredients and brands you use, so these numbers are just an estimate. For a standard serving size of 1 ounce, you can expect around 150 calories, 12g of fat (7g saturated), 2g of protein, and 15g of carbohydrates, including 10g of sugar. Enjoy your homemade chocolate guilt-free, but always remember to tweak it to match your personal dietary needs!
FAQ Section
Got questions about how to make chocolate? Don’t worry, I’ve got you covered! Here are some common queries that might pop up as you embark on your chocolate-making adventure:
Can I use different types of cocoa beans? Absolutely! Each type has its unique flavor profile, so feel free to experiment with different varieties for a personalized touch.
What if my chocolate doesn’t set? If that happens, it might be due to moisture. Make sure all your tools are dry, and try chilling it in the fridge for a bit longer.
Can I add other flavors? Yes! You can mix in spices like cinnamon or even add nuts for texture. The beauty of homemade chocolate is you can customize it to your heart’s content!
How long does it last? If stored in a cool, dry place, your chocolate should stay fresh for about two weeks, though I doubt it’ll last that long!
Why You’ll Love This Recipe
- It’s a fun and rewarding process that lets you unleash your inner chocolatier!
- Making chocolate from scratch is surprisingly quick and easy—perfect for any skill level.
- You can customize the sweetness and flavor to match your personal taste.
- Using high-quality ingredients means you get to enjoy richer, more intense flavors.
- It’s a fantastic way to impress friends and family with your homemade treats!
Storage & Reheating Instructions
Once you’ve crafted your delightful chocolate, proper storage is key to keeping it fresh and tasty! To store your homemade chocolate, wrap it tightly in parchment paper or place it in an airtight container. Keep it in a cool, dry place away from direct sunlight—your pantry is perfect! Just remember, chocolate can absorb odors, so ensure it’s well-sealed.
If you ever need to reheat your chocolate, do so gently. I recommend using a double boiler or a microwave in short intervals, stirring frequently to avoid scorching. Just a quick warm-up should do the trick, bringing back that silky smooth texture we all love. Enjoy your delicious creation!
Serving Suggestions
Now that you’ve got your homemade chocolate ready, let’s talk about how to enjoy it! I love pairing my chocolate with some fresh strawberries or bananas for a delightful contrast of flavors. You can also serve it alongside a scoop of vanilla ice cream for an indulgent treat. Or, if you’re feeling adventurous, try sprinkling some sea salt on top for that perfect sweet-and-salty combo. Trust me, it’s divine!
How to Make Chocolate: 7 Steps to Sweet Bliss
- Prep Time: 20 minutes
- Cook Time: 15 minutes
- Total Time: 35 minutes
- Yield: 2 cups of chocolate 1x
- Category: Dessert
- Method: Melting and molding
- Cuisine: Global
- Diet: Vegetarian
Description
A simple guide on how to make chocolate from scratch.
Ingredients
- 1 cup cocoa beans
- 1/2 cup sugar
- 1/4 cup cocoa butter
- 1 teaspoon vanilla extract
- Pinch of salt
Instructions
- Roast the cocoa beans at 350°F for 10 minutes.
- Let the beans cool, then remove the shells to get the nibs.
- Grind the nibs into a paste using a food processor.
- Add sugar, cocoa butter, vanilla extract, and salt to the paste.
- Melt the mixture in a double boiler until smooth.
- Pour the mixture into molds and let it cool.
- Once set, remove from molds and enjoy your chocolate.
Notes
- Use high-quality cocoa beans for better flavor.
- Adjust sugar to taste.
- Store chocolate in a cool, dry place.
Nutrition
- Serving Size: 1 ounce
- Calories: 150
- Sugar: 10g
- Sodium: 1mg
- Fat: 12g
- Saturated Fat: 7g
- Unsaturated Fat: 5g
- Trans Fat: 0g
- Carbohydrates: 15g
- Fiber: 3g
- Protein: 2g
- Cholesterol: 0mg
Keywords: how to make chocolate, homemade chocolate, chocolate recipe