
Oh my goodness, let me tell you about the joy of making homemade tortilla chips! Seriously, there’s something magical about frying up a batch of these golden, crispy beauties right in your own kitchen. The smell alone is enough to make your mouth water! I remember the first time I made them; I was just experimenting with some old corn tortillas I had lying around, and wow, did I hit the jackpot!

What I love most is how incredibly easy it is. With just a few simple ingredients, like corn tortillas, oil, and salt, you can whip up a snack that’s way better than anything you’d find in a bag. Plus, they’re perfect for dipping into guacamole or salsa – trust me, your friends and family will be begging for seconds. The satisfaction of watching those tortillas transform into crispy chips is just unbeatable!
You’ll feel like a kitchen rockstar, and the best part? You can customize them to your heart’s content. Want them a little spicy? Just sprinkle on some chili powder! Prefer them plain? No problem! It’s all about making them your way, and I can’t wait for you to try this delightful recipe. Let’s get started, shall we?
Ingredients for Homemade Tortilla Chips
Alright, let’s gather everything you need for these fantastic homemade tortilla chips. Trust me, it’s a super short list, which makes this recipe even more appealing!
- 6 corn tortillas – I usually go for the smaller ones, but you can use any size you have on hand. Just remember, the thinner they are, the crunchier they’ll be!
- Vegetable oil for frying – You’ll need enough to fill your pan to about 1-2 inches deep. I love using canola or peanut oil because they have a high smoke point, which is perfect for frying!
- Salt to taste – This is where you can really make these chips shine! I recommend starting with a pinch and adjusting it after frying. You can always add more, but it’s hard to take it away!
That’s it! With these simple ingredients, you’re just moments away from snacking bliss. Let’s dive into the fun part—preparing these delicious chips!
How to Prepare Homemade Tortilla Chips
Alright, it’s time to get our hands dirty and make these homemade tortilla chips! Don’t worry, I’ll walk you through every step so you can feel like a pro in no time. Just follow along, and I promise you’ll be munching on these crispy delights in about 20 minutes!
Step-by-Step Instructions
- Cut the tortillas: First things first, grab those corn tortillas and stack them up. Using a sharp knife or a pizza cutter, cut them into triangles. You can go for classic chip shapes or make them smaller for bite-sized pieces. It’s totally up to you!
- Heat the oil: Next, pour enough vegetable oil into a deep pan to cover the bottom by about 1-2 inches. Place it over medium heat and let it warm up. You’ll know it’s ready when a small piece of tortilla sizzles when you drop it in. It should take about 5 minutes, but keep an eye on it to avoid overheating!
- Fry the tortilla triangles: Once the oil is hot, it’s time to fry! Carefully add a batch of tortilla triangles to the hot oil, making sure not to overcrowd the pan. Fry them for about 2-3 minutes, flipping them halfway through until they’re golden brown and crispy. Oops! Watch out for splatters—use a splatter guard if you have one!
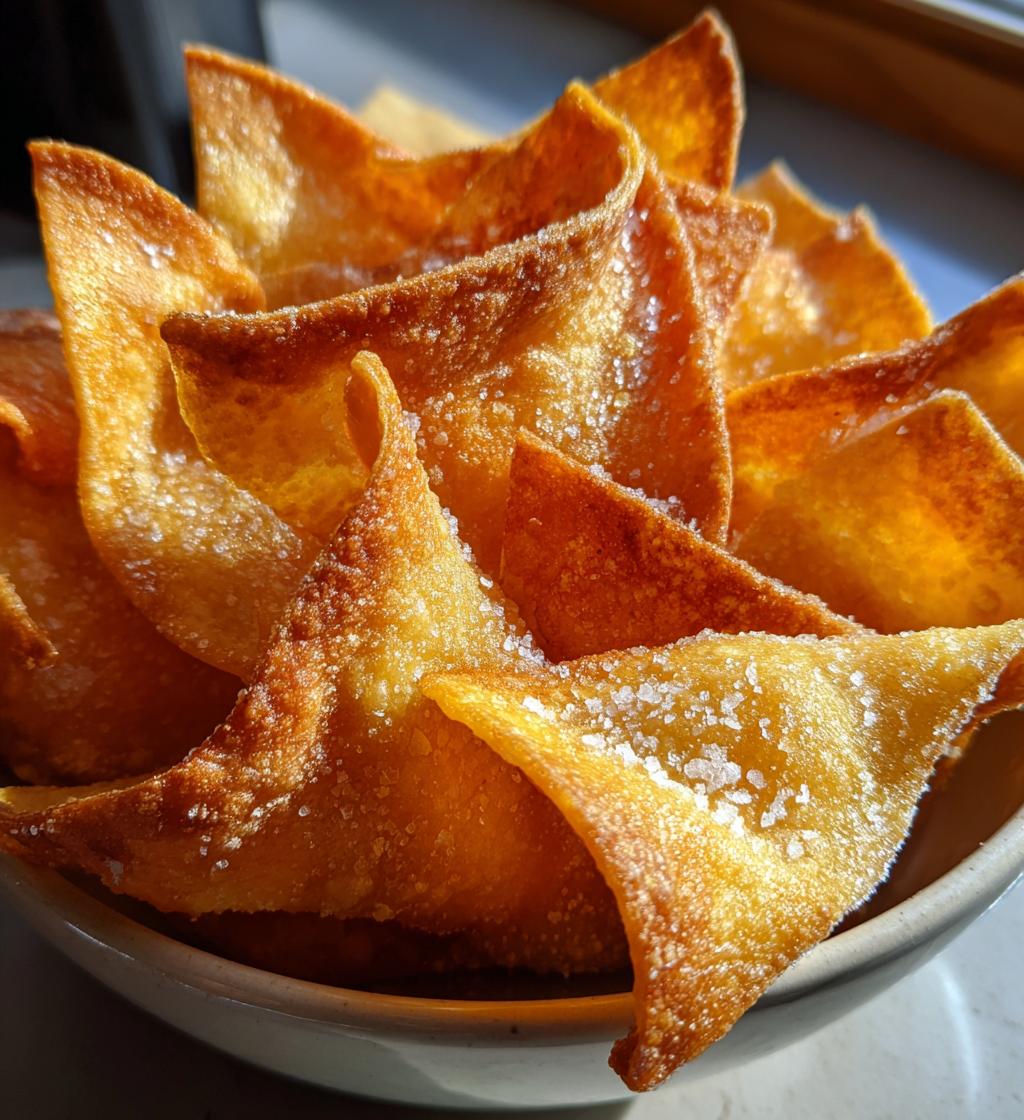
- Drain and season: Once they’re perfectly golden, use a slotted spoon to remove the chips from the oil and place them on a plate lined with paper towels. This helps to soak up any excess oil. While they’re still warm, sprinkle the chips with salt. You want them to soak up that salty goodness right away!
And there you have it! Homemade tortilla chips that are crispy, delicious, and ready for your favorite dip. Don’t forget to taste one as you go—they’re just too good to resist! Now, let’s move on to the next section and talk about why you’ll absolutely love this recipe!
Why You’ll Love This Recipe
- Quick and easy: You can whip these up in just 20 minutes! Perfect for when you need a snack in a hurry.
- Deliciously fresh: There’s nothing like the taste of warm, homemade tortilla chips. You’ll never want store-bought again!
- Customizable: Add your favorite spices or seasonings to create your own unique flavor profile. The sky’s the limit!
- Perfect for sharing: These chips are great for parties, movie nights, or just a cozy snack with family. Everyone will love them!
- Healthier option: You can control the ingredients and oil used, making these a better choice than many packaged snacks.
- Fun to make: There’s something satisfying about frying your own chips! It’s a great way to get the kids involved in the kitchen too.
Tips for Success
Now that you’re all set to make your own homemade tortilla chips, let me share some of my favorite tips for ensuring they turn out perfectly crispy and delicious every single time!
- Use the right oil: Choosing an oil with a high smoke point is key! Canola, peanut, or even sunflower oil work wonders for frying. Avoid olive oil here—it can burn too quickly and change the flavor.
- Don’t overcrowd the pan: It’s tempting to fry a ton of chips at once, but trust me, it’s better to work in batches. Overcrowding lowers the oil temperature and can lead to soggy chips. You want that oil nice and hot to achieve that golden crunch!
- Watch the temperature: Keep an eye on your oil temperature. If it’s too hot, your chips will burn before they get crispy. Too cool, and they’ll soak up too much oil. A good rule of thumb is to keep it around 350°F (175°C). You can use a kitchen thermometer or just drop in a small piece of tortilla to test it. If it sizzles right away, you’re good to go!
- Season while warm: Make sure to sprinkle your salt on the chips right after they come out of the oil. The warmth helps the salt stick and really brings out the flavor. You can even experiment with other seasonings like chili powder, garlic salt, or even a squeeze of lime for a zesty kick!
- Store properly: If you happen to have leftovers (which is rare!), let the chips cool completely before storing them in an airtight container. This keeps them crispier for longer. You can also pop them back in a hot oven for a few minutes to refresh them if they lose some crunch.
With these tips in your back pocket, you’re all set to create the best homemade tortilla chips ever! Get ready to impress your family and friends with your snacking skills—they’ll be asking for your secret! Now, let’s keep the momentum going and check out how to store and reheat those delicious chips!
Storage & Reheating Instructions
So, you’ve made a delicious batch of homemade tortilla chips, and now you’re wondering what to do with any leftovers. First off, if you have any left at all, you deserve a high-five! But just in case, here’s how to store and reheat them to keep that glorious crunch intact.
To store your leftover chips, let them cool completely before placing them in an airtight container. This is super important because if you put them away while they’re still warm, they’ll steam and lose their crispiness. Nobody wants a soggy chip, right? I usually use a glass container or a resealable plastic bag—whatever I have on hand works just fine!
Now, when it comes to reheating, here’s my favorite method to bring back that fresh-out-of-the-fryer crunch. Preheat your oven to 350°F (175°C). Spread the cold chips in a single layer on a baking sheet. Pop them in the oven for about 5-7 minutes, keeping a close eye on them. You’ll know they’re ready when they’re hot and crispy again. It’s like giving them a second life!
If you’re in a hurry, you can also use the microwave, but I don’t recommend it if you want to maintain that delightful texture. If you must, place the chips in a single layer on a microwave-safe plate and heat them in 15-second intervals. Just be cautious—too long in the microwave, and they can turn chewy. Yikes!
So there you have it! With these simple storage and reheating tips, your homemade tortilla chips will be just as tasty as when you first made them. Now, go ahead and enjoy those crunchy bites anytime you want! Happy snacking!
Nutritional Information
Alright, let’s chat about the nutritional info for these delightful homemade tortilla chips. Now, keep in mind, these numbers are estimates and can vary based on the exact ingredients you use and how much oil you absorb during frying. But here’s a ballpark idea to keep in mind:
- Serving Size: 1 serving
- Calories: 300
- Fat: 15g
- Saturated Fat: 2g
- Unsaturated Fat: 13g
- Trans Fat: 0g
- Cholesterol: 0mg
- Carbohydrates: 40g
- Fiber: 3g
- Protein: 5g
- Sugar: 0g
- Sodium: 150mg
So, there you have it! These chips are a tasty snack that can fit into a balanced diet. Plus, you get to enjoy them fresh, warm, and perfectly crispy! Just remember to enjoy them in moderation—though I won’t judge if you can’t resist having a few extra. They’re just that good!
FAQ Section
Got questions about making homemade tortilla chips? No worries, I’ve got you covered! Here are some of the most common queries I get, along with my trusty answers.
Can I use flour tortillas instead of corn tortillas?
Absolutely! While I love the flavor and crunch of corn tortillas, flour tortillas work just as well. Just keep in mind that they might turn out a bit softer, but they’ll still be delicious!
How do I know when the oil is hot enough?
Great question! You can drop a small piece of tortilla into the oil; if it sizzles right away, you’re good to go! If it browns too quickly, the oil might be too hot, so adjust the heat as needed.
What can I do if my chips are too oily?
If your chips end up a little greasier than you’d like, try laying them out on paper towels immediately after frying. This will help absorb some of that excess oil. You can also sprinkle them with a bit of extra salt to balance the flavor!
Can I bake the tortilla chips instead of frying them?
Yes! If you’re looking for a healthier option, you can brush the tortilla triangles with a little oil and bake them in a preheated oven at 350°F (175°C) for about 10-15 minutes, flipping halfway through. They may not be quite as crispy as the fried version, but they’re still tasty!
How long do the chips stay fresh?
Homemade tortilla chips are best enjoyed fresh, but if stored properly in an airtight container, they can last for about 3-5 days. Just remember, the longer they sit, the less crispy they’ll become. So, snack away while they’re still at their best!
Serving Suggestions
Now that you’ve got your hands on those crispy homemade tortilla chips, let’s talk about the fun part—what to serve them with! These chips are the ultimate canvas for a variety of dips and toppings. Here are some of my all-time favorite pairings that will take your snacking experience to the next level:
- Classic Guacamole: You can’t go wrong with this creamy avocado dip! The smooth texture and fresh flavors of guacamole perfectly complement the crunch of your chips. Add some diced tomatoes, onions, and a squeeze of lime for an extra kick!
- Fresh Salsa: Whether you prefer a chunky tomato salsa or a zesty mango salsa, these vibrant flavors are a match made in heaven with tortilla chips. The acidity from the tomatoes or fruits balances out the richness of the chips beautifully.
- Queso Dip: Melty cheese dip is always a crowd-pleaser! Pour some warm queso over your chips or serve it on the side for dipping. You might want to make a double batch—trust me, it disappears fast!
- Bean Dip: A hearty black bean or refried bean dip adds protein and flavor. The creaminess of the beans pairs perfectly with the crunch of the chips, making it a satisfying snack.
- Spicy Hummus: For a twist, try serving your chips with a spicy hummus. The rich, nutty flavor of chickpeas with a hint of heat is a delightful change from traditional dips!
- Cheesy Nachos: Layer those chips with shredded cheese, jalapeños, and your favorite toppings, then pop them in the oven for a quick nacho feast. Top with sour cream and cilantro for a fantastic party snack!
- Fresh Veggies: If you’re looking for something lighter, serve your chips with a side of fresh-cut veggies like carrots, bell peppers, and cucumbers for dipping into hummus or tzatziki. It’s a great way to balance out the indulgence!
So, whether you’re hosting a game night, having a cozy movie marathon, or just indulging in a snack at home, these homemade tortilla chips are the perfect accompaniment. Get creative and mix and match your dips to find your favorite combos! Enjoy every crunchy bite!
Print
Homemade Tortilla Chips: 5 Simple Steps to Crunchy Bliss
- Prep Time: 10 minutes
- Cook Time: 10 minutes
- Total Time: 20 minutes
- Yield: 2 servings 1x
- Category: Snack
- Method: Frying
- Cuisine: Mexican
- Diet: Vegetarian
Description
Crispy and delicious homemade tortilla chips.
Ingredients
- 6 corn tortillas
- Vegetable oil for frying
- Salt to taste
Instructions
- Cut the corn tortillas into triangles.
- Heat vegetable oil in a deep pan over medium heat.
- Fry the tortilla triangles in batches until golden brown.
- Remove chips and drain on paper towels.
- Sprinkle with salt while still warm.
Notes
- Store leftover chips in an airtight container.
- Adjust salt according to your preference.
Nutrition
- Serving Size: 1 serving
- Calories: 300
- Sugar: 0g
- Sodium: 150mg
- Fat: 15g
- Saturated Fat: 2g
- Unsaturated Fat: 13g
- Trans Fat: 0g
- Carbohydrates: 40g
- Fiber: 3g
- Protein: 5g
- Cholesterol: 0mg
Keywords: homemade tortilla chips