
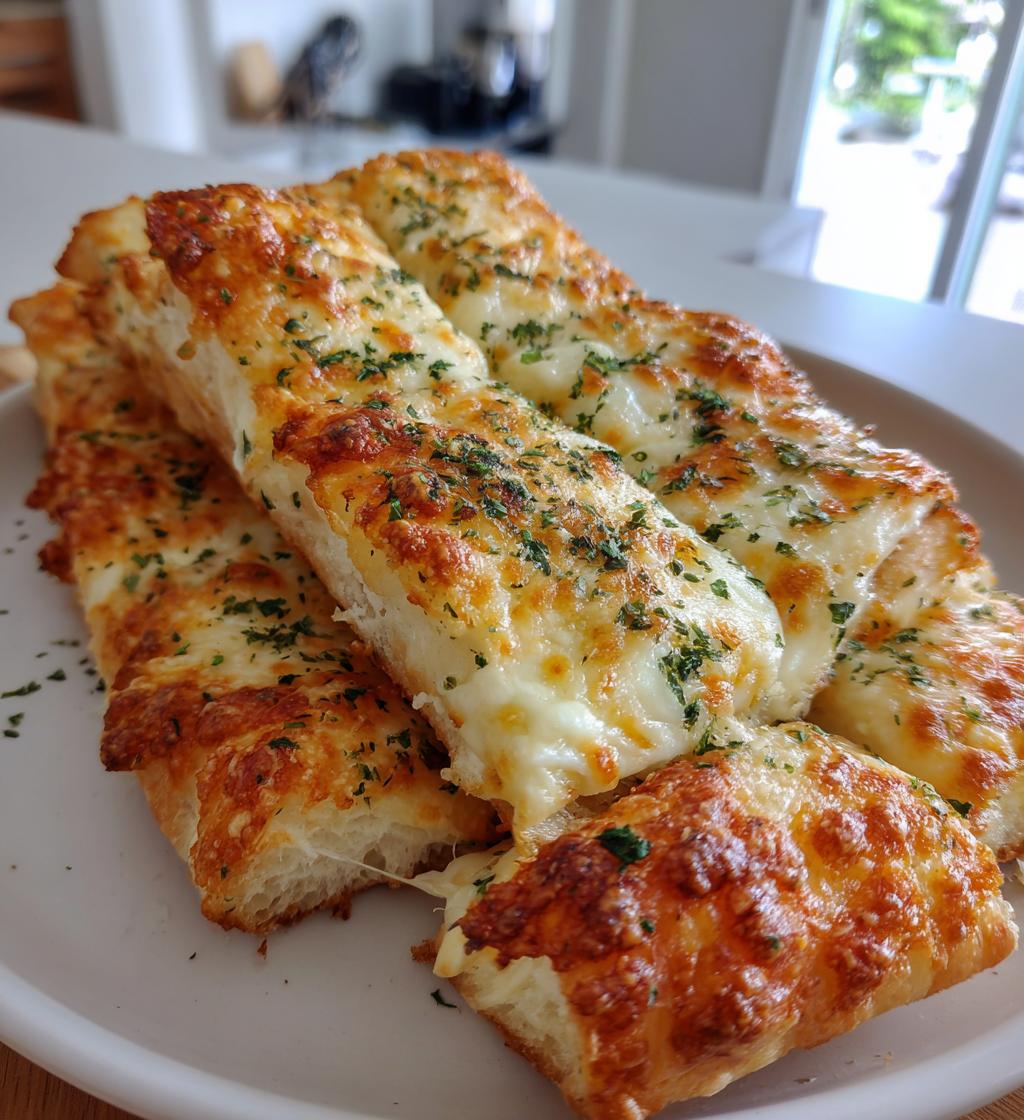
Oh my goodness, have you ever tried cheesy garlic breadsticks? They’re like a warm hug for your taste buds! I can’t even begin to tell you how easy they are to whip up—perfect for a cozy night in or a gathering with friends. Just imagine biting into those golden, cheesy strips, with that irresistible garlic aroma wafting through your kitchen. Trust me, you won’t be able to stop at just one! These cheesy garlic breadsticks are not only delicious but also super simple to make. With just a few ingredients and minimal effort, you’ll have a crowd-pleasing appetizer or side dish that everyone will love. Let’s dive into the recipe so you can experience this cheesy goodness for yourself!
Ingredients List
- 1 package of pizza dough
- 2 tablespoons of garlic butter (melted)
- 1 cup of shredded mozzarella cheese
- 1/4 cup of grated Parmesan cheese
- 1 teaspoon of dried oregano
- 1/2 teaspoon of salt
How to Prepare Cheesy Garlic Breadsticks
Prepping the Dough
Alright, let’s get that dough ready! Start by preheating your oven to 400°F (200°C). Roll out your pizza dough on a floured surface until it’s about 1/4 inch thick. Don’t stress if it doesn’t look perfect; a little rustic charm is part of the fun! Just make sure it’s even so it bakes uniformly. I like to use a rolling pin, but if you don’t have one, your hands work just fine too! Once it’s rolled out, you’re ready for the next step.
Adding Flavor and Cheese
Now comes the best part—adding flavor! Grab your melted garlic butter and brush it all over the surface of the dough. You want every inch coated because that’s what brings the magic! Next, sprinkle the shredded mozzarella cheese generously on top, ensuring it covers the dough evenly. Then, add the grated Parmesan cheese for that extra punch of flavor! Finally, season with dried oregano and a pinch of salt. I like to give it one last gentle press with my hands to make sure everything sticks together nicely.
Baking Instructions
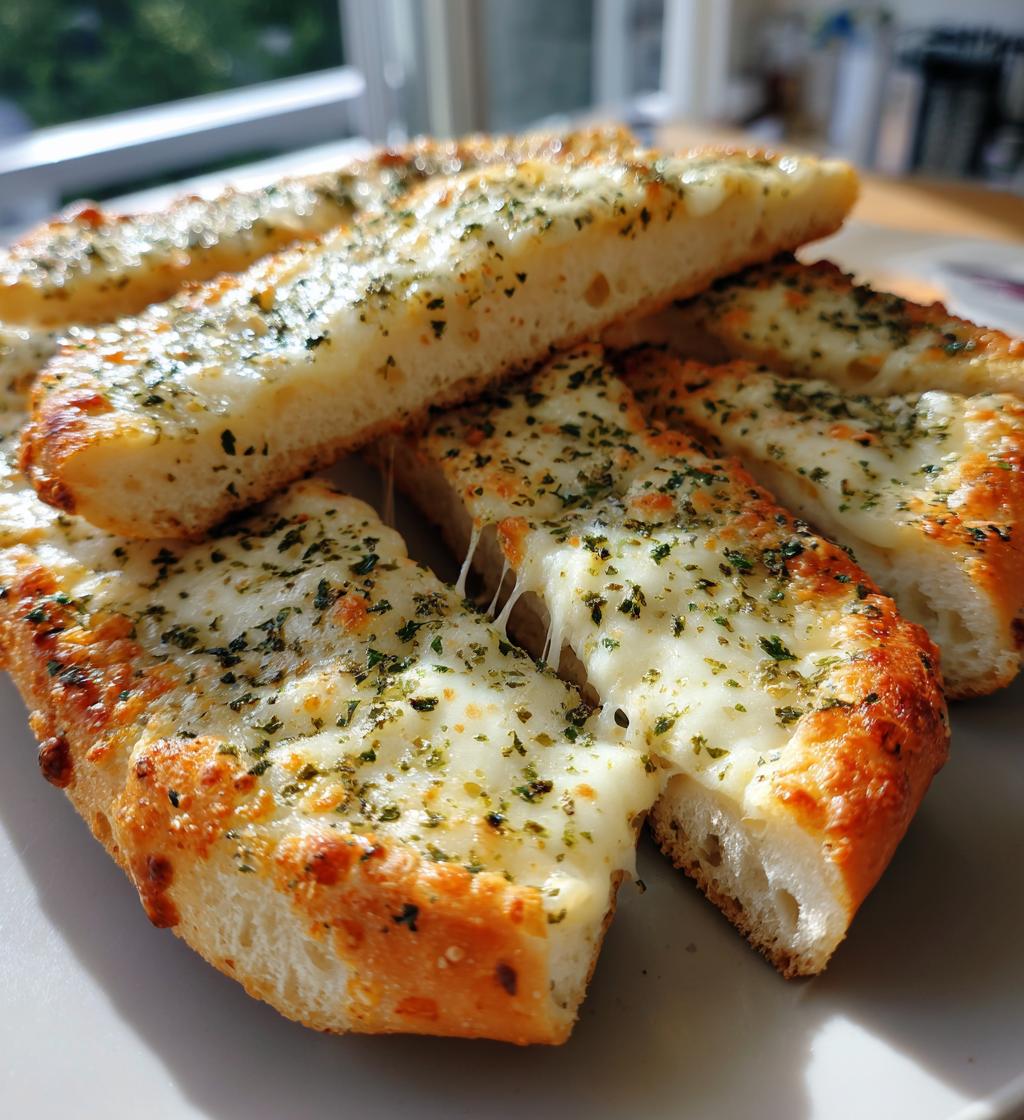
Time to cut the dough! Use a sharp knife or pizza cutter to slice it into sticks—about 1 inch wide works great. Then, carefully place the sticks on a baking sheet lined with parchment paper, giving them a little space to breathe. Pop them into your preheated oven and bake for 12-15 minutes. You’ll know they’re done when they’re golden brown and your kitchen is filled with that heavenly garlic aroma. Let them cool for just a minute before serving, and get ready to dive in!
Nutritional Information
Now, let’s talk about the numbers! I always think it’s good to know what you’re munching on, even when it’s as delicious as cheesy garlic breadsticks. Keep in mind, the nutritional values can vary based on the specific ingredients you use or the brands you choose, so these figures are just a general guide. Here’s what you can expect per serving (that’s one delightful breadstick):
- Calories: 150
- Fat: 7g
- Saturated Fat: 4g
- Carbohydrates: 18g
- Fiber: 1g
- Protein: 5g
- Sodium: 250mg
- Sugar: 1g
- Cholesterol: 20mg
So, whether you’re indulging for a special occasion or just treating yourself on a weeknight, you can enjoy these cheesy delights with a little more knowledge about what’s going into your belly!
Tips for Success
- Don’t Skip the Flour: Make sure to flour your surface and rolling pin to prevent sticking. This little step keeps your dough nice and manageable!
- Use Fresh Ingredients: Fresh garlic butter and quality cheeses make a big difference in flavor. Trust me, you’ll taste the love!
- Experiment with Cheese: Try adding different cheeses like cheddar or pepper jack for a fun twist! Get creative—your taste buds will thank you.
- Watch the Oven: Every oven is different, so keep an eye on your breadsticks as they bake. If they start to brown too quickly, lower the temperature slightly.
- Let Them Cool: Letting the breadsticks cool for a minute before serving helps them hold their shape and makes them easier to handle.
- Pair with Dips: Don’t forget to serve with marinara or a garlic dipping sauce. It takes the cheesy goodness to a whole new level!
Variations
One of the best things about cheesy garlic breadsticks is how adaptable they are! You can easily mix things up to suit your taste or use what you have on hand. Here are some fun ideas to customize your breadsticks:
- Different Cheeses: Swap out the mozzarella for other cheeses like cheddar, gouda, or even a spicy pepper jack for an extra kick! Each cheese brings its own unique flavor profile.
- Herb Infusion: Add fresh herbs like basil, parsley, or thyme for a burst of freshness. Just chop them up and sprinkle them in with the cheese for a delightful twist.
- Spicy Garlic Breadsticks: If you love a little heat, sprinkle some red pepper flakes over the cheese before baking. It’ll give your breadsticks a nice kick that pairs perfectly with the garlic!
- Cheesy Pesto Variation: Spread a thin layer of pesto on the dough before adding the garlic butter. The combination of garlic and basil from the pesto is simply heavenly.
- Stuffed Breadsticks: For a heartier option, try stuffing the breadsticks with a bit of ricotta or cream cheese before rolling them up. It’ll create a gooey, cheesy surprise inside!
- Garlic Parmesan Topping: After baking, brush the breadsticks with a little extra garlic butter and sprinkle with additional grated Parmesan for an extra cheesy finish.
Feel free to get creative! These variations are just a starting point, and I encourage you to experiment with whatever flavors you love. Each twist can make your cheesy garlic breadsticks even more delicious!
Serving Suggestions
Oh, let me tell you, cheesy garlic breadsticks are like the ultimate sidekick to your favorite dishes! They shine on their own, but they really come to life when paired with the right accompaniments. First of all, you absolutely *must* serve them with some marinara sauce for dipping. That tangy, tomato goodness complements the buttery garlic flavor so well, it’s a match made in heaven!
If you’re looking for something a bit heartier, why not serve these breadsticks alongside a fresh, crisp salad? A classic Caesar or a simple mixed greens salad with a light vinaigrette would balance out the richness beautifully. You could also pair them with your favorite pasta dish—imagine twirling spaghetti while munching on those cheesy sticks. Yum!
Feeling fancy? You could present them with a charcuterie board full of cured meats, olives, and cheeses. The breadsticks would be a delightful addition, perfect for snacking while sipping on a nice glass of wine. And if you want to keep it simple, just enjoy them with a cozy bowl of soup, like tomato basil or a creamy potato leek. Seriously, these cheesy garlic breadsticks elevate any meal!
So gather your friends, set up a little spread, and get ready to enjoy the deliciousness together. Trust me, once you start serving these cheesy delights, they’ll become a staple at your table!
Storage & Reheating Instructions
So, you’ve made a batch of cheesy garlic breadsticks and there are leftovers? First of all, well done! Now, let’s make sure you can enjoy that cheesy goodness again. To store your leftover breadsticks, simply place them in an airtight container. They’ll keep well in the fridge for about 3-4 days. Just make sure they’re completely cooled before sealing them up to prevent any sogginess.
If you want to keep them longer, you can freeze them! Wrap each breadstick tightly in plastic wrap and then place them in a freezer-safe bag. They’ll stay good for about 2 months. When you’re ready to indulge again, just let them thaw overnight in the fridge or pop them in the microwave for a quick defrost.
Now, when it comes to reheating, I highly recommend using the oven for the best results. Preheat your oven to 350°F (175°C), place the breadsticks on a baking sheet, and bake them for about 5-10 minutes, or until they’re warmed through and slightly crispy again. If you’re in a hurry, the microwave works too! Just heat them in 10-15 second intervals until they’re warm. But be careful not to overdo it—nobody wants tough breadsticks!
With these simple storage and reheating tips, you can enjoy your cheesy garlic breadsticks whenever the craving strikes! Happy snacking!
FAQ Section
Can I use store-bought garlic butter for these cheesy garlic breadsticks?
Absolutely! Store-bought garlic butter works just fine and can save you some time. Just make sure to check the flavor—it should be rich and garlicky to really elevate your breadsticks!
What kind of pizza dough should I use?
You can use any pizza dough you like! Whether it’s homemade, store-bought, or even a gluten-free option, just roll it out as instructed, and you’ll be golden!
Can I make these breadsticks ahead of time?
Of course! You can prepare the cheesy garlic breadsticks up to the baking stage, then cover them and refrigerate for a few hours. When you’re ready, just pop them in the oven and bake as usual. It’s a great way to save time for gatherings!
How do I know when the breadsticks are done baking?
You’ll know they’re ready when they turn golden brown and your kitchen smells like garlic heaven! If they’re puffed up and slightly crisp on the edges, you’re all set!
Can I add other toppings to my cheesy garlic breadsticks?
Definitely! Feel free to get creative! Adding toppings like sliced olives, jalapeños, or extra herbs can give your breadsticks a fun twist. Just remember to keep the balance so the breadsticks don’t get too heavy!
Cheesy Garlic Breadsticks: 5 Irresistible Ways to Indulge
- Prep Time: 10 minutes
- Cook Time: 15 minutes
- Total Time: 25 minutes
- Yield: 12 breadsticks 1x
- Category: Appetizer
- Method: Baking
- Cuisine: Italian
- Diet: Vegetarian
Description
Cheesy garlic breadsticks are a delicious and easy-to-make appetizer or side dish. They are perfect for sharing or enjoying on your own.
Ingredients
- 1 package of pizza dough
- 2 tablespoons of garlic butter
- 1 cup of shredded mozzarella cheese
- 1/4 cup of grated Parmesan cheese
- 1 teaspoon of dried oregano
- 1/2 teaspoon of salt
Instructions
- Preheat your oven to 400°F (200°C).
- Roll out the pizza dough on a floured surface to about 1/4 inch thick.
- Brush the dough with garlic butter evenly.
- Sprinkle mozzarella and Parmesan cheese on top.
- Season with oregano and salt.
- Cut the dough into sticks.
- Place the sticks on a baking sheet lined with parchment paper.
- Bake for 12-15 minutes or until golden brown.
- Let cool slightly before serving.
Notes
- Serve with marinara sauce for dipping.
- Feel free to add more cheese if desired.
- Store leftovers in an airtight container.
Nutrition
- Serving Size: 1 breadstick
- Calories: 150
- Sugar: 1g
- Sodium: 250mg
- Fat: 7g
- Saturated Fat: 4g
- Unsaturated Fat: 2g
- Trans Fat: 0g
- Carbohydrates: 18g
- Fiber: 1g
- Protein: 5g
- Cholesterol: 20mg
Keywords: cheesy garlic breadsticks, breadsticks, garlic bread, appetizer