
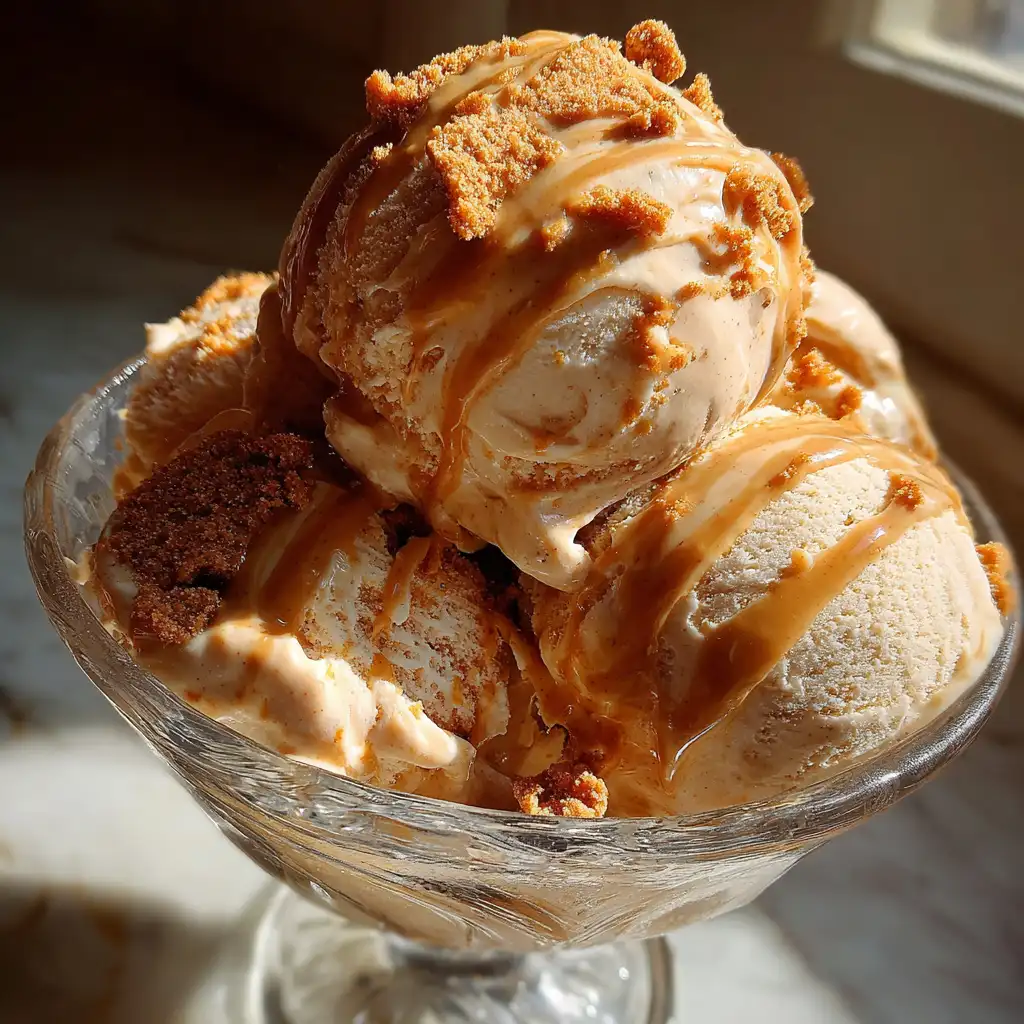
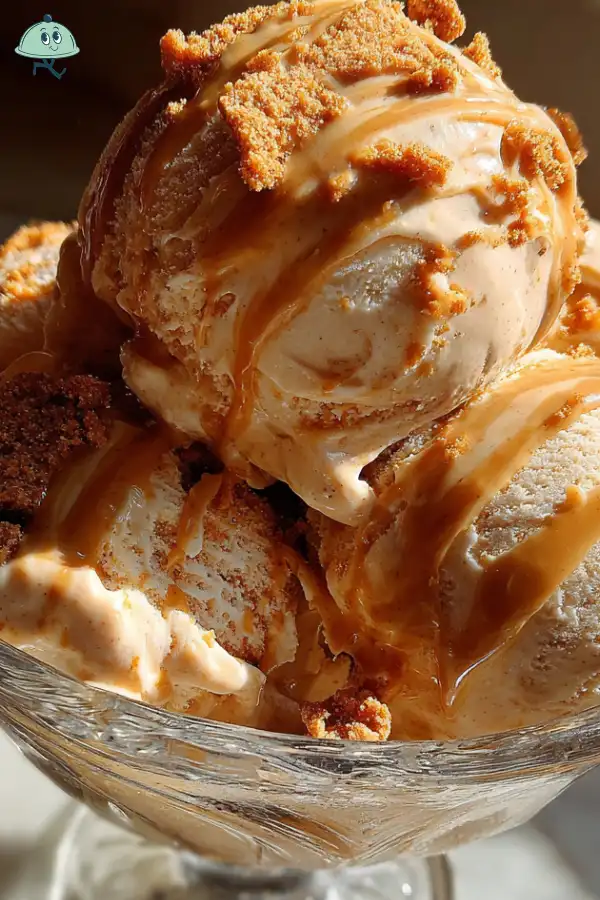
If you’re looking for a delightful treat that combines creamy goodness with a hint of spice, then the Biscoff ice cream recipe is just for you! This indulgent dessert brings together the rich flavors of Biscoff cookies and cookie butter, creating a unique experience for your taste buds. Whether you’re enjoying it on a hot summer day or as a sweet ending to a cozy dinner, this ice cream is sure to impress.
What Makes Biscoff Ice Cream Special?
Biscoff ice cream stands out for several reasons. First, it features the iconic Biscoff cookie butter, which is made from crushed Biscoff cookies. This spread adds a warm, caramel-like flavor that is simply irresistible. The combination of the creamy ice cream base with the crunchy bits of Biscoff cookies creates a delightful texture that keeps you coming back for more.
Moreover, this recipe is incredibly easy to make at home. With just a few simple ingredients, you can whip up a batch of this delicious ice cream in no time. Plus, it’s a fantastic way to impress your friends and family. Imagine serving them a scoop of homemade Biscoff ice cream, drizzled with extra cookie butter and topped with crushed cookies. It’s a dessert that not only tastes great but also looks stunning!
In addition, this ice cream is versatile. You can customize it by adding your favorite mix-ins or even trying a dairy-free version. The possibilities are endless! So, let’s dive into the ingredients and preparation steps to create your very own Biscoff ice cream.
Ingredients for Biscoff Ice Cream Recipe
To create your delicious Biscoff ice cream, you’ll need a few key ingredients. Each one plays a vital role in achieving that creamy texture and rich flavor. Here’s what you’ll need:
- 2 cups heavy cream (480 ml): This is the base of your ice cream, providing a rich and creamy texture.
- 1 cup whole milk (240 ml): Whole milk adds creaminess and helps balance the richness of the heavy cream.
- 3/4 cup granulated sugar (150 g): Sugar sweetens the ice cream and helps create a smooth texture.
- 1 teaspoon vanilla extract: This adds a lovely depth of flavor that complements the Biscoff.
- 1/2 cup Biscoff cookie butter (120 g): The star ingredient! This spread gives the ice cream its signature flavor.
- 1/2 cup crushed Biscoff cookies (about 6-8 cookies): These add delightful crunch and enhance the cookie flavor.
- Pinch of salt: A little salt enhances the sweetness and balances the flavors.
Gathering these ingredients is the first step toward making your homemade Biscoff ice cream. Each component contributes to the overall taste and texture, ensuring a delightful treat for everyone. Now that you have your ingredients ready, let’s move on to the preparation steps!
Step-by-Step Preparation of Biscoff Ice Cream Recipe
Step 1: Gather Your Ingredients
Before you start making your Biscoff ice cream, it’s essential to gather all your ingredients. Having everything ready will make the process smoother and more enjoyable. Make sure you have:
- Heavy cream
- Whole milk
- Granulated sugar
- Vanilla extract
- Biscoff cookie butter
- Crushed Biscoff cookies
- Salt
Once you have everything in one place, you’re ready to move on to the next step. This preparation will help you stay organized and focused as you create your delicious ice cream.
Step 2: Prepare the Base for Biscoff Ice Cream
Now it’s time to make the ice cream base. In a mixing bowl, combine the heavy cream, whole milk, granulated sugar, vanilla extract, and a pinch of salt. Use a whisk to mix everything together. Make sure the sugar dissolves completely. This step is crucial for a smooth texture.
Once mixed, you’ll notice a creamy consistency forming. This base is the heart of your Biscoff ice cream, so take your time to ensure it’s well combined. After that, cover the bowl with plastic wrap and refrigerate it for at least 2 hours. Chilling the mixture helps achieve that creamy texture we all love!
Step 3: Incorporate Biscoff Spread
After your mixture has chilled, it’s time to add the Biscoff cookie butter. This step is where the magic happens! Pour the chilled mixture into your ice cream maker. As it churns, drizzle in the Biscoff cookie butter. This will create beautiful swirls throughout the ice cream.
Additionally, during the last few minutes of churning, add the crushed Biscoff cookies. This will give your ice cream a delightful crunch and enhance the cookie flavor. The combination of creamy and crunchy textures makes this ice cream truly special!
Step 4: Churn the Mixture
Churning is a vital step in making ice cream. Follow your ice cream maker’s instructions for churning time. Typically, it takes about 20-25 minutes to reach a soft-serve consistency. Keep an eye on it, as you want it to be creamy but not too hard.
As the mixture churns, you’ll see it transform into a luscious ice cream. The Biscoff cookie butter and crushed cookies will blend in beautifully, creating a delightful treat that’s hard to resist. Once it reaches the right consistency, it’s time to move on to the next step!
Step 5: Freeze the Ice Cream
After churning, transfer your ice cream to an airtight container. Use a spatula to smooth the top. If you want to add a little extra flair, drizzle some more Biscoff cookie butter on top before sealing the container. This will create a lovely presentation when you serve it later.
Now, place the container in the freezer for at least 4 hours. This step is crucial for achieving that firm, scoopable texture. Once it’s fully frozen, your homemade Biscoff ice cream will be ready to enjoy!
Tips for Perfecting Your Biscoff Ice Cream Recipe
Choosing the Right Ingredients
When it comes to making the best Biscoff ice cream, the quality of your ingredients matters. Start with fresh heavy cream and whole milk. These will provide the rich, creamy base that makes your ice cream so delightful. Opt for full-fat versions to ensure a smooth texture.
Next, select a high-quality Biscoff cookie butter. The flavor can vary between brands, so choose one that you love. This spread is the heart of your ice cream, so it’s worth investing in a good one. Additionally, using fresh Biscoff cookies will enhance the crunch and flavor in your ice cream.
Don’t forget about the sugar! Granulated sugar is the best choice for this recipe, as it dissolves easily and sweetens the ice cream perfectly. A pinch of salt is also essential; it balances the sweetness and enhances the overall flavor. By choosing the right ingredients, you’ll elevate your Biscoff ice cream to a whole new level!
Storage Tips for Biscoff Ice Cream
Once you’ve made your delicious Biscoff ice cream, proper storage is key to keeping it fresh. Transfer the ice cream to an airtight container to prevent freezer burn. Make sure to smooth the top with a spatula before sealing. This helps maintain the texture and flavor.
Store your ice cream in the coldest part of the freezer, ideally at 0°F (-18°C) or lower. This will help it stay firm and scoopable. Homemade ice cream is best enjoyed within two weeks for optimal flavor and texture. However, it can last up to a month if stored properly.
When you’re ready to serve, let the ice cream sit at room temperature for a few minutes. This will make scooping easier. If you notice any ice crystals forming on the surface, simply stir the ice cream before serving. With these storage tips, your Biscoff ice cream will remain a delightful treat for days to come!
Variations of Biscoff Ice Cream Recipe
Adding Mix-Ins to Your Biscoff Ice Cream
One of the best things about making your own Biscoff ice cream is the ability to customize it! Adding mix-ins can elevate your dessert to new heights. Here are some fun ideas to consider:
- Chocolate Chips: Fold in some semi-sweet or dark chocolate chips during the last few minutes of churning. The combination of chocolate and Biscoff is simply divine!
- Caramel Swirls: Drizzle in some caramel sauce while churning for a sweet surprise in every bite. This adds a rich flavor that pairs beautifully with the cookie butter.
- Nutty Crunch: Add chopped nuts like pecans or almonds for an extra crunch. This will give your ice cream a delightful texture and a nutty flavor.
- Fruit Additions: For a fruity twist, consider adding chopped bananas or strawberries. These fresh fruits can balance the sweetness of the Biscoff.
Feel free to experiment with different combinations! The key is to add mix-ins that complement the flavors of the Biscoff cookie butter. This way, you can create a unique ice cream that suits your taste perfectly.
Dairy-Free Biscoff Ice Cream Recipe
If you’re looking for a dairy-free option, you can still enjoy the deliciousness of Biscoff ice cream! Here’s how to make a creamy, dairy-free version:
- Coconut Milk: Replace the heavy cream and whole milk with full-fat coconut milk. This will give your ice cream a rich and creamy texture.
- Maple Syrup: Use maple syrup instead of granulated sugar for sweetness. It adds a lovely flavor that pairs well with Biscoff.
- Dairy-Free Biscoff Cookie Butter: Ensure that the Biscoff cookie butter you choose is dairy-free. Most brands are, but it’s always good to check the label.
Follow the same preparation steps as the original recipe, and you’ll have a delightful dairy-free Biscoff ice cream that everyone can enjoy. This version is just as creamy and delicious, making it a perfect treat for those with dietary restrictions.
FAQs About Biscoff Ice Cream Recipe
Can I use other cookie spreads in the Biscoff Ice Cream Recipe?
Absolutely! While Biscoff cookie butter is the star of this recipe, you can experiment with other cookie spreads. Nutella, for example, can add a rich chocolate flavor. You might also try peanut butter or almond butter for a nutty twist. Just keep in mind that different spreads will change the flavor profile of your ice cream. So, choose one that you love!
How long does Biscoff Ice Cream last in the freezer?
When stored properly, your homemade Biscoff ice cream can last up to a month in the freezer. To keep it fresh, make sure to use an airtight container. This will help prevent freezer burn and maintain the creamy texture. However, for the best flavor and texture, try to enjoy it within two weeks!
Can I make Biscoff Ice Cream without an ice cream maker?
Yes, you can! If you don’t have an ice cream maker, don’t worry. Simply pour the chilled mixture into a shallow dish and place it in the freezer. Stir the mixture every 30 minutes for the first 2-3 hours. This will help break up any ice crystals and create a smoother texture. After a few hours, your ice cream will be ready to enjoy!
What can I serve with Biscoff Ice Cream?
Biscoff ice cream is delicious on its own, but you can elevate it even further with some tasty toppings. Consider drizzling extra Biscoff cookie butter on top for added flavor. Crushed Biscoff cookies make a great crunchy garnish. You could also serve it with a side of chocolate sauce or caramel for a sweet surprise. For a refreshing twist, fresh fruit like strawberries or bananas pairs nicely too!
Print
Biscoff Ice Cream Recipe
- Prep Time: 15 minutes
- Cook Time: 25 minutes
- Total Time: 4 hours 40 minutes
- Yield: About 1.5 quarts 1x
- Category: Dessert
- Method: Churning
- Cuisine: American
- Diet: Vegetarian
Description
A creamy and delightful Biscoff ice cream recipe that combines the rich flavors of Biscoff cookies and cookie butter.
Ingredients
- 2 cups heavy cream (480 ml)
- 1 cup whole milk (240 ml)
- 3/4 cup granulated sugar (150 g)
- 1 teaspoon vanilla extract
- 1/2 cup Biscoff cookie butter (120 g)
- 1/2 cup crushed Biscoff cookies (about 6–8 cookies)
- Pinch of salt
Instructions
- Gather all your ingredients.
- Prepare the base by mixing heavy cream, whole milk, sugar, vanilla extract, and salt in a bowl. Refrigerate for at least 2 hours.
- Incorporate Biscoff cookie butter into the chilled mixture while churning in an ice cream maker.
- Churn the mixture according to your ice cream maker’s instructions until it reaches a soft-serve consistency.
- Transfer the ice cream to an airtight container and freeze for at least 4 hours before serving.
Notes
- Use high-quality ingredients for the best flavor.
- Store in an airtight container to prevent freezer burn.
- Let the ice cream sit at room temperature for a few minutes before scooping.
Nutrition
- Serving Size: 1/2 cup
- Calories: 300
- Sugar: 25g
- Sodium: 50mg
- Fat: 20g
- Saturated Fat: 12g
- Unsaturated Fat: 8g
- Trans Fat: 0g
- Carbohydrates: 30g
- Fiber: 1g
- Protein: 3g
- Cholesterol: 80mg
Keywords: Biscoff, ice cream, dessert, homemade, creamy